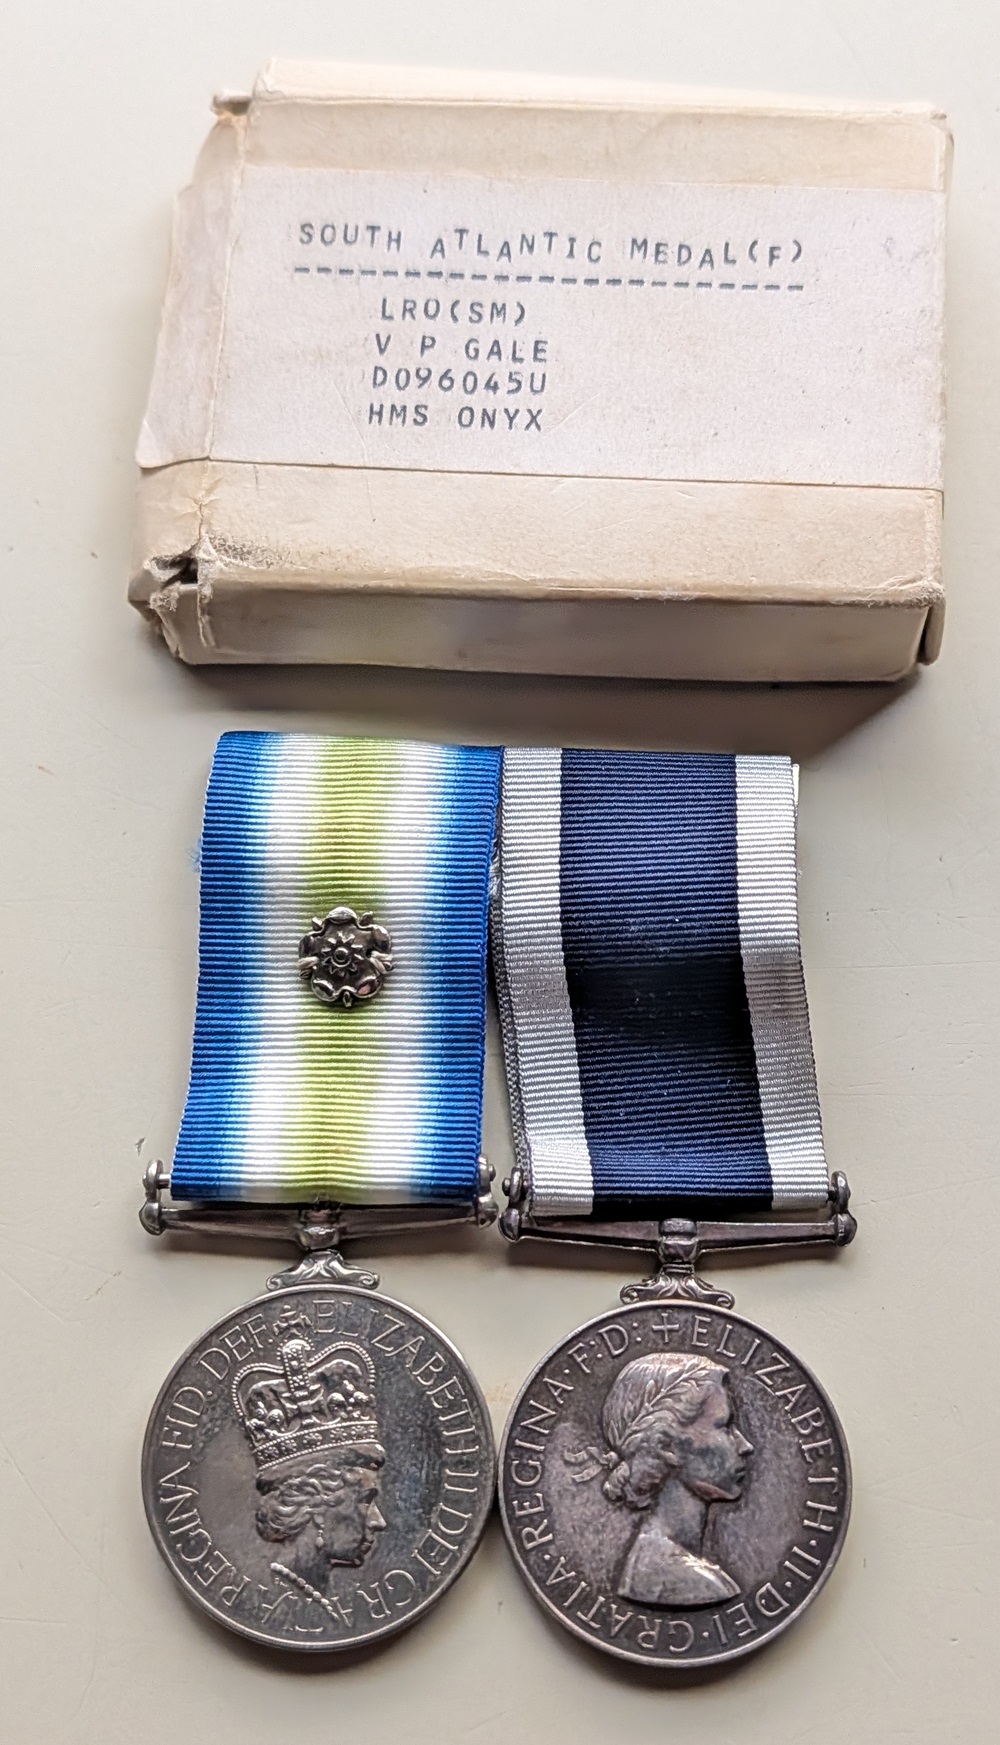
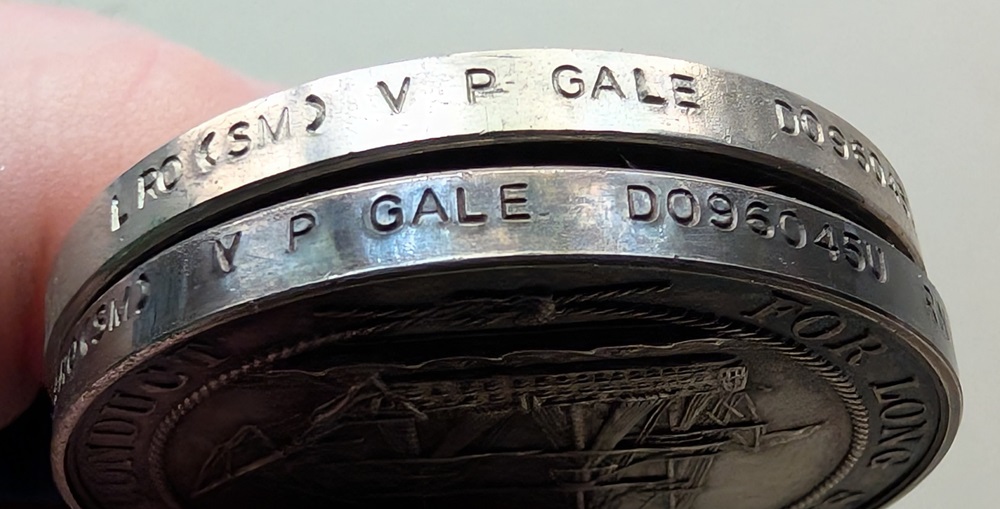
South Atlantic Medal (with Rosette) & RN LSGC
HMS Onyx
LRO (SM) V P Gale D09045U
Design and construction
Onyx was laid down by Cammell Laird on 16 November 1964, and launched on 18 August 1966. During the Onyx’s construction there was an explosion which took the life of a shipyard worker and severely wounded communist union leader Barry Williams. The boat was commissioned into the Royal Navy on 20 November 1967. Onyx was ordered after a previous Oberon-class submarine of the same name (laid down by Chatham Dockyard in 1962) was transferred to the Royal Canadian Navy as HMCS Ojibwa before launching in February 1964. The submarine’s motto, “Taurus excreta cerebrum vincit,” is correctly translated as “Bullshit conquers brains”.
Onyx was the only non-nuclear submarine of the Royal Navy to take part in the Falklands War. The diesel submarine went south with a special 5 man diving chamber and fully armed with 10 MK 24, 2 Mk 20 and 11 Mk 8 torpedoes. The smaller displacement of Onyx compared to the nuclear submarines made her ideal for landing SBS marines ashore on the islands in shallow waters. During one of these missions, Onyx hit an uncharted pinnacle while submerged at 150 feet (46 m) and suffered minor damage to her bow. Other claims are the damage was inflicted by one of two torpedoes dropped by an Argentine Navy S-2E Tracker from ARA Veinticinco de Mayo operating 70 NM off the Argentine coast, which had been lost by its RN SSN tail. The Tracker S-2 twice detected sub-surface and electronic traces and a MAD contact on 5–6 May while searching for the ARA Alférez Sobral which was out of contact after being hit by Sea Skua missiles launched by Lynx helicopters. Contrary to some reports, after the British cancelled Operation Mikado, there was never a plan to use Onyx to land the SAS in order to destroy Argentina’s remaining stockpile of Exocet missiles. Prior to the submarine being damaged the SBS had been embarked to attack a mainland airfield but this operation, too, was cancelled.
Postwar, Onyx sank the hulk of the landing ship Sir Galahad with a Mk 8 Torpedo after firing two Mk 24 Tigerfish, the second Tigerfish, after a ten-minute delay, at the hulk; both failed to explode probably due to torpedo battery faults. Sir Galahad had been damaged beyond repair during an Argentine Air Force raid at Fitzroy and Bluff Cove.
Taken from the RN Subs website:
HMS Onyx was on a visit to Plymouth when the summons came. Her Commanding Officer had just arrived at his home nearby when the telephone rang with orders to take his submarine back to Gosport. He would not be back for another 117 days.
Onyx sailed on 26th April and travelled on the surface for the journey south. For a long time it was believed that they would get no further than Ascension Island before some political agreement would be reached.
The Falklands War
On arrival at Ascension Island, the Task Force’s staging post in the middle of the Atlantic, Onyx hit trouble. They had to change a large number of cylinder heads on one of the diesel engines after it had over sped. The engineer actually shut it off by throwing his jacket over the air intake. Also a small hole in one of the external fuel tanks had to be repaired, as no trail of oil could be left behind. This was done by the XO, who also was a ship’s diver He very courageously spent a long period in the open sea, over the side in oily water in a rubber suit which gradually deteriorated in the oil trying to patch a metal blanket over it.
As Onyx neared her destination she spent more time dived to avoid detection and in the end, around half the entire period of her “cruise” was carried out submerged. There was little time for relaxation, although she was able to stop for the traditional ceremony as she “crossed the line” of the Equator.
Onyx had a double role, as well as adding the submarine deterrent, she could also be employed in reconnaissance and “cloak and dagger” operations, taking periscope photographs of enemy installations and likely landing areas for small groups of Special Forces. Onyx was better suited for this as she could move closer inshore where her silence of operation afforded her extra protection.
At Ascension Island, she picked up yet another cargo of SAS/SBS men trained in the clandestine arts of sabotage ashore for a series of operations. The crew worried about them every time they left, as it wasn’t always the Onyx who picked them up again.
It was not very pleasant getting them on and off it was generally very difficult to see or hear anything at all and it was just a question of gritting your teeth and hanging on and having faith in your navigation and not being put off when it was blowing a Force 12 and pouring with rain.
One of the biggest problems was the navigational information available. The charts for this part of the globe were mainly signed by one Captain James Cook over 200 years ago. The giveaway was where the distance between the soundings of the seabed got to be five or ten miles apart. Onyx hit one rock that James Cook missed which put a bit of a dent in the front end of the submarine.
After the news of the Argentine surrender at Port Stanley, Onyx did not begin her return journey until the end of July and then was slowed down by trouble with a main engine. The trip north after crossing the equator was made on one engine. The evening before entering harbor, Onyx anchored off the Solent.
The next morning the windlass used to pull up the anchor seized and Onyx had to leave the anchor and cable behind on the seabed. During the conflict the submarine had performed outstandingly well. 20,000 miles where logged and she was met with cheering crowds.
At the next Submarine Old Comrades Association dinner, the Commanding Officer was presented the Efficiency Shield for the year by Flag Officer Submarines
Royal Navy submarines hadn’t flown the Jolly Roger since WWII. The dagger on the flag indicates the Onyx was involved with clandestine ops, most probably in support of Special Forces personnel, SAS or SBS.
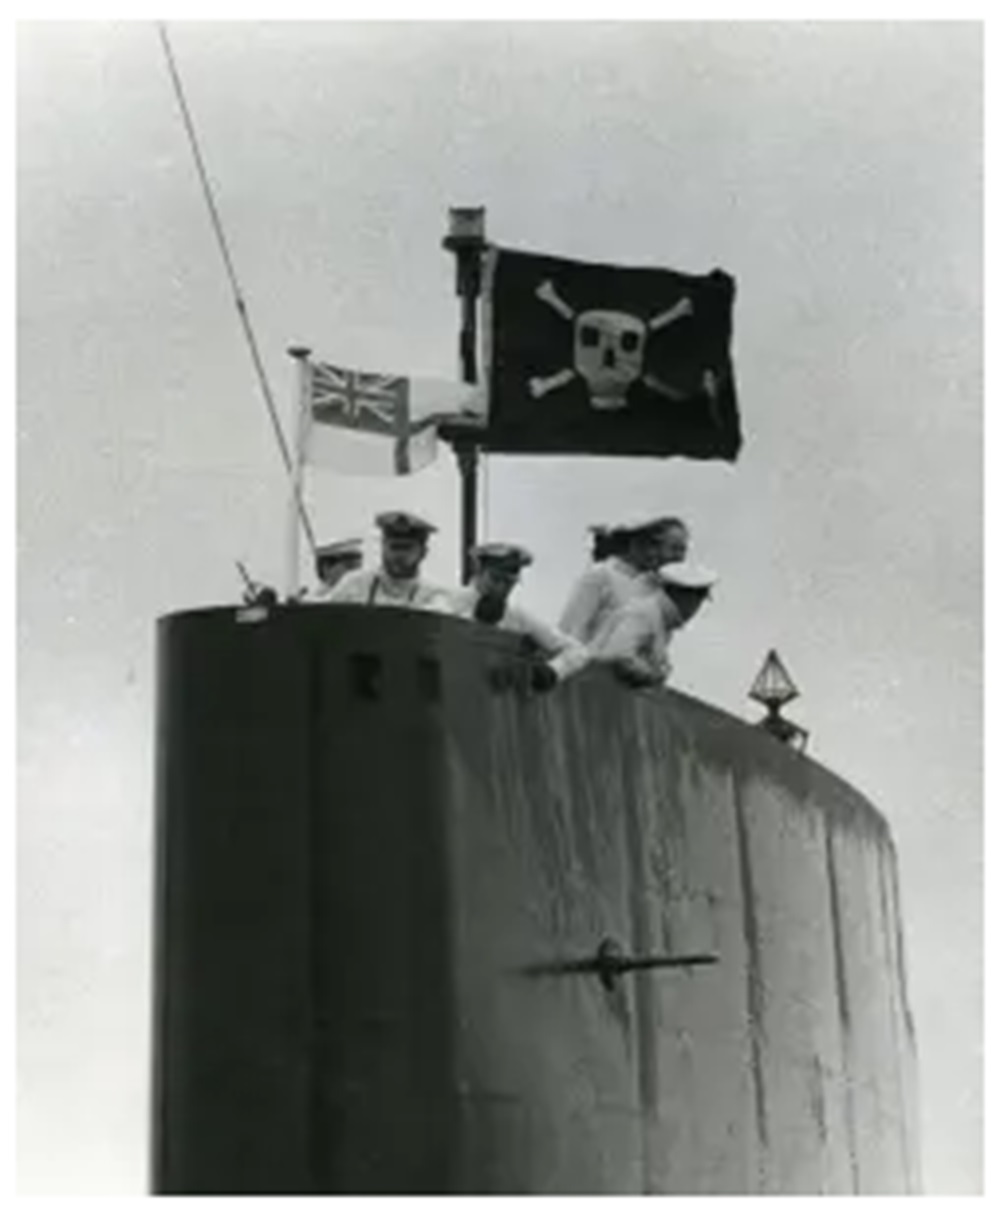
HMS Onyx flying the “Jolly Roger” on it’s return from the South Atlantic.
The dagger indicates clandestine operations, inserting SAS/ SBS for shore recce.
The origins of the Jolly Roger and the British submarine service came about at the beginning of the 1st World War when the British Admiral Beresford stated that all submariners were pirates and if caught should be hung. He probably only meant the German U-Boats, nevertheless his remarks were not missed by British submariners. The Jolly Roger was quickly adopted as the symbol of a successful patrol.
Scarce, only about 68 medals awarded to this submarine.
Mounted as worn.
Price: £1950
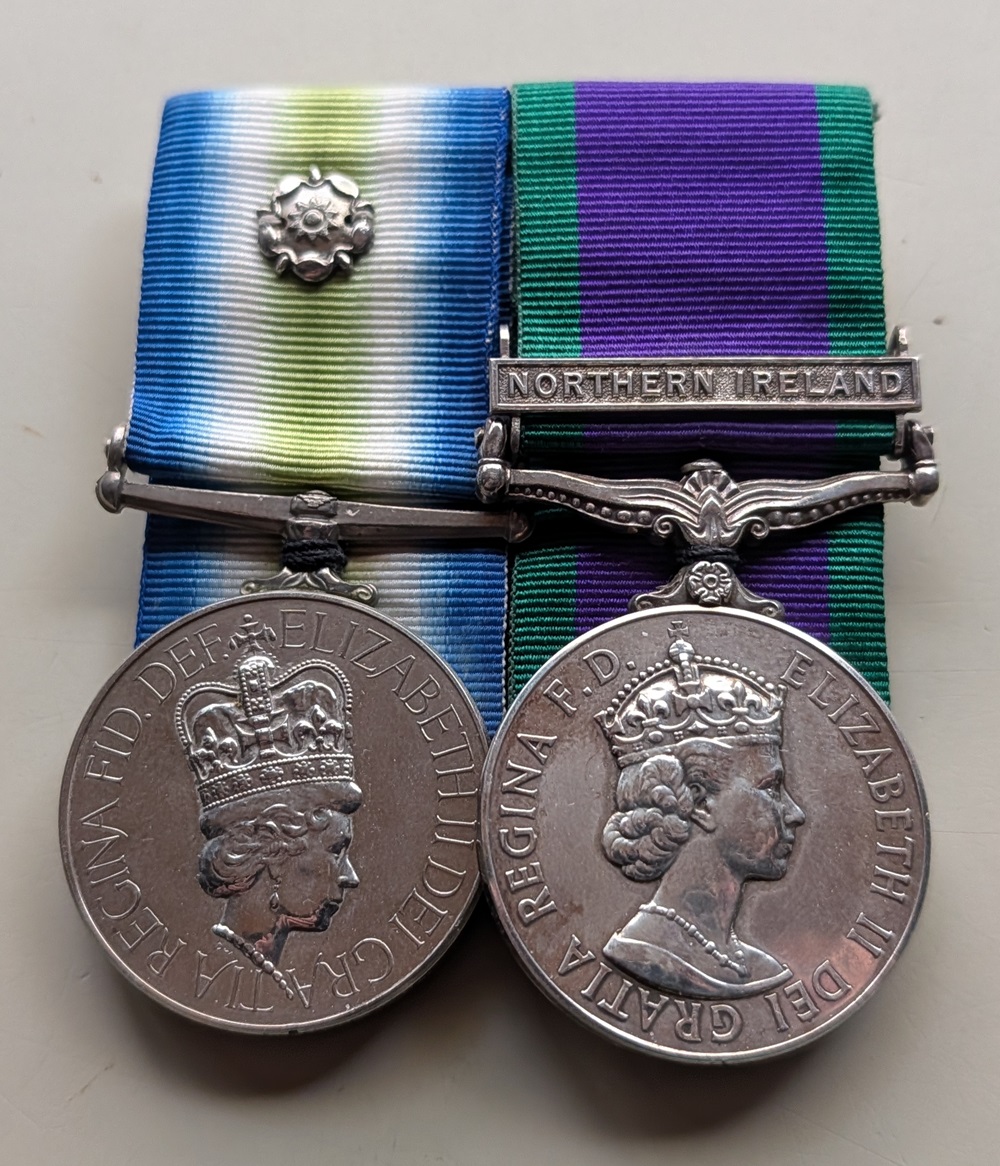
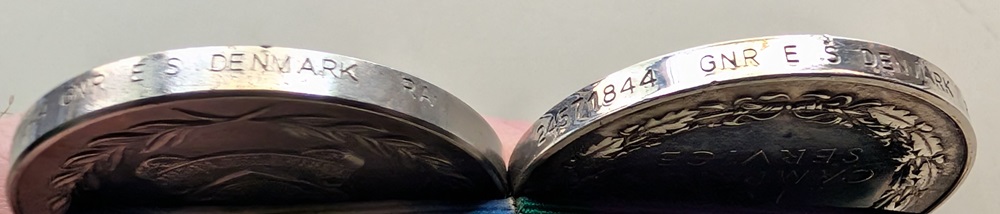
GSM “Northern Ireland & South Atlantic Medal (with Rosette)
“T” Battery (Shah Sujah) Royal Artillery
Rapiers – Air Defence
24571844 Gnr E S Denmark RA
South Atlantic Medal (with Rosette) 24571844 Gnr E S Denmark RA
General Service Medal – Northern Ireland 24571844 Gnr E S Denmark RA
Author of the book “Not for Queen and Country” in which he gives full biographical details and service history in the South Atlantic and Northern Ireland.
By the Author:
“I was born and grew up on the Wirral peninsula which is between the River Mersey and the River Dee in the Northwest. I am one of 10 children and the second youngest of two brothers and seven sisters. We grew up in a rather poor household and life was not easy.
After taking a few manual dead end jobs I decided that my best option was to join the British Army. I went on to see action in the Falklands war and Northern Ireland. I also received a General Officer Commanding Commendation for saving life. “Not for queen and country” is the story of that journey through the brutal basic training and the horror of war and life on the streets of Northern Ireland facing hatred and violence. I hope you will join me on my life changing journey. As a result of my experiences I suffer from Post-Traumatic Stress Disorder commonly known as PTSD. I have suffered from nightmares that have never ceased since my time in the Falklands war. People often ask me the reason for the title of my book “not for queen and country” It came about because the truth is when you are facing an enemy who want you dead at that time it is not for queen and country it is pure survival, to keep on living a primal instinct that we all have.
I left the Army after injuring my knees and returned home to the Wirral where I now live with my wife Tricia. We have a Daughter Kristy and a son Nathan. We are also Grandparents to Henry and Ophelia
After receiving many emails asking me about my life before I went in the army I decided to write about my childhood, which in many ways was as traumatic as my time in the military.
“We spoke in whispers” was published in September 2017.
I was diagnosed with blood cancer in May 2016 and I am undergoing treatment”
Copy of photos from various internet sources.
Mounted as worn.
Price: £1800
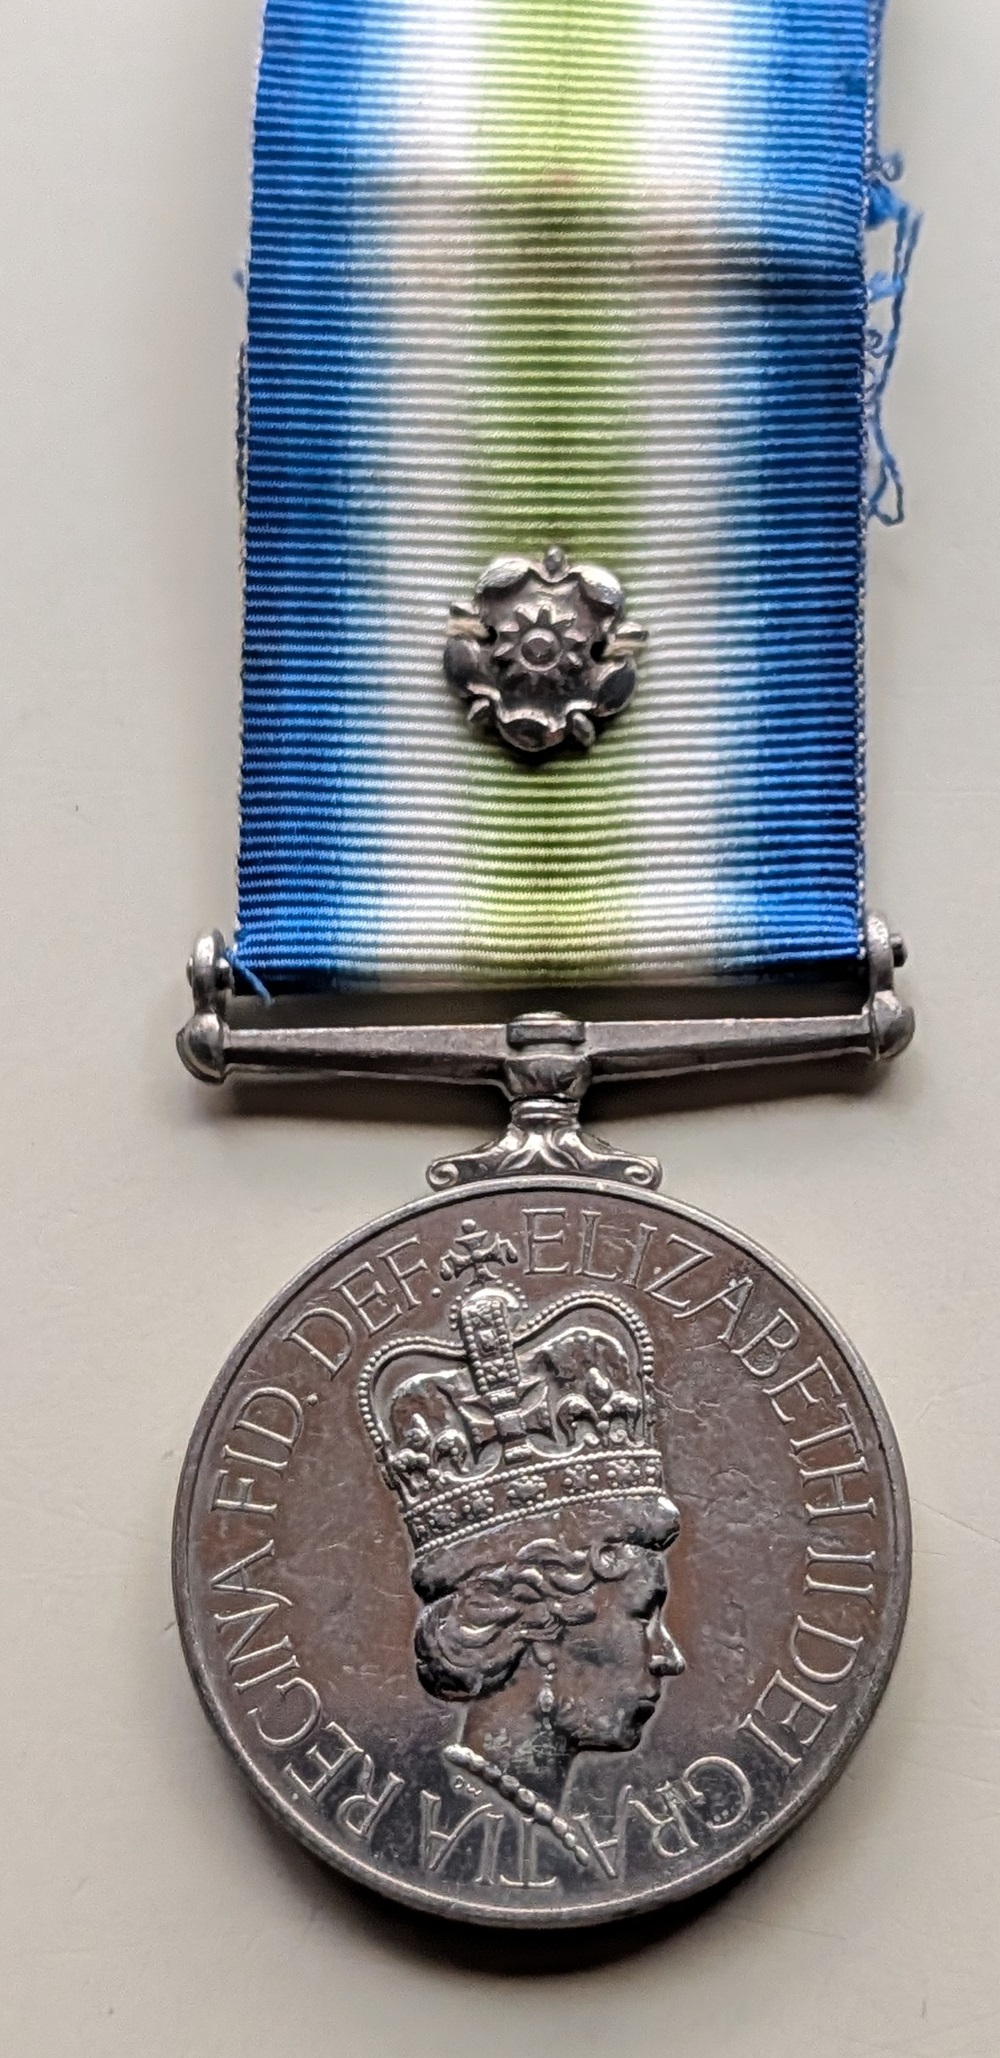
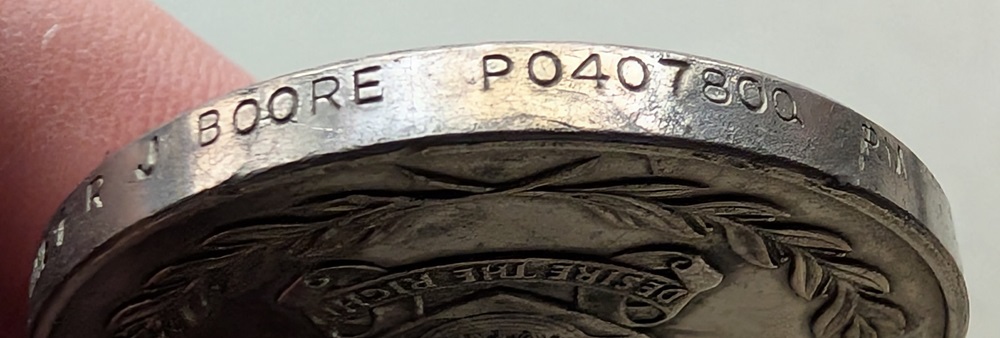
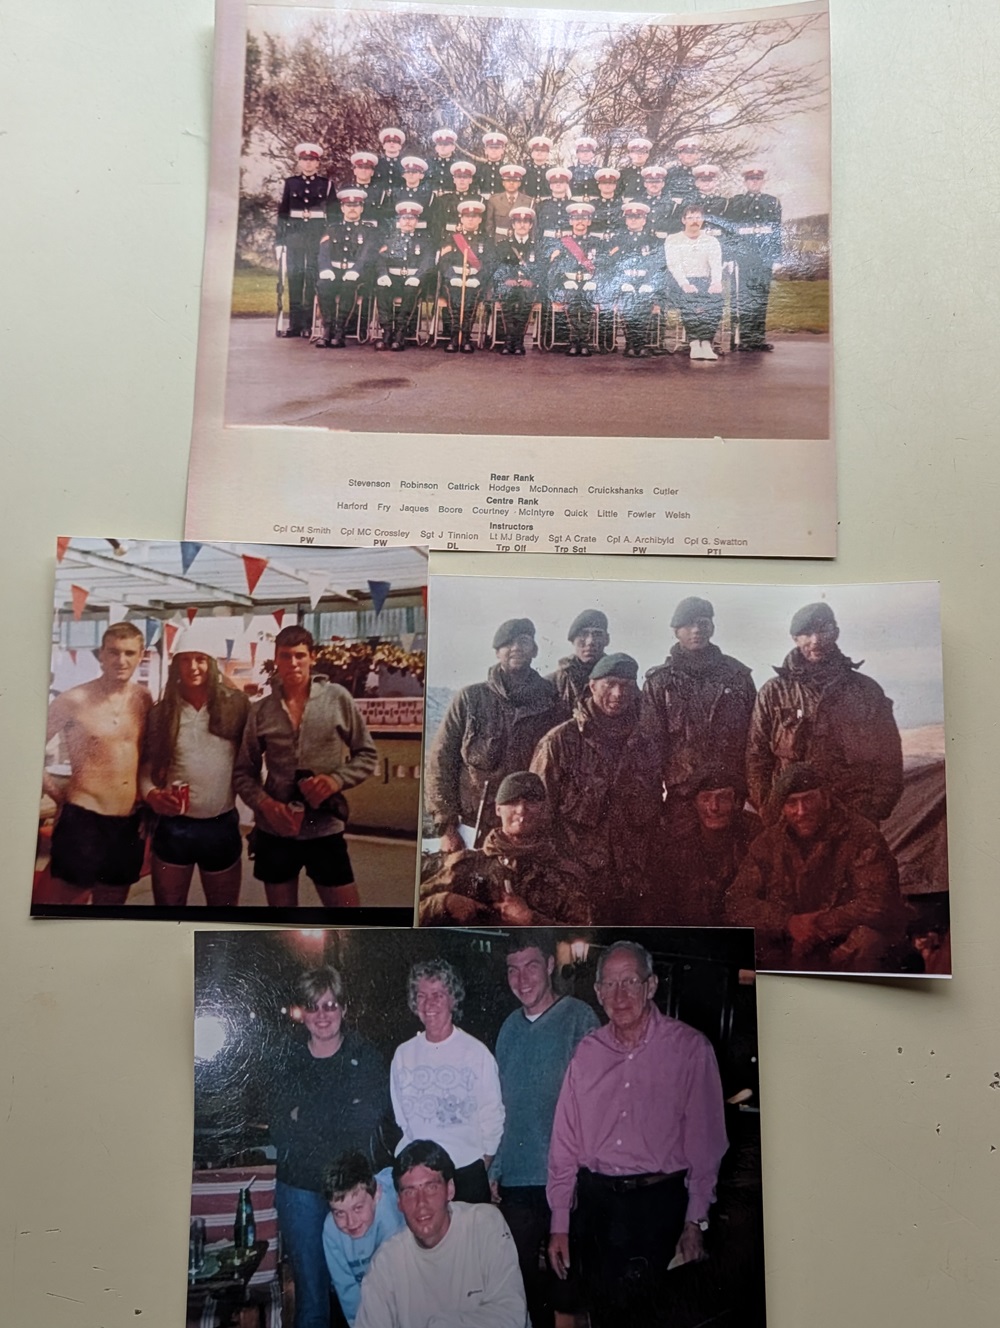
South Atlantic Medal (with Rosette)
42 Commando
Mne 1 Roy J Boore P0407800
Born: 16th November 1963
Passed Out: April 1981 (Aged 17)
Discharged: 1985
Married: Janice, June 2005
Lived: Corby, Northants
Served “M” Company but didn’t have enough AWT so was put in “J” Coy when it was formed, 12 Trp, 9 Section, under Lt Colin Beadon.
J Company
42 Commando was a Rifle Company short due to the detachment of M Company to aid in the capture and garrison of South Georgia. J Company was quickly formed from the clerks, drivers and other supernumery marines of 42 Commando, as all were foremost trained Marines and their specialist trades second. With J Company 42 Commando was up to full strength with K and L Companies.
Battle of Mount Harriet
Following K Coy’s helicopter flight forward on to Mount Kent over the night of Sunday 30th May to join D Sqn SAS, the rest of 42 Cdo moved to Mount Challenger during that week, and were eventually joined by K Coy. From there, they pushed out a troop strength observation post to Wall Mountain, and planned for an attack on the heavily defended Mount Harriet.
An advance direct from Wall Mountain across minefields and into Argentine machine guns, was out of the question, and a left flanking move would risk overlapping 45 Cdo’s assault on Two Sisters. Lt Col Vaux therefore decided on a right hook taking him well south of the more northerly Fitzroy/Stanley track to come up behind the Argentines from the south east. Finding an approach route through the extensive minefields and pinpointing enemy positions on this side of Mount Harriet called for careful patrolling, and for his part in this, Sgt Collins was decorated. And, as in the other battles and the approaches to them, men of the Royal Engineers played a key role in dealing with the minefields.
The final plan was to leave J Coy on Wall Mountain (‘Tara’) both as a reserve and to create a diversion, and for K and L Coys to march from the western end of Wall Mountain and across the Fitzroy/Stanley track before swinging east and then up to the start line behind Mount Harriet (‘Zoya’). Moving off at 8.30 pm, K Coy was to attack the eastern end, and an hour later, L Coy the western end, after which 42 Cdo would move on to take Goat Ridge (‘Katrina’). Unlike the other two attacks, this one was ‘noisy’ with Mount Harriet receiving a preliminary bombardment as part of the diversion plan.
On Friday 11th, as 42 Cdo prepared to move off, Argentine shellfire killed one of the Marines on Wall Mountain. Later, K and L Coys started off from Mount Challenger, with one of J Coy’s Troops going ahead to mark the route and drop off Milan sections, including one on the Stanley track in case any of the Argentine Panhard armoured cars should appear. They were also due to meet up with a Welsh Guards patrol assigned to secure 42 Cdo’s start line. But there was a delay and H-hour held up, although J Coy went ahead and opened fire from Wall Mountain to simulate a large scale clash.
Battle for Mount Harriet – K Coy crossed the start line at 10.00 pm, and almost reached the Argentine positions without being spotted. On the left, 1 Troop engaged the first enemy, and 2 Troop to the right went ahead to start clearing their part of K Coy’s objective during which time 42 Cdo suffered its only fatal casualty of the night. 3 Troop now passed through 2 Troop on to the summit, and with 1 Troop below them to the south, started to work their way westwards bunker-by-bunker, but were held up by machine gun fire. It was at this time that three K Coy Corporals – Newland of 1 Troop and Eccles and Ward of 3 Troop – won the Military Medal for taking the enemy position.
While K Coy was fighting on the eastern end of the summit and coming under artillery fire, L Coy was making its way up towards the western end of Mount Harriet under heavy machine gun fire which opened up soon after they crossed the start line. Milans were successful in knocking out these and other enemy sniper positions, but it took a number of hours and casualties from artillery, before L Coy’s half of the summit was taken, still in the dark. 5 Troop was then sent forward to the next objective just to the north of the summit, but was initially held up until the enemy resistance crumbled under mortar and artillery fire.
With dawn and L Coy still fighting forward, K Coy was ordered on to Goat Ridge, by which time J Coy had moved directly across from Wall Mountain to join in the final securing of Mount Harriet, running through a minefield on the way.
In successfully taking its objective, 42 Cdo had lost just one man killed.
Price: £1400
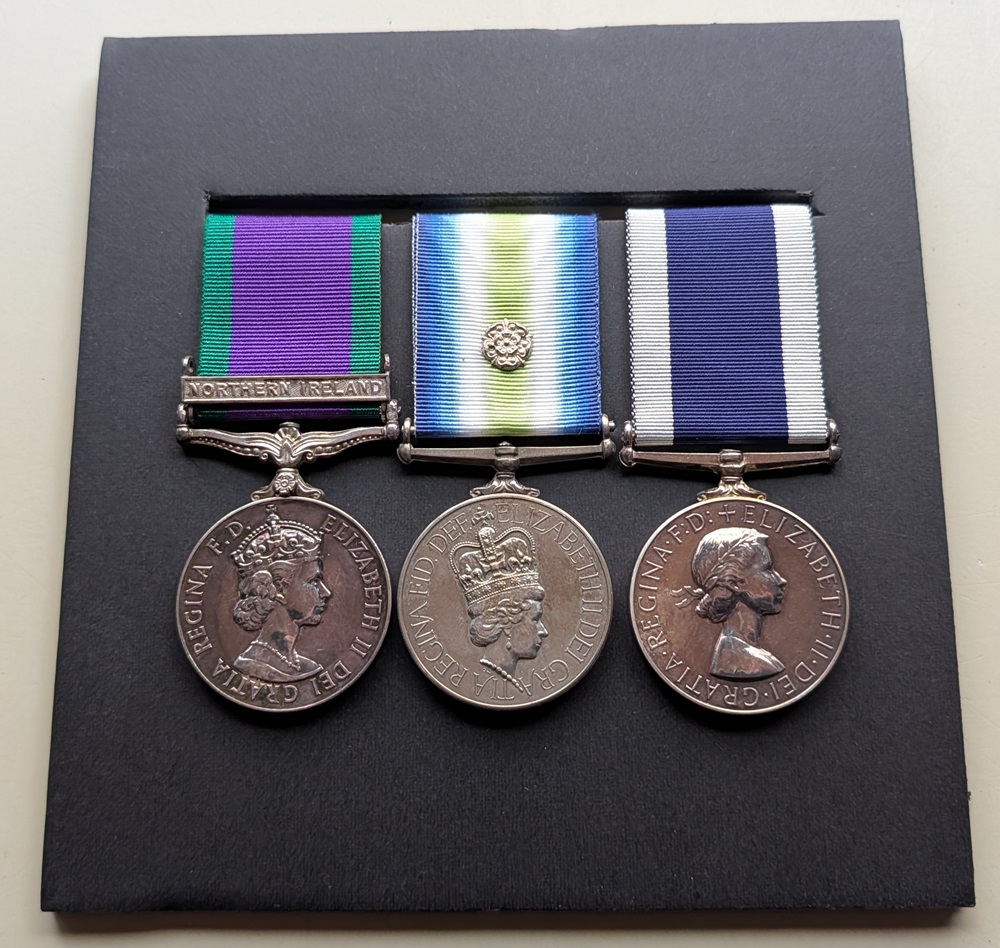
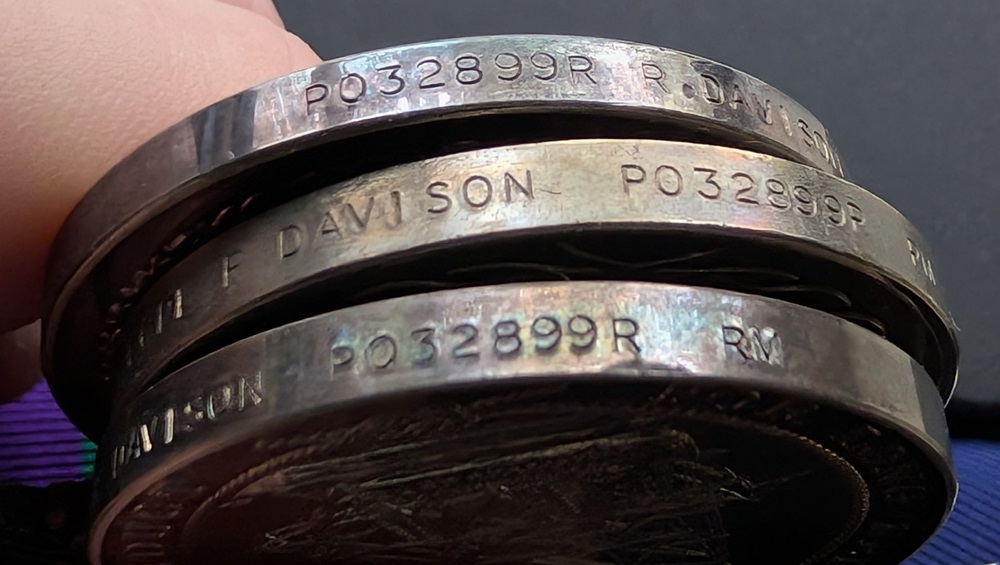
GSM “Northern Ireland, South Atlantic Medal (with Rosette) & RN LSGC
Commando Logistic Regiment
Marine / L/Cpl R “TC” Davison P032899R
GSM (Northern Ireland): Marine R Davison P032899R
South Atlantic Medal – L/Cpl R Davison P032899R
RN LSGC – Marine 1 R Davison P032899R
Armourer Workshop Squadron
One of the most difficult logistical issues for the British was transport for the land campaign, once the decision was confirmed on April 17 to land at San Carlos Bay, just over 80 kilometres from Port Stanley. On sailing from Britain, 3rd Commando Brigade had chosen to take its 76 Volvo BV202 tracked oversnow vehicles, but no wheeled vehicles other than nine Eager Beaver rough-terrain fork-lifts and ten 4-tonner trucks with fuel pods, in the belief that wheeled vehicles could not cope with the rugged and boggy East Falklands terrain.
In fact, light four-wheel drive vehicles and tractors used by local farmers could be used, and some were pressed into service. But following the loss of the Atlantic Conveyor, the British possessed only one heavy-lift RAF Chinook helicopter for their whole ground campaign, augmented by several medium-sized and smaller helicopters. Sea transport along the coast was also limited by the numbers of landing craft, together with powered rafts known as Mexeflotes, and other smaller craft, and by British reluctance to risk larger vessels close inshore.
One obvious consequence of this lack of transport was that much of the British advance towards Port Stanley had to be made on foot. A further consequence was that at Goose Green on May 28, light artillery support was very limited, and the guns eventually ran out of high explosive shells. For the final battles for the hills above Port Stanley, the British light artillery had only 500 rounds per gun, half their optimum requirement, although repeated statements that more than one battery was critically short of shells at the battles’ end have been contested by some participants.
One logistical advantage for the British was that 3rd Commando Brigade had its own dedicated logistics battalion, known as the Commando Logistic Regiment Royal Marines (RM). This consisted of a headquarters, a medical squadron, a transport squadron, a workshop squadron, and an ordnance squadron; during the campaign its strength rose from 256 to 673 personnel. The most notable absence from this battalion in the war was the specialist petroleum platoon of its ordnance squadron, who since they were civilian volunteer reservists were not included in the deployment. Consequently, following the San Carlos landings, the 3rd Commando Brigade petrol point was operated by inexperienced troops, including one key element operated by a single private who had received ten minutes’ instruction.
The logistics landing plan for 3rd Commando Brigade, approved on April 10 before a decision had been taken on the actual landing site or sites, was for a small base to be established ashore but for most of the brigade supplies to be kept afloat off the beachhead, including two LSLs carrying the equivalent of two days’ resupply for the brigade, and SS Canberra for immediate medical support. Once the decision to land at San Carlos was made, Ajax Bay was chosen for the logistics base ashore, as the largest of the very limited beach landing areas, and with the only buildings, a disused mutton refrigeration plant. As the British advanced across East Falkland, a forward logistics base for the brigade was created at Teal Inlet in Port Salvador bay, to support the final battles for Port Stanley. But following the first landings at San Carlos on May 21, it was obvious that the plan to hold most supplies offshore and afloat was impractical in the face of Argentinean air attacks. Instead, the main supply dump had to be established at Ajax Bay, despite its unsuitability, including its lack of sufficient space to disperse stocks safely and create a circuit.
The fleet auxiliary and STUFT ships had to be brought in under cover of darkness to unload, mostly sailing away before each morning’s air attacks. Most of the STUFT ships did not have the capability to unload by helicopter at night, and unloading using landing craft and Mexeflote rafts was a long and difficult process.
This had two major logistical consequences for the British. First, since the Commando Logistic Regiment had no helicopters or landing craft under its own command, it was in direct and often unsuccessful competition with tactical and operational commanders. Ship movements in and out of the beachhead were controlled from the Task Force, and were highly dependent on the estimated and actual air threat, so that requests even for essential supplies and equipment could not necessarily be met. Secondly, almost all the British helicopters and landing craft were tied up in unloading at San Carlos including Ajax Bay for about a week, leaving none for forward movements out of the beachhead.
At the political level, the British were increasingly sensitive to the possibility of international support for their actions declining, and the failure in London to understand the logistical situation in the Falklands led to increasing frustration, and to the orders to advance being given that led to the controversial Battle of Goose Green.
In the British advance across East Falkland, food and water and non-combat medicine were only relatively minor issues. But exposure to the cold weather was a problem for all troops, and the boggy and rugged terrain of the Falklands also caused cases of trench foot, and endemic mild diarrhoea from drinking the water. Battle casualty treatment and evacuation functioned well, resulting in a very high survival rate for casualties treated. Of over 1,000 casualties evacuated back to the designated hospital ship, the SS Uganda, including over 300 Argentineans, all but three men survived. But the only suitable location for the field dressing station at Ajax Bay, known as “The Red and Green Life Machine” (from the red beret worn by the Parachute Regiment and the green beret worn by the Royal Marines), was the disused refrigeration plant next to a large ammunition dump. In consequence, the British decided not to mark the dressing station with a Red Cross for protection under the Geneva Convention, since it was so close to the ammunition dump, and at one point it functioned with two unexploded bombs lodged in its roof.
With the arrival of 5th Infantry Brigade on June 2, the British opened a second axis of advance eastward south of the advance of 3rd Commando Brigade, with a forward logistics base being established at Bluff Cove and intended to support this advance. There is a controversy over the decision to use the three battalions of the fresh brigade as part of the British advance, rather than to protect the beachhead or reinforce 3rd Commando Brigade further. Again, a large part of this decision came from the political need to end the war as quickly as possible, and also from the belief that the Argentinean troops were of poor quality.
Unlike 3rd Commando Brigade with its integral logistics battalion, 5th Infantry Brigade deployed with only two ordnance companies, since its intended logistics unit were reservists and were not sent out to the Falklands; the brigade also had almost no suitable cross-country transport. For the final battles for Port Stanley, the Commando Logistic Regiment (which absorbed these ordnance companies) had to support the equivalent of a small division, with eight infantry battalions. Also, in order to move the troops and equipment of 5th Infantry Brigade forward, the British had to risk unprotected ships and landing craft close inshore. This led to the loss on June 8 of the LSL Sir Galahad, and the damage and temporary abandonment of the LSL Sir Tristam, from air attack at Fitzroy Creek near Bluff Cove.
The British plan of campaign was aimed initially at interdicting Argentinean logistics on the Falkland Islands, starting with their Maritime Exclusion Zone on April 12, which was extended to a Total Exclusion Zone on April 30, and was intended to prevent reinforcement or resupply of the islands. Repeated attacks on Port Stanley airfield and smaller grass airstrips were intended to reduce the threat from Argentinean aircraft, but also to reduce Argentinean helicopter mobility. The British believed correctly that they could do little to affect ammunition and other supplies reaching the Argentinean troops on the hills guarding Port Stanley. They discovered after the Argentinean surrender that food and protective tentage had not reached many of these troops, but this appears to have been due to poor Argentinean organisation rather than to any British efforts.
In logistics, as in all other aspects of their campaign, the British depended very heavily on high-quality personnel improvising to overcome the difficulties that they faced. Although logistical factors inevitably played a critical role in the campaign, there was no occasion on which adverse logistical issues became insuperable. From that perspective, and certainly when compared to their adversaries, British logistics in the Falklands War must count as a considerable success.
Price: £1600
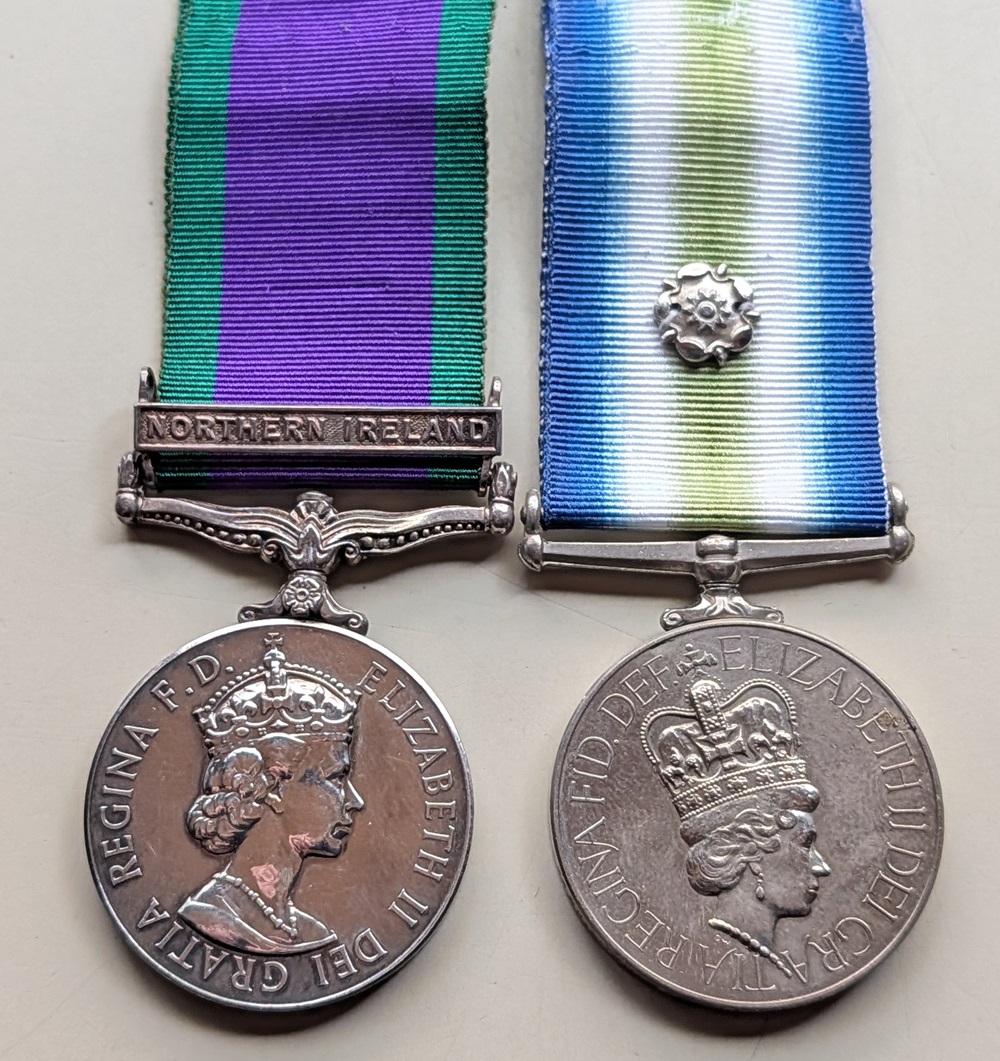
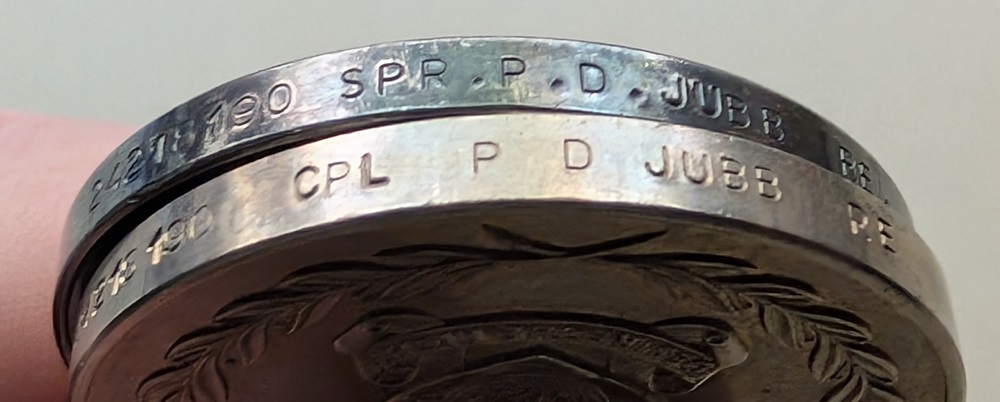
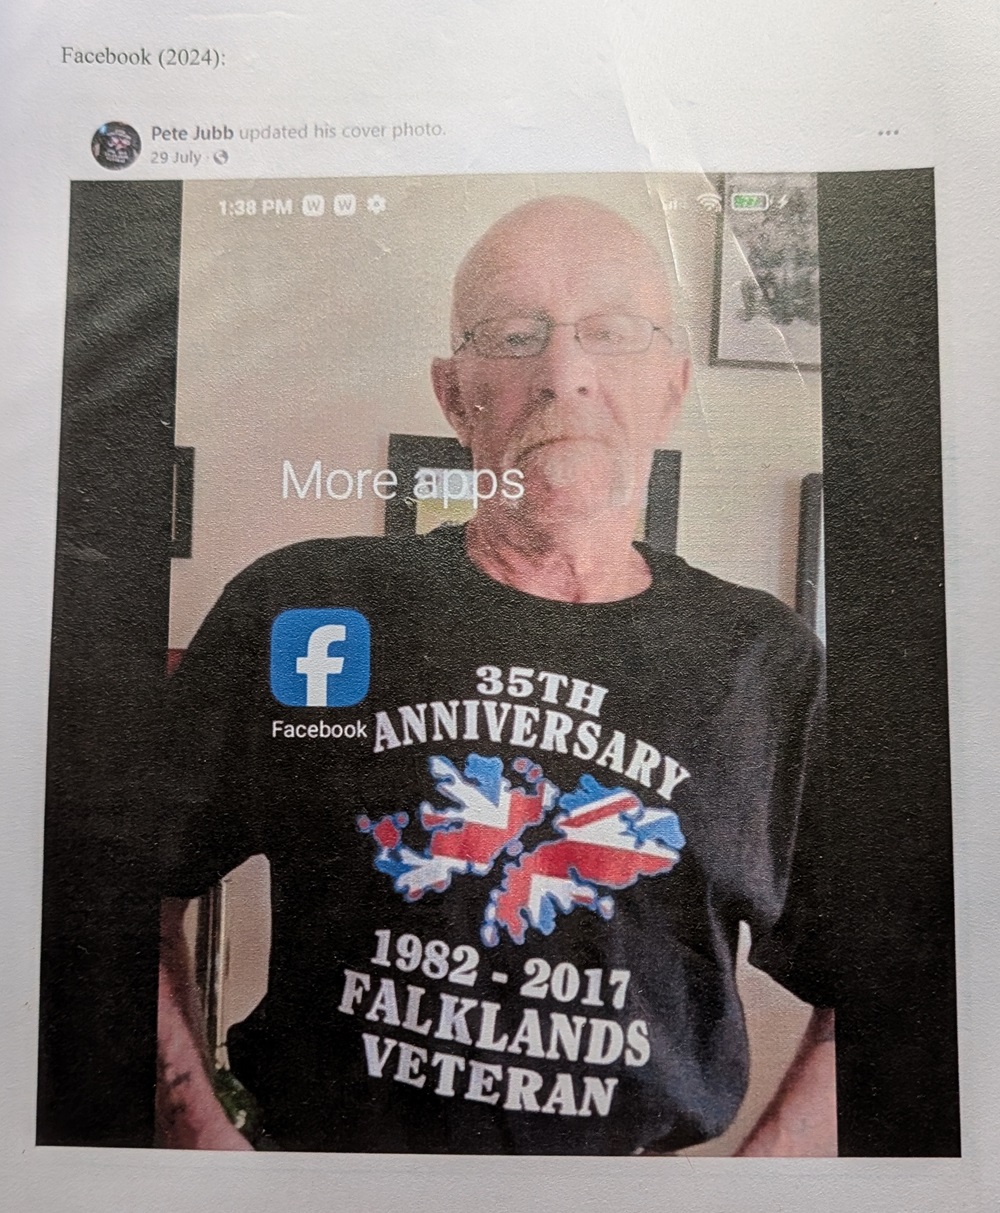
South Atlantic Medal (with Rosette) & GSM “Northern Ireland
9 Para Squadron Royal Engineers
Served 1 Troop
L/Cpl Peter D Jubb
Born: 1952, Agbrigg, Wakefield
Married: January 1998, Bury
Lives: Manchester
1 Troop Actions (from Squadron War Diary)
2nd Apr – Recalled to Aldershot Barracks.
18th Apr – 2 days range firing at Lydd Ranges.
20th Apr – Moved to Wyke Regis for 4 days bridging training, then Sennybridge for Brigade exercise. Afterwards a return to Wyke Regis for a concentrated period of Comba Engineer Infantry and helicopter training until 3rd May.
12th May – Boarded QE2 at Southampton. Two weeks of intense fitness training, weapon training, first aid, navigation, air defence, target identification, recognition, survival, tactics, mine clearing, escape and evasion, resistance to interrogation, the pace was intense early morning to evening.
2nd Jun – Landed San Carlos Water from the Canberra (having transferred from the QE2 at South Georgia) after 3 weeks at sea. Squadron (except 2 Troop) move to Squadron area and dig in. Fitzroy Bridge was reported demolished and surrounded by mines. Elements of 3 Troop were transferred by Sea King to Bluff Cove and within a couple of hours all the mines and explosive charges had been removed from the bridge. The 66 ft hole was repaired by the next day and the bridge was open to pedestrian traffic. 1 Troop later fully repaired the bridge to vehicular traffic.
5th Jun – Squadron warned for embarkation to LSL Sir Tristam. Squadron broken done into:
1 Troop & Sqn Tac/CV
3 Troop Scots Guards
4 Troop Welsh Guards
7th Jun – Sqn HQ & 1 Troop embark early on Sir Tristam. 1 Troop took the LCU to Fitzroy Bridge after being rejoined by Captain Willett. The Troop started the task of reconstructing the Fitzroy Bridge using locally acquired resources and material brought from San Carlos including RSJ’s and timber.
8th Jun – 4 Troop, with the Welsh Guards, arrived at Fitzroy on the Sir Galahad, which was hit by bombs. Casualties were brought in a constant stream by helicopters and boats and the intensive first aid training the Squadron had been put through paid off, especially in the administration of drips and morphine.
9th Jun – 1 Troop still at Fitzroy Bridge.
13th / 14th Jun – 3 Troop in support of 2 Scots Guards for Mt Tumbledown attack.
With the war over the serious Sapper work started. Making life bearable, and safe, for all was an enormous task. The Aquadron dug DTL’s, provided water, erected ‘wash ‘n’ brush up’ areas, repaired tracks and buildings, provided electricity and, of course cleared many settlements of mines, booby traps, and ordnance of all types. Fitzroy, Bluff Cove, Goose Green, Ajax Bay, Fox Bay, Pebble Island and Port Howard: all saw detachments of the Squadron beavering away in the weeks after the war finished. When 59 Sqn pulled out with the Commando Brigade on 25 June they moved to Stanley to continue the task of bringing that battered town back to normal. With 35 POW they set about marking, recording and fencing off the incredible number of minefields in the area. 94 minefields were located with in excess of 12,000 mines. many of them were lifted, breached others (in time – honoured fashion – with prodders and finger tips) and removed booby-traps wherever they were found. All happily without injury, though one of the POW’s stepped on a mine in an “unmined” area and lost a leg. But there was much to do in addition to the minefield work. Cpl Pete Jubb and his boys built a culvert at the airfield, Cpl Tony Caswell tried his hand at quarrying, Cpl Adg Iles re-roofed the town’s water purification plant, Cpl Graham Singer repaired holes in the roads, Sgt Baines and his Sp Tp crew ran the generators on the battered SIR TRISTRAM to enable it to be used as an accommodation ship. They set up the Military Power Station, repaired pipe-lines and jetties and even sent LCpl Field to be CRE South Georgia! With 2 Troop and 4 Troop (now returned to us from INTREPID) engaged full time on clearance of a veritable mountain of ordnance from the streets and houses of Stanley itself. The Squadron left on the 17th July on board the St Edmund for the trip to Ascension to catch the flight home.
With copy photos from Facebook
Price: £2200

South Atlantic Medal (with Rosette), Nato “Former Yugoslavia”, Golden Jubilee, RN LSGC & Bar
D175785E RO1(SM) Douglas Robert Singleton
Complete with:
RN LSGC J960048
F. Singleton. PO HMS Oracle. Possibly father?
The Falklands Conflict
Spartan was ordered to sail south for the Falkland Islands two days before the Argentine invasion of the islands on March 30, 1982. Spartan was the first ship to arrive in the islands and began to enforce a 200-mile (370-km) maritime exclusion zone imposed by the British. Shortly after, Spartan sighted Argentine merchant shipping mining the harbour at Stanley, but was not ordered to attack. This was partly due to British concerns about escalating the war too early, but also to avoid scaring off more lucrative targets such as the Argentine aircraft carrier Veinticinco de Mayo. In the end, Spartan did not fire in anger during the Falklands War, she did however provide valuable reconnaissance to the British Task Force on Argentine aircraft movements. Spartan’s presence also ensured that the Argentine Navy would not dare leave its port.
On the afternoon of April 30, 1982, the War Cabinet of Prime Minister Margret Thatcher transmitted a message to three Royal Navy submarines in the South Atlantic—designating the carrier Veinticino de Mayo a priority target to be hunted down and destroyed.
The Argentine carrier—ironically, of British origin—posed an unpredictable threat to the Royal Navy taskforce commencing amphibious operations to retake the disputed Falkland Islands following their seizure by Argentinian troops on April 2, 1982.
The ensuing nine-day game of cat-and-mouse between British submarines and the anti-submarine aircraft onboard the Veinticinco is recounted in A Carrier at Risk by Mariano Sciaroni, who compares interviews with Argentine sources with Reports of Proceedings filed by British submariners to shed new light on a formerly obscure subject.
Sciaroni’s book not only serves as a primer for the anti-submarine tactics and technology of the time, but features many maps plotting day-by-day movements of the combatants and numerous photos and color illustrations depicting the vessels and aircraft engaged. Sciaroni also captures the routines and human foibles of wartime life at sea, such as quarrels over stocking snacks in the pilot ready room and fearful crewmen sleeping at their stations in life vests.
The Veinticinco Races for the Coast
By May 1982 three British hunter-killer submarines in Task Force 324 were patrolling exclusives zones around the disputed islands. The older Churchill-class Conqueror hunted south of the Falklands, while more modern and quieter Swiftsure-class attack subs Splendid and Spartan patrolled northwestern and northeastern quadrants respectively.
All three 5,400-ton nuclear-powered submarines could sustain up to 26-30 knots without needing to surface for air and were armed with Mark 24 Tigerfish acoustic homing torpedoes with a range of 13 miles, and World War II-vintage Mark 8 torpedoes designed to fire in a straight line. As the Tigerfishes were unreliable versus surface targets, the short-range Mark 8s were preferred.
The nuclear-powered Courageous and Valiant and the diesel-electric Onyx would arrive later in the conflict.
British intelligence had compromised the Argentina Navy’s Swiss Crypto AG encryption systems and intercepted Argentine plans for a combined carrier strike and surface attack. Aided by CIA spy satellites, the Royal Navy had a general idea of the Argentinian carrier taskforce’s positions but lacked precise coordinates.
In fact, on May 1 one of Veinticinco’s S-2E Tracker planes located the British fleet first. The Veinticinco prepared to launch its A-4Q Skyhawk jets to attack the British carriers—only for the Skyhawks to be grounded by unusually long-lasting dead wind.
Then at midnight, a British Harrier jet located the Argentinian fleet. Hours later, far to the south, the Conqueror torpedoed the cruiser General Belgrano, killing 323 Argentine sailors.
The Veinticinco’s skipper, José Julio Sarcona, realized his taskforce now was on the verge of being annihilated by the Royal Navy’s quantitatively and qualitatively superior forces, so he turned Veinticinco westward and made full steam for the Argentinian coast. However, the carrier’s troublesome boilers limited her to limping at 18-20 knots—meaning the British subs might easily overtake her.
The retreating Veinticinco was firmly in the hunting ground of Splendid under Commander Roger Lane-Nott. Her sistership Spartan could easily have joined the hunt but was denied permission to avoid potential friendly fire incidents.
Tracker versus Swiftsure
The Veinticinco adopted a zig-zag course over shallow waters that would force pursuing submarines to slow down to avoid running aground. Her escorting destroyers were spaced five miles to her left, right and front: two British-built Type 42 destroyers, Hercules and Santisima Trinidad, and the older Py, a Gearing-class destroyer formerly named USS Perkins equipped with a longer-range sonar.
Veinticinco also carried four ex-U.S. Navy S-2E Trackers, large twin-radial-engine planes with folding wings and a crew of four. The pokey aircraft could fly six-hour long patrols, parachute-dropping Jezebel sonobuoys set to transmit passive omnidirectional sonar returns to the operators of the S-2E’s AQA-4A system. Uniquely capable of night operations, the Naval Anti-Submarine Squadron was dubbed the “Owls.”
The Tracker’s secondary sub-hunting sensors included APS-88 surface-search radar and an electromagnetic (ESM) sensor that could detect radar and radio emissions. Despite not needing to surface for air, the British submariners still rose close to the surface every few hours to receive orders, transmit reports, and observe with their periscopes—during which time they were more exposed to detection.
When a Tracker acquired a Possible or Probable contact (POSSUB, PROBSUB), it’s crew would visually inspect the area and comb low over the sea using a short-range Magnetic Anomaly Detector. If a submarine appeared to be nearby, the Tracker could then parachute-drop a Mark 44 lightweight homing torpedo. This would swim in circles scanning the water with its active-sonar until it acquired a target. Trackers also hefted two 350-pound Mark 54 depth charges for dropping directly above a submarine.
The carrier also disposed of two S-61D-4 Sea King helicopters that could lower an AQS-13A dipping sonar into the water with an effective range of three miles. The Sea Kings also were armed with depth charges and torpedoes, but were slower (max 166 miles per hour), and had only a few hours endurance.
Sarcona decided to keep the Sea Kings running close patrols, while the Trackers roved over 100 miles away, laying a triangular-pattern field of sonobuoys spaced nine miles apart.
The Argentinians could have used active-sonar which “pings” the water with sonic waves to more aggressively locate the British hunter-killers. But senior Argentinian officers insisted on using only passive hydrophone sonar, not wishing to broadcast anything that could be traced back to them, compromising their position.
Indeed, by May 3 Splendid was close to heading off the retreating carrier, repeatedly establishing visual contact with Veinticinco’s escorts—but not the carrier itself. The British submariners were also acutely aware of the aircraft hunting them thanks to their own ESM systems.
For example, at 5:30 AM on May 4 the Splendid detected the radar of a Tracker and dove deep to avoid detection. An hour later, her sonar acquired multiple contacts—the Veinticinco and her destroyers!
By the time the British submarine closed within torpedo range, however, all but one large, slow ship had passed into Argentinian territorial waters, beyond which they were forbidden from attacking. Splendid ascended to periscope depth to visually identify the last remaining contact target prior to launching torpedoes—only to discover it was the cargo ship Formosa! Splendid had fallen just short of her prey.
While Splendid continued to search south, Veinticinco steamed northward up Argentina’s coast, her Trackers continuing to scour the seas. At 7:43 AM on May 5, a Tracker pilot visually acquired what appeared to be a submarine snorkel heading north, and released a Mark 44 torpedo, which splashed into the water and disappeared.
Two Sea Kings were quickly scrambled to pick up the chase, one of which detected a faint mechanical signature with its dipping sonar. A second Tracker dropped a trio of sonobuoys and began swooping low over the water to use its MAD sensors, which repeatedly reported faint contacts.
After an hour, the Tracker released a second homing torpedo, which pinged rapidly as if its active sonar had acquired a target. But again, the torpedo vanished.
In fact, Sciaroni discovered that Splendid was over 130 miles to the south at the time. Even stranger—Splendid too reported sonar contact with what sounded like a diesel-electric submarine, assumed (incorrectly) to be the Argentinian submarine Salta. Lacking loaded anti-submarine torpedoes, Splendid retreated. Sciaroni speculates the British and Argentine sonars might have picked up a Soviet, Chilean or U.S. submarine passing through the conflict zone.
By May 7, damage to one of Splendid’s turbochargers forced her to retire, while sistership HMS Spartan cruised northward to finish off Veinticinco. But Spartan too found her patrol constrained by the shallow, transparent waters the Veinticinco was cruising in, and was unable to close with the carrier during daylight hours. Veinticinco finally slipped into port at Viedma on May 9, bringing an end to the hunt.
Ultimately, it seems Argentinian aircraft probably never directly fired at British submarines—save an extraordinary later coincidence when the Valiant was damaged by bombs jettisoned by Argentine Air Force Dagger jets roaring back to base. Admittedly, British ASW forces also launched numerous torpedoes at suspicious sonar contacts, while failing to prevent the Argentinian submarine San Luis from launching multiple unsuccessful torpedo attacks.
However, Sciaroni argues the Trackers and Sea Kings likely saved Veinticinco by constraining the British submarines’ freedom of maneuver, forcing them to hunt more slowly and cautiously. Indeed, in World War I and II, anti-submarine aircraft were just as important for preventing submarines from attacking as destroying them outright
The British submariners may have lost their shot at a carrier, but could remain content with having played a decisive role compelling the Argentinian fleet to retire from the conflict in the first place.
Launched by Lady Lygo
Sea Trials February 1979
During the countdown to commissioning many of the first crew and key figures in the Barrow building team featured in a special feature in the Barrow News.
Among them was Radio Supervisor William McCurry who grew up in a caravan on the former army base at Haverigg.
George Hughes, Mechanician 1st Class was standing by his third Barrow-built submarine after serving on Valiant and Sovereign.
Spartan’s first Coxswain was Raymond ‘Harry’ Harrison who had also stood by Sceptre. He was a regular on the darts board at the Britannia pub in Barrow.
Many crew members found other ways to play a part in the local community during the wait to take over the new boat from the builders. Able Seaman W Harley and Able Seaman N White were pictured painting a house in Devon Street, Barrow, for Age Concern.
Lt Ian Whitehouse, the Spartan navigator, declared himself sad to be leaving South Cumbria – on account of his new-found love for local beer Har tley’s XB.In charge was Commander Nigel Goodwin who had joined the Royal Navy at Dartmouth in 1961 and moved to the Submarine Service in 1966. In 1970 he had been appointed commanding officer of the HMS Onyx.
Spartan was the first boat to arrive in the Falkland Islands after the Argentine invasion of British territory in the South Atlantic. The crew began to enforce a 200 mile (370 km) maritime exclusion zone providing valuable reconnaissance to the British Task Force on Argentine aircraft movements and ensuring the Argentine Navy dare not leave port.
In January 1990 Spartan hit the sea bed and damaged its rudder during manoeuvres off Scotland in January 1990.
The boat was decommissioned in January 2006 following a five-month global deployment covering 30,000 miles – including a goodwill port visit to Rio de Janeiro. This was the first time that a Royal Navy nuclear powered submarine had visited Brazil in 20 years.
HMS Spartan Paying Off – From the Clyde Courier
HMS Spartan left HM Naval Base Clyde for the last time following 28 years of service with the Royal Navy (Wednesday 25th January 2006). Sailing out of the Gareloch with her 45 m decommissioning pennant blowing in the breeze Commander Paul Halton, the Captain of Spartan said:
It is sad leaving Faslane for the last time. Over the years the teams in the base have given us exceptional support to keep Spartan ready for operations and of course keeping the crew fed, watered and happy when alongside.
Prior to her last sailing, and as is traditional in the Navy, a decommissioning ceremony was held on 20th January to mark the successful completion of her service and to thank the men who have served in the Swiftsure Class Submarine over the years. Guest of honour at the ceremony was former First Sea Lord Admiral Sir Raymond Lygo, KCB who’s late wife, Lady Emily Lygo, was the boat’s Sponsor having originally named and launched her in 1978.
Spartan’s last patrol was one of the most successful yet, having completed a five month long global deployment which saw her cover some 30,000 miles, transit three oceans and visit four continents before returning home just in time for Christmas 2005.
During this South Atlantic and Gulf deployment she conducted patrols and also found time to enjoy visits to Rio de Janeiro, La Reunion, Fujairah and Dubai. Their goodwill port visit to Rio de Janeiro in Brazil was a particular highlight as this was the first time that a Royal Navy nuclear powered warship had visited Brazil in twenty years and the boat’s crew conducted a two day exercise with the Brazilian Navy to further develop training and cooperation between the forces. Whilst there, crew members also visited an orphanage where they helped to refurbish a children’s basketball court and cleared some land allowing a new accommodation building to be started.
‘Courage with great endurance’, the Submarine’s motto is fitting for a boat whose life began just before the Falklands conflict in which she played an important role. She was afforded battle honours for her part during Operation Corporate in 1982 when she spent 74 days dived in operations against Argentine Forces.
Over the years the ‘hunter killer’ capable of detecting and destroying both surface and submerged targets, has been involved in tracking, intelligence gathering, patrolling areas of heightened tension and remaining at readiness to deploy Tomahawk Land Attack Missiles.
Although Spartan’s departure means one less Submarine at HM Naval Base Clyde, the Royal Navy’s new generation of Attack Submarines, the Astute Class, will be base ported at Faslane and will replace both the Swiftsure Class and ultimately the Trafalgar Class too. The Astute Class will be the largest and most capable Attack Submarines ever built for the Royal Navy, with the first vessel due on the Clyde in 2008.
Includes award certificate for NATO medal.
Scarce combination.
Price: £2750
South Atlantic Medal (with Rosette), Gulf War Medal with 16 Jan-28 Feb 1991 Clasp, NATO Medal clasp Former Yugoslavia, United Nations Medal for Bosnia
South Atlantic Medal with Rosette – Stwd R K Waters RFA Resource
Gulf War Medal with 16 Jan-28 Feb 1991 Clasp – Stwd K W Waters RFA
Operation Corporate – Falklands Conflict (RFA Resource)
Steward Walters served aboard RFA Resource in the Falklands War, RFA Sir Bedivere in the Gulf War and operations in the Adriatic in relation to the former Yugoslavia and RFA Fort Grange for the Bosnia operations.
RFA Resource was an armament stores ship of the Royal Fleet Auxiliary (RFA), the Naval Auxiliary Fleet of the United Kingdom, commissioned 6th June 1967 and de-commissioned 1st May 1997. Resource served in the Falklands War, captained at that time by Captain Bruce Seymour. She was one of the first vessels on the scene to pick up survivors from HMS Sheffield, having just supplied her. Resource was one of several RFA munitions replenishment ships certified to store and supply the fleet with munitions, including WE.177A live nuclear weapons. Other ships capable of carrying (stored in deep magazines) or deploying these weapons were HMS Hermes, HMS Invincible, HMS Broadsword and HMS Brilliant, they were transferred to various Royal Fleet Auxiliary ships with their specialist magazines. This was initially RFA Regent, and when RFA Resource exited San Carlos, they were transferred to her, and then to RFA Fort Austin. After the end of the conflict they were transported back to Britain aboard RFA Fort Austin and RFA Resource. Inert practice weapons and surveillance weapons without fissionable material were also transported.
Gulf War (RFA Sir Bedivere)
27 September 1990 sailed U.K. for Bremerhaven to embark units of the 7th Armoured Brigade for the Gulf Area following the Iraqi invasion of Kuwait
28 September 1990 sailed Bremerhaven with tanks and other military vehicles of the 7th Armoured Brigade, in company with the Danish ro-ro MERCANDIAN QUEEN 11 and the Italian ro-ro JOLLY TURCHESE for service during Operation Granby – the Gulf War
20 October 1990 arrived Al Jubayl for Gulf War Support Duties
25 December 1990 suffered a main engine defect while on passage back to the Gulf Area and diverted to Gibraltar for repairs
28 February 1991 provided Stores Support in the Forward Area
1991 was awarded the Kuwait 1991 Battle Honour along with 10 other RFA’s
Yugoslavia (RFA Sir Bedivere)
25 October 1992 arrived Split with a British Army Field Hospital and medical supplies and to act as an Accommodation Ship for 450 Troops who were the British element of the UN Protection Force in former Yugoslavia along with RFA’s RESOURCE and ARGUS
Bosnia (RFA Fort Grange)
Operation Grapple was the codename given to the deployment of British forces in Bosnia from 1992 as part of the United Nations Protection Force (UNPROFOR).
Between January 1993 and August 1993 RFA’s Olwen and Fort Grange were deployed in support of Royal Naval and other UN units with 820 NAS embarked.
With an 11th Transportation Battalion, Fort Story, Virginia Certificate of Appreciation dated 6th May 1994 to Steward (C) Ralph K Waters for “Your outstanding operational support during the joint and combined logistics over the shore operation, Resolute Venture ’94 conducted at Fort Story, Virginia. The 11th Transportation Battalion greatly appreciates your efforts, professionalism, and dedication for a super job”.
With a 10th Transportation Battalion Certificate of Appreciation dated 6th May 1994 to Steward Ralph K Waters RFA Sir Bedivere for “Your exemplary professionalism and outstanding support of Task Force Ten during Resolute Venture 1994 at Fort Story, Virginia. Your tireless efforts were integral in our total success during this joint logistics over the shore combined force exercise. Your selfness assistance during the combined United States – British Army operation is commendable and reflects distinct credit upon you and the RFA Sir Bedivere“.
With boxes of issue for all medals.
Scarce combination.
Price: £850
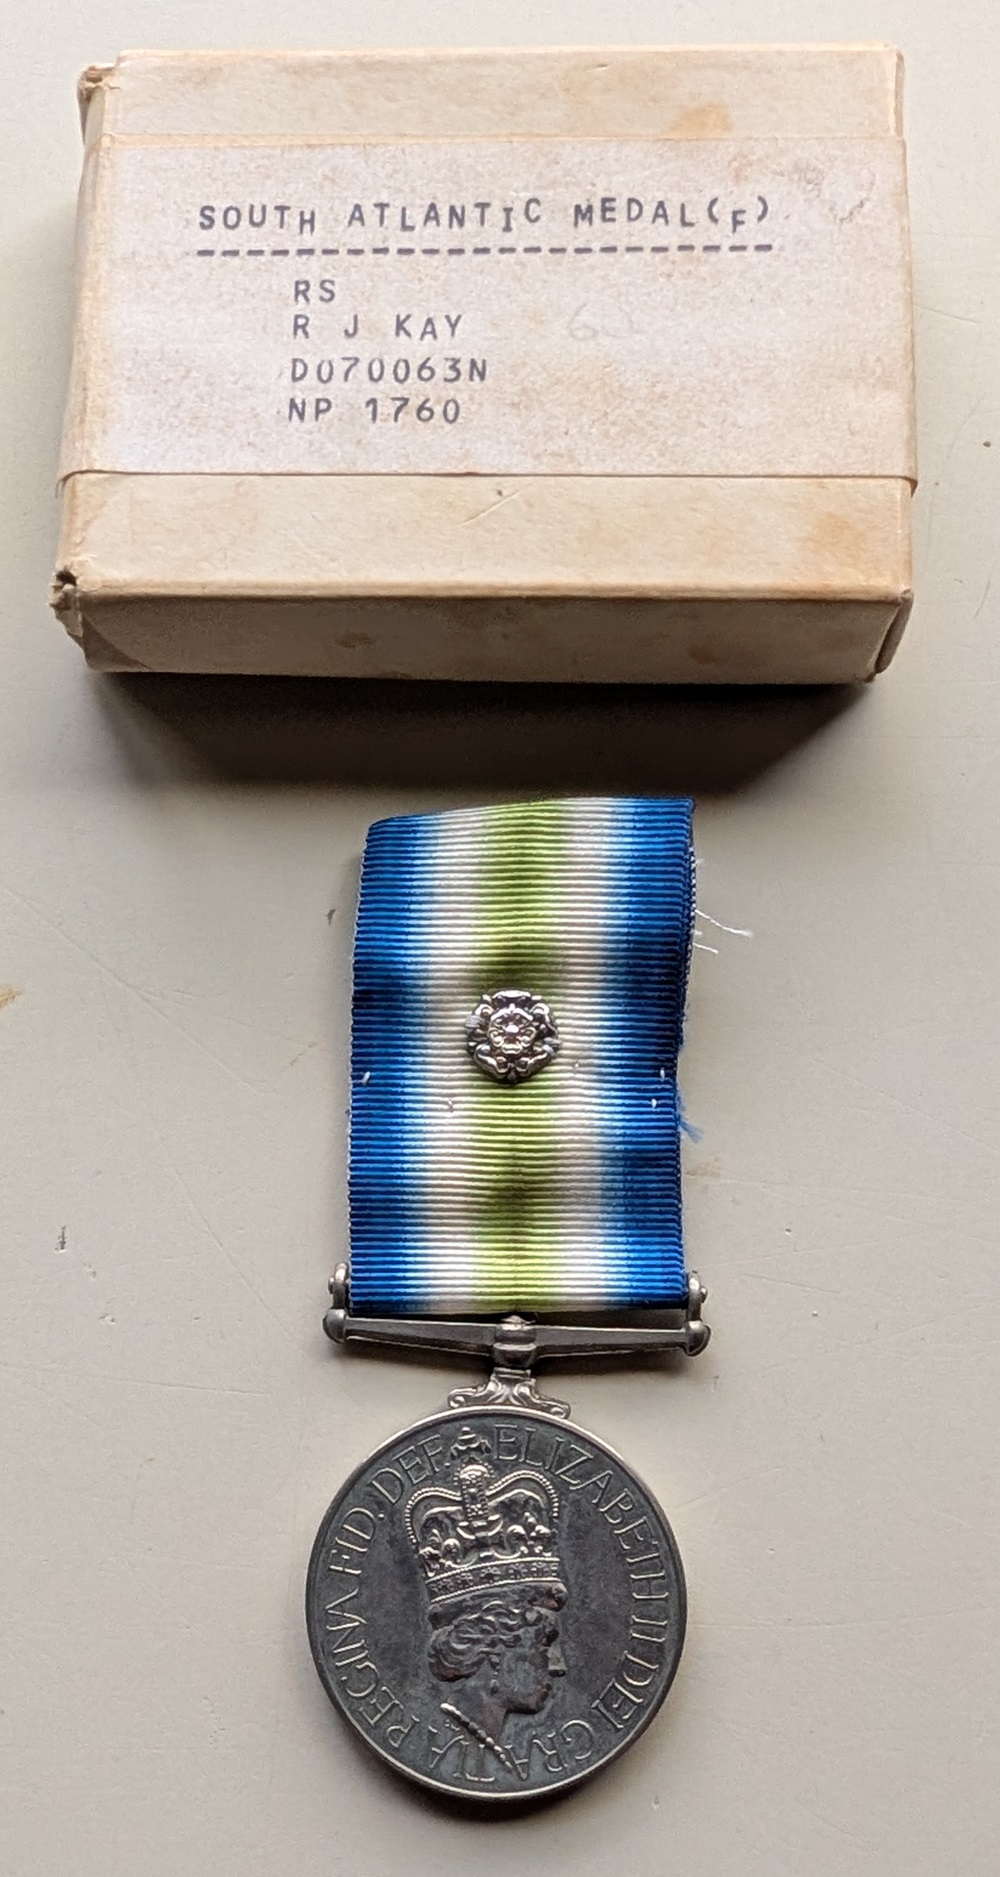
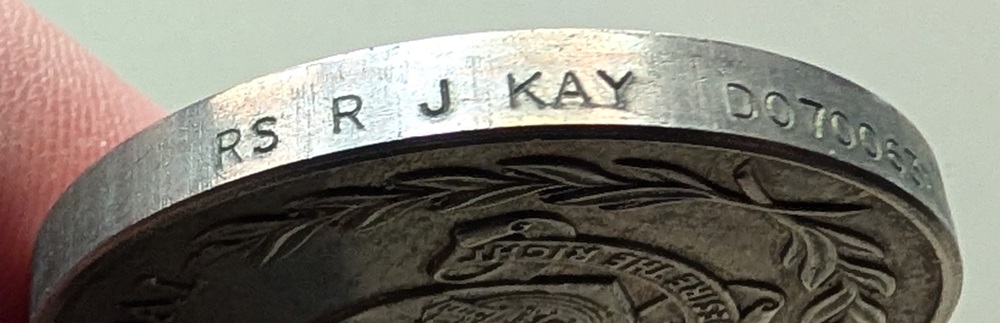
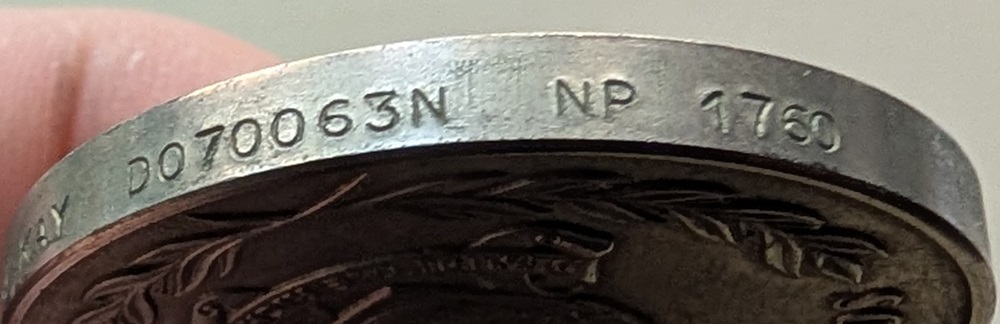
South Atlantic Medal (with Rosette)
NP 1760 HMS Salvageman
Radio Supervisor R J Kay D070063N NP 1760 – Note: Petty Officer Rank
Operation Corporate
The United Towing Company’s tugs Salvageman and Yorkshireman sailed from Portsmouth on 10 April and on arrival at Ascension were used for local patrol, ferry and ship-handling duties. On 24 April they were joined by Irishman.
On 26 April Salvageman, the most powerful of the three, sailed in company with RMAS Typhoon for Tristran da Cuna, thence to South Georgia, where she arrived on 7 May. The following day Salvageman was ordered to sea to rendezvous with HMS Yarmouth towing HMS Sheffield. Sadly Sheffield sank whilst still under tow by Yarmouth, and Salvageman returned to South Georgia for bunkers before moving out to the TARA (Tug and Repair Area) where she met Uganda and Stena Seaspread.
Mr B. W. Vere-Stevens, Senior Mooring Salvage and Boom Officer, embarked in Salvageman, reported that this period was enlivened by the occasional visit of an Argentinian C130 Hercules modified for bombing. Fortunately, this aircraft never got within eight miles of the STUFTs in the TARA. On 24 May Salvageman rendezvoused with HMS Glasgow and remained in company with the Task Group for 36 hours. During this period HMS Coventy and Atlantic Conveyor were hit by air attack and abandoned. During the engagement Salvageman was much comforted by Glasgow’s ‘covering fire’.
Shortly after the attack Salvageman was ordered to close the Atlantic Conveyor with a view to possible salvage, but with the ship ablaze from stem to stern and search and rescue operation completed Salvageman withdrew once more to the TARA in company with Glasgow. Here she was later joined by Irishman and Yorkshireman; the former had managed to get a line aboard Atlantic Conveyor, but the ship had sunk whilst under tow. The three tugs were kept busy supplying Stena Seaspread with the salvage plant and stores while she carried out battle damage repairs to, among others, Brilliant, Yarmouth and Argonaut.
On 5 June Salvageman and Yorkshireman left the newly named TRALA (Tug, Repair and Logistic Area) and arrived at South Georgia on 7 June. Here they were kept busy berthing ships—four-five per day. Between 17-24 June Salvageman accompanied HMS Endurance, Yarmouth and RFA Olmeda in the successful operation to re-take the island of South Thule.
From 28 June to 15 July, Salvageman, Yorkshireman and Endurance worked together in the most hostile and uncomfortable of conditions at Grytviken refloating the Argentine submarine Santa Fe. After towing her out and beaching her, Salvageman and Yorkshireman proceeded to Port Stanley and more routine tug type duties!
With box of issue.
Price: £750
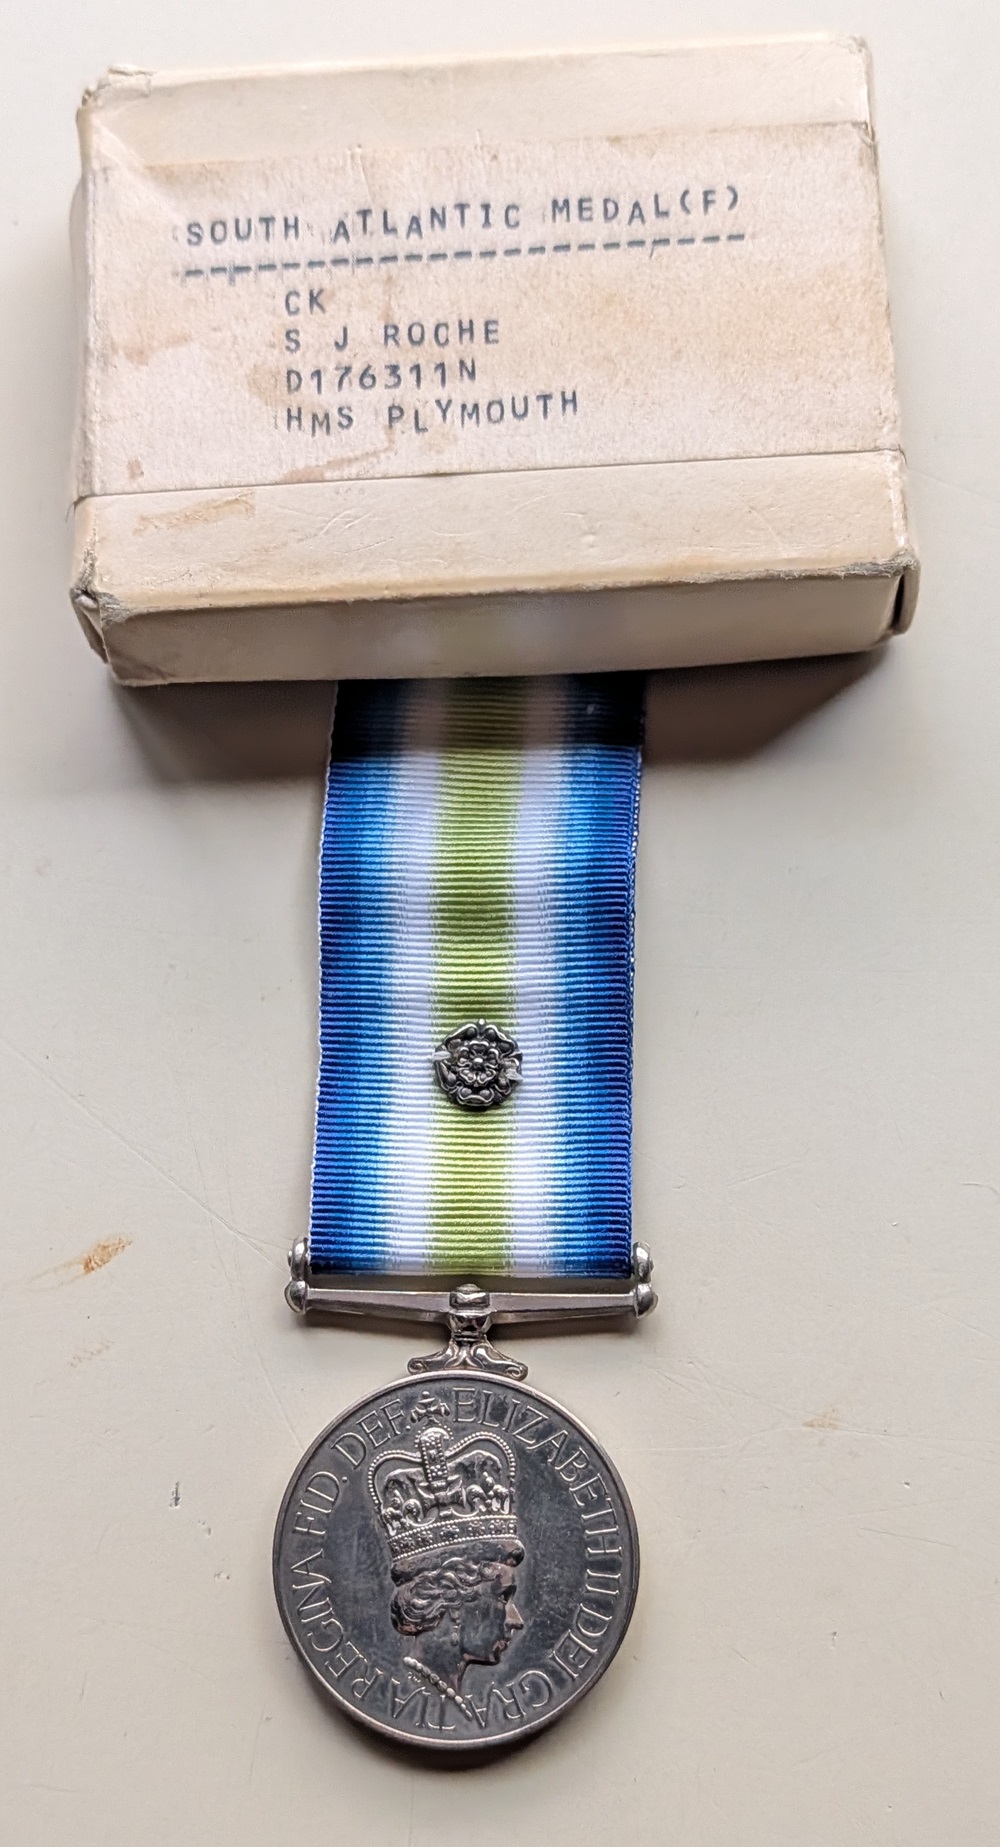
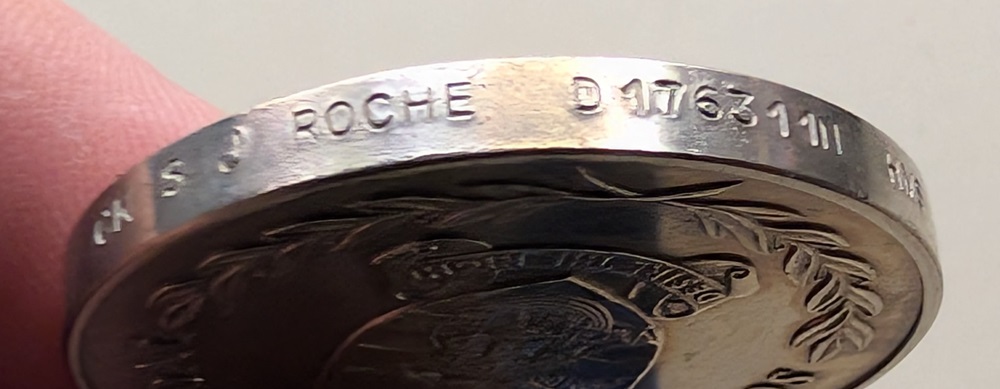
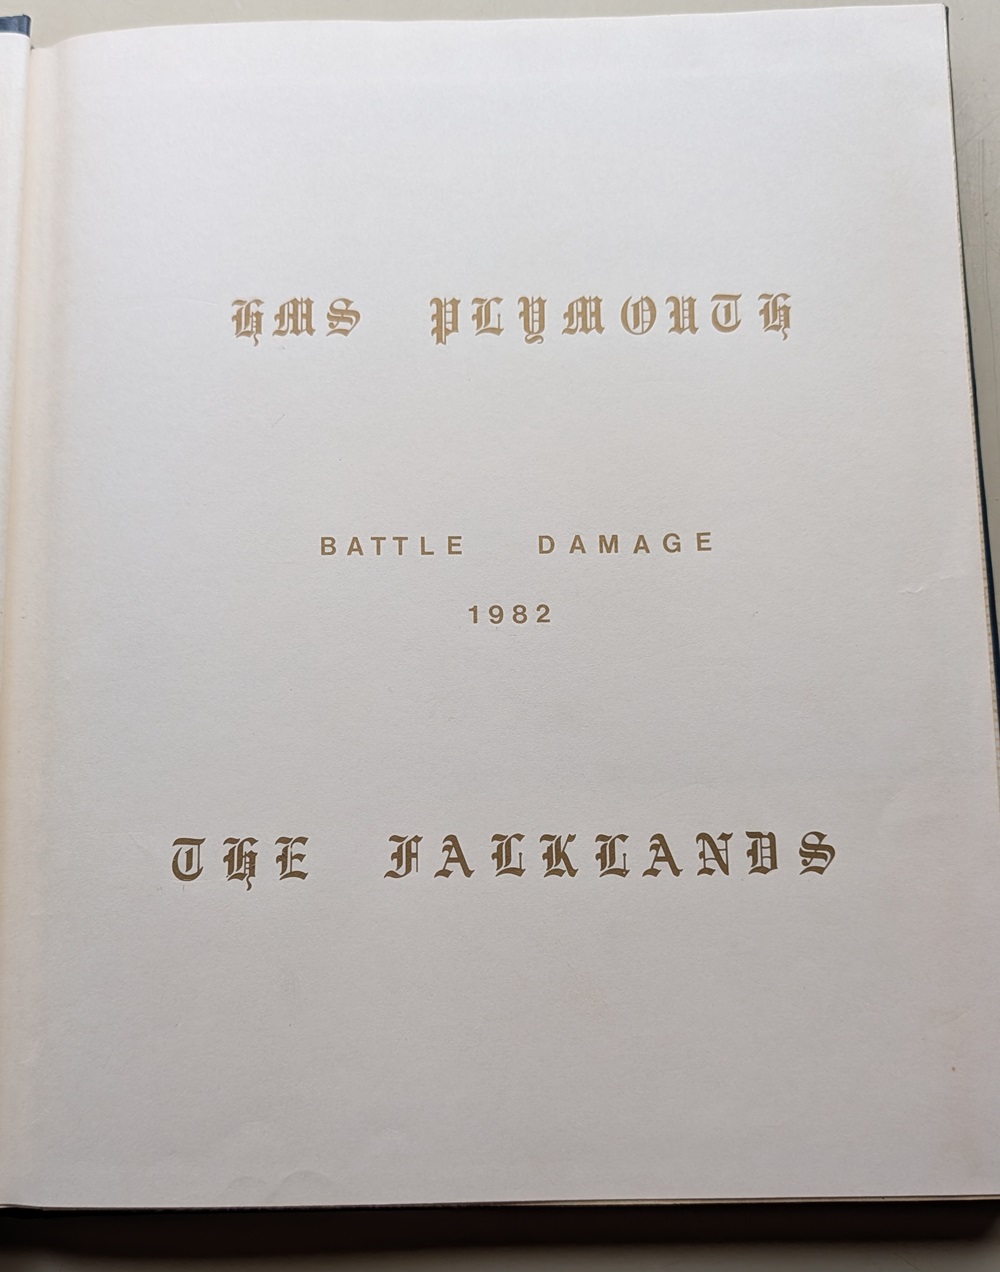
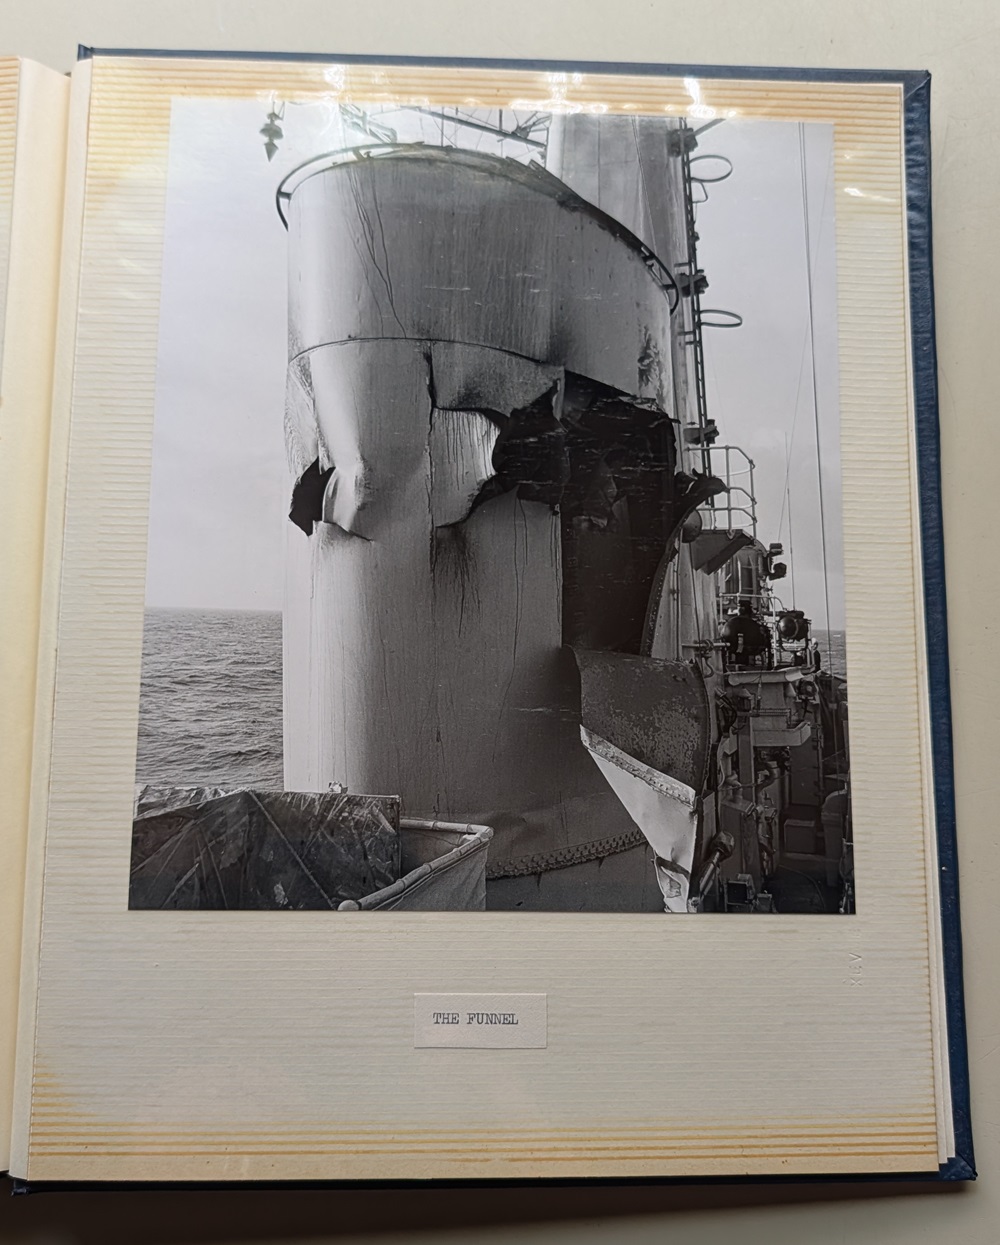
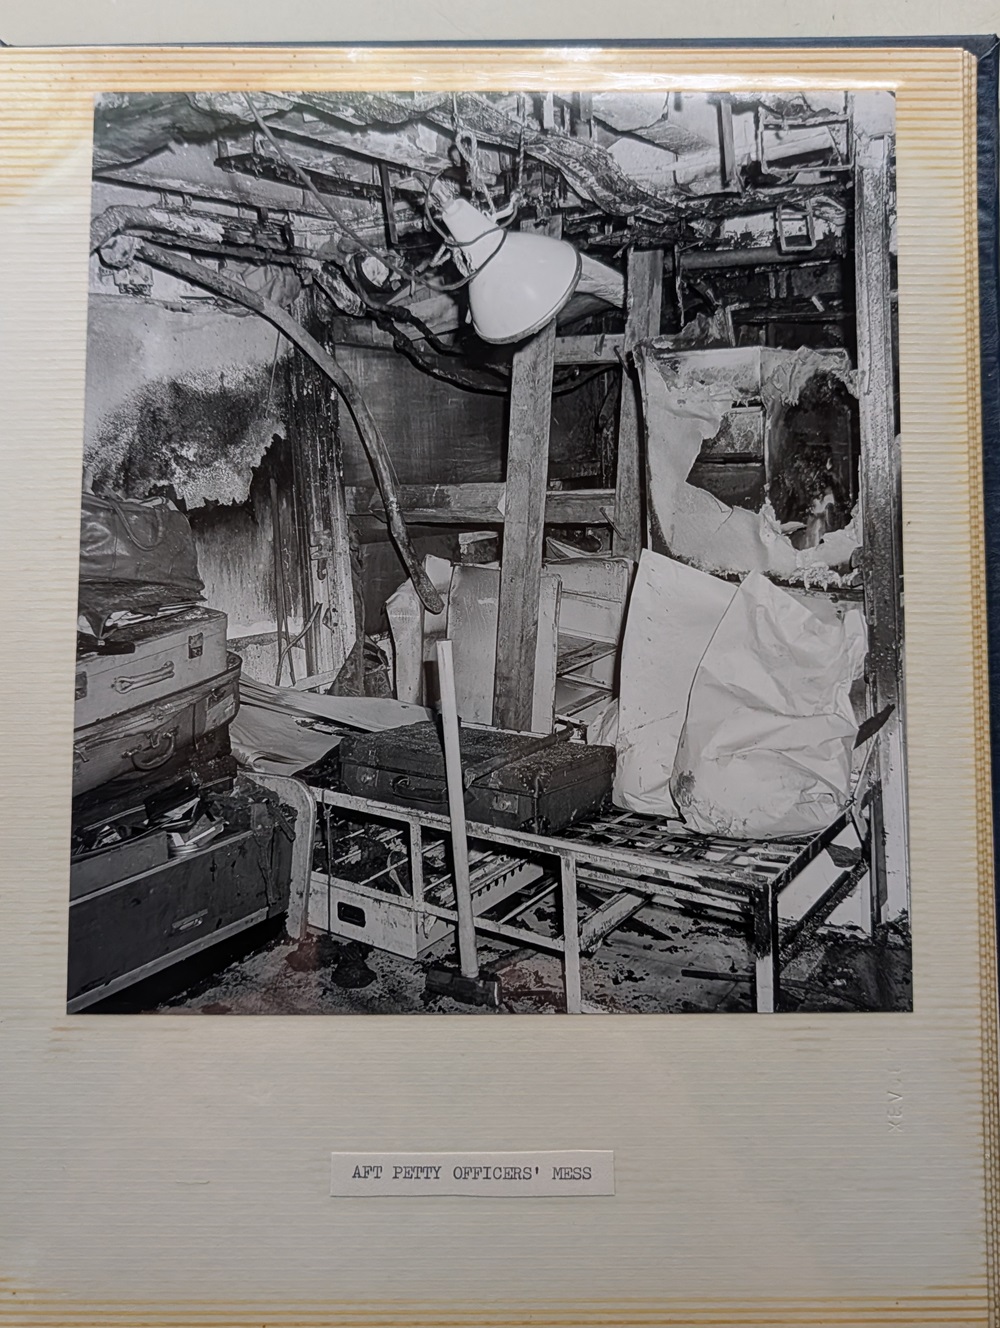
South Atlantic Medal (with Rosette)
HMS Plymouth
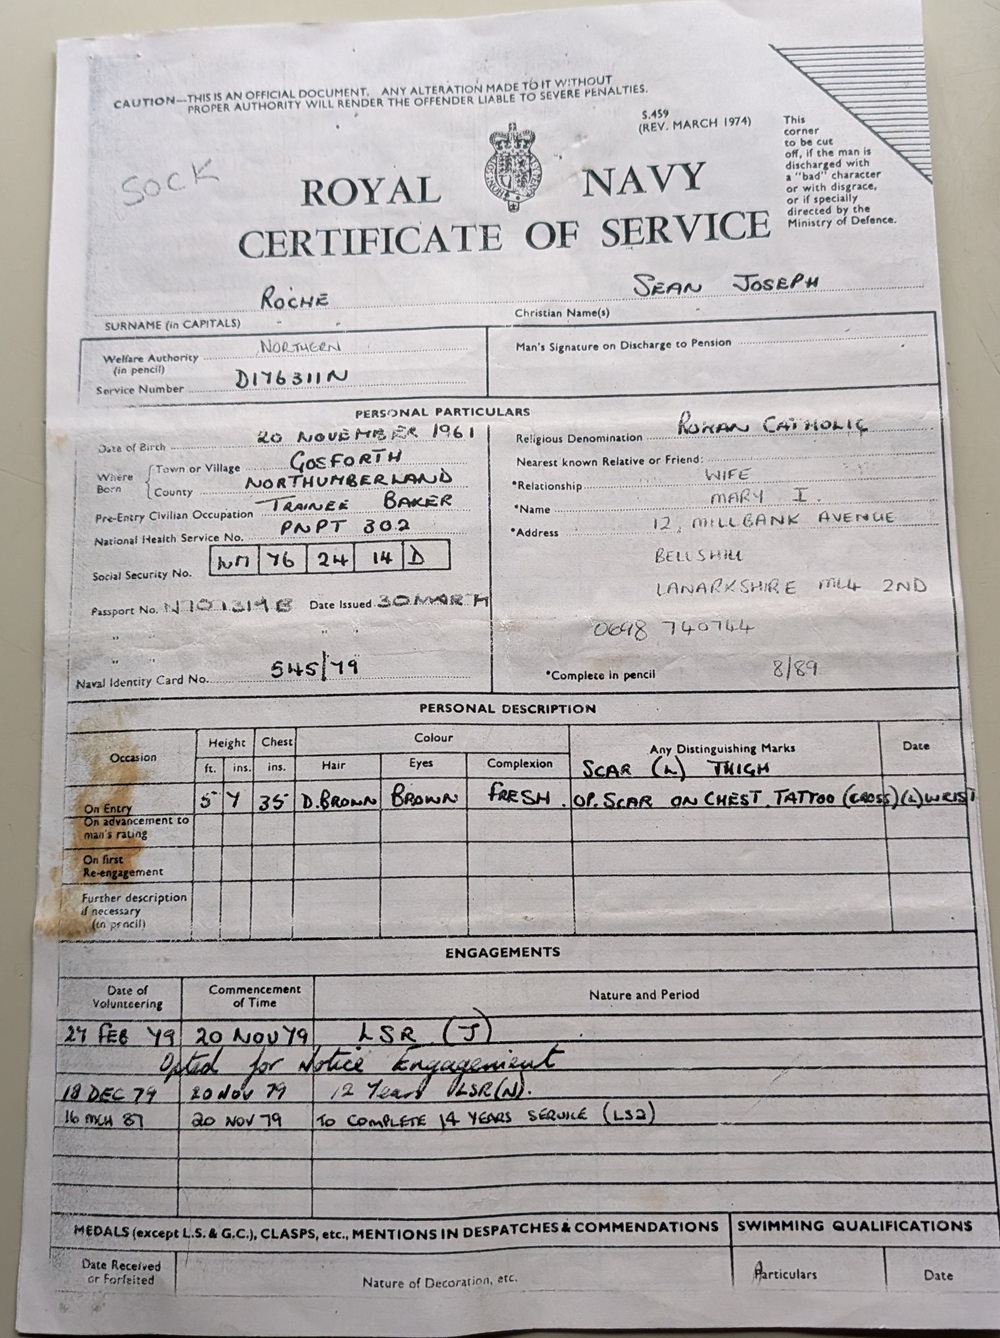
Cook Sean J Roche D176311N (nickname – Cockroach)
With Official Photo Album “HMS Plymouth Battle Damage 1982 Falkland Islands”
Falklands Conflict
Plymouth, then commanded by Captain David Pentreath, was one of the first Royal Navy ships to arrive in the South Atlantic following the Argentine invasion of the Falkland Islands and South Georgia. Together with Antrim, Brilliant and Endurance, she took part in the recapture of South Georgia during Operation Paraquet. On 25 April, her Wasp helicopter took part in an attack on the Argentinian submarine Santa Fe, which had previously been badly damaged by a depth charge attack from Antrim′s Wessex, claiming one hit on the waterline with an AS12 missile. After the crippled Santa Fe had sailed back into Grytviken harbour and was abandoned by her crew, a scratch force of Royal Marines, SAS and SBS troops was landed to capture the settlement. Along with Antrim, Plymouth provided naval gunfire support for this force, both ships firing a total of 235 shells, until the Argentinian troops raised the white flag. Later that day Plymouth sailed with Endurance to Leith Harbour, which was still held by the Argentines. The next day the garrison commander, Lieutenant commander Alfredo Astiz, signed the surrender in Plymouth’s wardroom.
Captain David Pentreath (far right), accompanied by Nick Barker, captain of HMS Endurance, takes the surrender of the South Georgia garrison, signed by the ‘Blond Angel of Death’, Alfredo Astiz
On 1 May, Plymouth rejoined the task force and on the night of 20–21 May, she was part of the escort for the amphibious assault force entering San Carlos Water, being the first British vessel to sail into the bay. On 21 May the Argentine Air Force began a series of air attacks against the landing force. Plymouth provided assistance to the frigate Argonaut, the first ship to suffer damage in “Bomb Alley”. For the next nine days she carried out air defense duties by day while by night undertaking escort and patrol missions and supporting ground troops with her 4.5-inch (114 mm) guns. She was then dispatched to the carrier battle group, located some 150 miles east of the Falklands. On 30 May, the group came under attack by Exocet missile but no damage was incurred and on 1 June Plymouth returned to San Carlos Water.
On 8 June, the ship was alone in Falkland Sound, returning from a naval gunfire mission, when she was attacked by five Dagger fighter-bombers of Grupo 6 of the Argentine Air Force. Despite Plymouth firing her 20 mm guns and a Seacat missile, the aircraft dropped eight Mk 82 500 lb bombs, five of which struck home, and fired their 30mm cannons. One Dagger was unable to release its payload due to a mechanical failure, and another suffered light damage from shrapnel. According to other sources Plymouth was hit by four 1000 lb bombs. All of the bombs failed to explode, but caused extensive damage: one hit the flight deck, detonating a depth charge and starting a fire, one went straight through her funnel and two more destroyed her Limbo anti-submarine mortar. Internal flooding caused the ship to take a six degree list. Five men were injured in the attack, and were rapidly evacuated by helicopter.
‘…they (Dagger formation) approached at high speed and very low level, firing their cannon before releasing their bombs and pulled up to avoid the Frigate. The Plymouth returned fire with Sea Cat and the port Oerlikon. There was no doubt in the minds of any of those aboard, and several witnesses ashore, believed that one Dagger was bought down by the Sea Cat. Four bombs struck the ship and it was peppered with 30mm cannon. The starboard Oerlikon caught the underside of another Dagger as it flew over and this was seen to crash into the sea. Two bombs hit the anti-submarine mortar, one went through the funnel and one hit a helicopter depth charge and bounced into the sea. The depth charge exploded. Five men were wounded and the only ‘fatality’ was the Chief Yeoman’s bicycle, lashed to the foremast!’
The fire took 90 minutes to extinguish with assistance from Avenger, and repairs were carried out through the night and the next day, restoring some of her capabilities.
On this day in the Falklands in 1982, a unit of Royal Navy Clearance Divers from Fleet Clearance Diving Team 1 (FCDT1), Fleet Chief Petty Officer (Diver) FCPO(D) Mick Fellows with Leading Divers (L/Ds) Tony Groom and Billy Evenden, were deployed to give explosive ordnance disposal assistance to HMS Plymouth anchored on fire off Fanning Head. Plymouth had come under intensive Argentinian aircraft attack and was hit by four bombs that failed to explode but caused extensive damage: one bomb had bounced off the flight deck, detonating a helicopter deployed depth charge and starting a fire, and one went straight through her funnel and two more caused extensive damage to anti-submarine mortars bombs in the mortar handling compartment and bent the armed centre barrel of the Limbo mortar launcher.
Damaged mortar bomb fuses were exposed and in a volatile condition with explosive filling and detonators scattered around the compartment floor. Two Sea Cat missiles on the port side launcher had fuel sections damaged by enemy cannon fire prohibiting safe operational use.
As it was not possible to evacuate the crew during the damaged mortar bomb and missile disposal operations the ship’s company was mustered on the forecastle, as far away from the mortar handling room as possible, in survival suits and inflated lifejackets. The ship’s wire guardrails were lowered to ensure a quick exit.
The exposed electrical circuits in four damaged mortars were separated and insulated, explosives scattered around the compartment collected, and the weapons stropped then lifted from their racks employing a chain hoist. With the two leading divers on the upper deck, the damaged mortars were pushed and manhandled through the Argie bomb entry hole then hoisted to the upper deck employing a tackle. The four mortar bombs were then gently lowered to the seabed on rope tails.
The damaged Seacat missiles were physically lifted off their launchers in a single man operation by the FCPO(D), as their explosive stability could not be determined, slung in a made-up a rope strop and lowered over the ship side into the sea. The render safe and removal operation took four hours.
The bomb-damaged Limbo mortar launcher, with an anti-submarine weapon still inside the centre barrel, was made safe and repaired by Fleet Clearance Diving Team 2 (FCDT)2, based on the Stena Seaspread, the following day.
Plymouth then withdrew to a repair area, where naval personnel on board the oil rig support vessel MV Stena Seaspread assisted in returning her to fighting order. She returned to shore bombardment duties on 14 June, when Argentine forces in the Falklands finally surrendered.
After hostilities had ended Plymouth was the first British warship to enter Port Stanley harbour on 17 June. After assisting in establishing naval control of the harbour she returned briefly to San Carlos before leaving the south Atlantic on 21 June in company with Glamorgan. She returned to Rosyth Dockyard on 14 July for a full repair and a refit. During the course of the war she fired 909 4.5 inch shells and nine Seacat missiles.
As an example of the dangerous work that the men of the various ordnance disposal teams had to do, the following piece was posted on social media recently and relates to the work carried out by Royal Navy Clearance Divers in the aftermath of the attack on HMS PLYMOUTH on 8th June 1982.
Enlisted: 1979
Demobed: 1991
Ships Served: HMS Dryad (1979 – 1980)
HMS Pembroke (1979 – 1979)
HMS Raleigh (1979 – 1979)
HMS Plymouth (1981 – 1991)
HMS Cochrane (1982 – 1983)
HMS Gannet (1983 – 1984)
HMS Sentinel (1987 – 1988)
HMS Caledonia (1990 – 1991)
Lives: Darwen, Lancashire
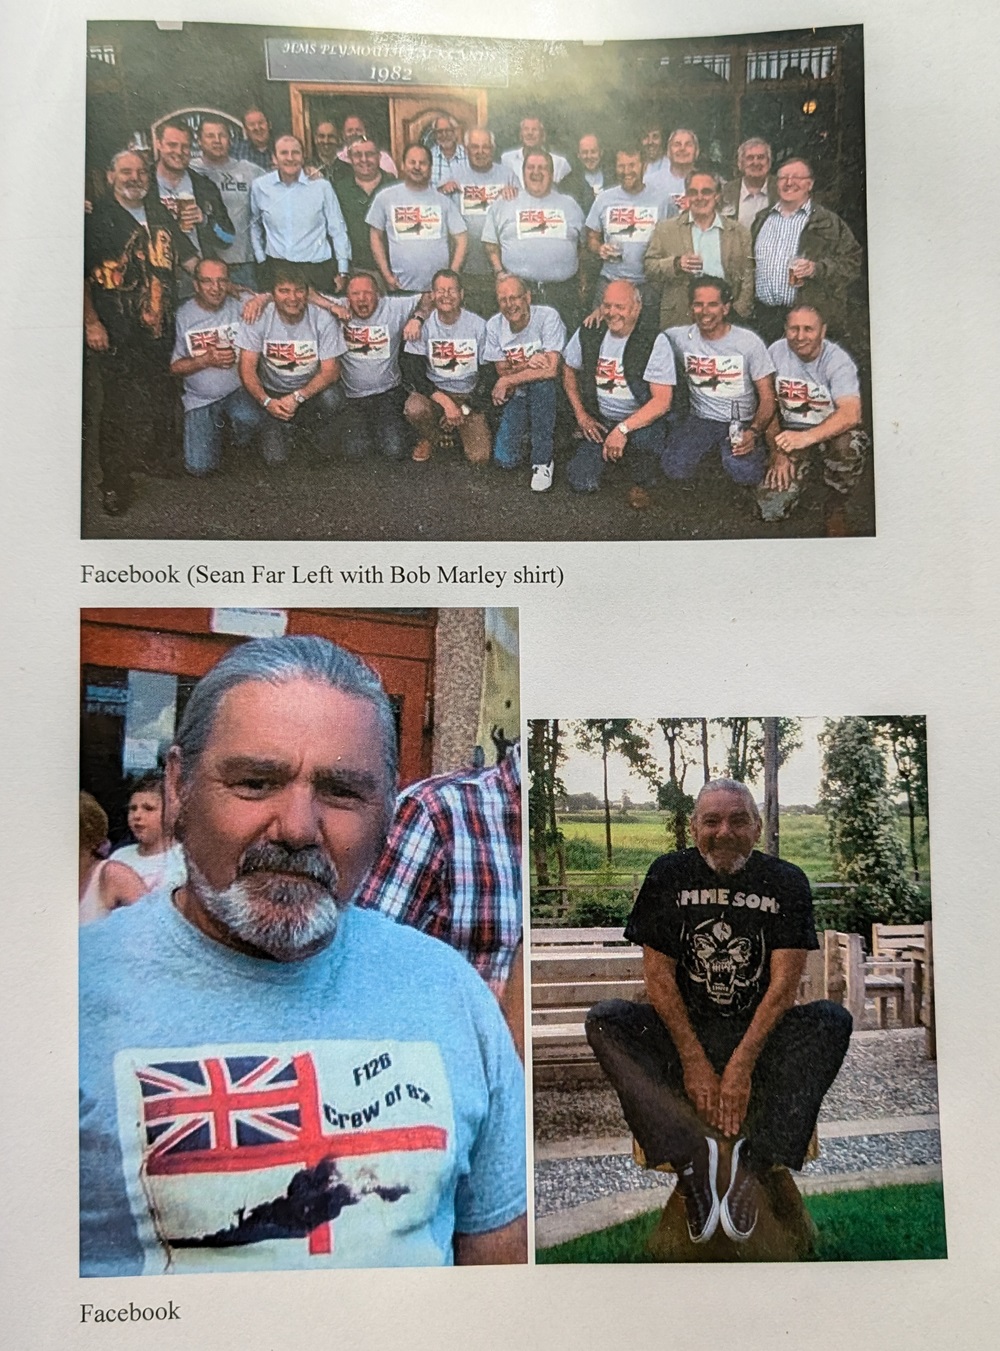
Comes with copy photos of Roach in uniform and later in life, taken from Facebook.
Price: £875
South Atlantic Medal (with Rosette)
HMS Penelope
Weapon Engineering Mechanician 2 (Petty Officer Rank) I R Mooney D120627N
Falklands Conflict
Penelope in company with Bristol, Andromeda, Minerva, Active and Avenger sailed from Devonport to the South Atlantic. The group was the first reinforcement for the ‘Operation Corporate’ Task Force and would be joined later by Cardiff and RFA Olna.
The passage South was fast and the ship successfully negotiated everything from intensive weapon training to the perils of King Neptune’s Court. Penelope found herself facing the rugged and uninviting terrain of Ascension Island, anchored just long enough to embark some last minutes stores, ammunition and to receive some welcome mail.
A popular spectator pastime during this brief stopover was provided by an abundance of a species of small black fish, in response to any bait they would appear in their hundreds and like piranhas had a voracious appetite and turned the sea into a boiling cauldron. Relaxation was short lived though and soon it was off south again, closed up at defence watches and proceeding firmly on a war footing. During the trip the climate changed dramatically from average UK spring, to a freezing cold South Atlantic winter. On the 21st May brought the welcome news that UK force had landed and established a bridgehead at San Carlos.
On 22nd May an ‘Argy’ Boeing 707 provided the first encounter with the enemy. The long-range reconnaissance aircraft appeared on the radar screens, ‘Action Stations was sounded for the first time in anger. Sea Dart missiles from Bristol and Cardiff engaged the aircraft, but they were fired at extreme range and the Boeing escaped to fight another day. On 23rd May, the strain on the machinery of the sustained fast and long passage finally proved too much when the lub” oil pipe fractured in the engine room and the ship was forced to slow down. However the engineers were quickly in action and in a matter of hours Penelope was under way once more at high speed towards the Total Exclusion Zone.
By 25th May, the effects of the South Atlantic winter began to be felt. The temperature dropped dramatically. There was no steam heating in the ship, a-ploy that encouraged everyone to wear three or four layers of clothing. Refuelling at sea became a more hazardous evaluation as the sea roughened. News of the loss of Coventry and the Atlantic Conveyor reached the ship and provoked an atmosphere of shock, anger and resolution. Sonar contacts became more frequent over the next few days, mostly caused by marine life and ships wakes. It’s a sad aspect of anti-submarine warfare measures taken by some ships that the South Atlantic whales suffered the devastating effects of torpedoes and depth charge attacks. Early in the morning of the 27th May, the Carrier Battle Group appeared on the horizon. At lunchtime we went to Action Stations, in response to our first ‘Air-raid Warning Red’ in the T.E.Z. Fortunately the only casualty was lunch. Later in the day Penelope’s Lynx helicopter had a busy time transferring stores embarked at Ascension Island for other ships. Stores distribution was to become a real problem as the operation continued.
By the 29th May, brought worsening weather, blizzards and gale force winds gusting up to 85 knots, and a tea time scare when an unidentified aircraft was detected 40 miles to the north of the force. Presumed to be a reconnaissance plane it departed without any action. The evening Penelope detached from the Battle Group with Fearless and Minerva to the Amphibious Objective Area in the east Falkland’s. Progress was thwarted by gearbox trouble but repairs were quickly effected. The main task was to escort our damaged sister ship Argonaut out of San Carlos Water. She had been hit while supporting the amphibious landings and for several days had lived with an unexploded bomb in her Seacat magazine.
On returning to the Carrier Group on the 30th May, the Lynx helicopter had just departed to Hermes as an air raid closed force. Enemy aircraft attacked and one, ‘Super Etendard’, probably fired an Exocet missile. One of the accompanying aircraft was shot down as it attempted to bomb one of our type 21’s. Later in the day another air-raid warning was called but the aircraft failed to close on the force. Later we learned that the Argentinean ‘Junta’ claimed to have hit Invincible during these raids. The nightly role of convoy escorts continued with transits inshore waters of the Falklands and on the 1st June, as a return was made to the Battle Group, Penelope clocked up her 10,000 miles, since leaving Devonport.
Penelope adopted the role of Battle Group Post office. On the 1st June, and 2nd June, on being detached for air-drops Ursula and Vera, sailing to the north-east of the Falklands to rendezvous with the RAF Hercules from Ascension Island. These Hercules were providing an air-bridge ferry of essential stores to the Task Force. As well as the stores, also collected was the new C.O. of 2nd Para, Lt. Col.Chaundler, who parachuted in from 1500 ft, – not the 25,000 reported in the press. The ships company were disappointed when the Colonel’s dog failed to arrive in the next drop! Later the Colonel transferred to Hermes then onto FEARLESS, and by evening was ashore with his troops. Back with the Battle Group on 3rd June, life seemed to mean going round in ever decreasing circles. Once again stores were despatched, the ships refuelled (a frequent and tiring necessity) the weather continued to be unfriendly, carriers continued to be intent on savaging poor frigates. However life in the Task Force was always unpredictable and Penelope was detached for 3 days to go into San Carlos Water Bomb Alley, slipping quietly in after day break on 4th June, to start what was to be the routine for the next 13 days – not the 3 days as previously thought. From sunrise to dusk the days were spent at full action stations and the nights at defence stations usually running; fast convoys of troops and supply ships back and forth to their landing areas. There were frequent ‘Red Alerts’ and it became clear that the Argentinean’s were making a determined effort to blitz San Carlos Water and the precious chain of merchant ships. Food was rudimentary and had to be nibbled at one’s place of action, such delights as BAMPS, (Bomb Alley Meat Pies) and tinned sausages kept the ships company going. Many ‘Red’ warnings were caused by eye level bombing runs aimed at the troops en-route to Stanley which passed over San Carlos and we were in company with Exeter and she spectacularly splashed a high flying aircraft with a Seadart missile.
Night operations proved equally exciting, every night an escort was provided for convoys from San Carlos out to an R/V and then return with another convoy. On several nights fast passages were made south through Falklands south and east to Port Fitzroy area an escort to Fearless and Intrepid. The 8th June, was a particularly black day. Having escorted the troop ships taking the Welsh and Scots Guards bound for Bluff Cove over several nights it was a sad blow to learn of the heavy air attack on the Welsh Guards and the many dead and wounded in SIR Tristram and SIR Galahad. That day also, enemy aircraft passed over Falkland Sound on their way to Bluff Cove came across Plymouth and bombed her just before she was able to reach the safety of San Carlos Water. She hove in sight around the headland belching smoke, although both ourselves and Avenger offered assistance she quickly got the fires under control, she was very lucky having been hit by 3 bombs and by cannon and rocket fire. On the 8th June, Penelope’s helicopter also had a narrow escape. While conducting a reconnaissance of the Pebble Island area it twice came under small arms fire. When at action station in San Carlos Water and under direct threat of air attack the helicopter would automatically be launched in record time on receipt of a ‘green’ from the bridge and fly towards land where it would hover until the attack was over. This tactic-avoided damage to a valuable asset and achieved instant S.A.R. (Search and Rescue), readiness should the ship have been hit.
On the night of 9th June, Penelope sailed to one of the northern islands in the West Falklands for a ‘Special Operation’, slipping back into San Carlos at dawn. It was during these nights around the Falklands that we saw much evidence of the artillery action and fierce fighting ashore with the sky continually illuminated by flares and gunfire. The 10th June also saw a high incidence of ‘Red’ warnings as the Argentinean Air Force once again turned their attention onto San Carlos. Luckily good ‘Combat Air Patrol’ cover by Sea Harriers managed to keep them at bay.
Refuelling became a more routine event as in San Carlos Water it was carried out along side the resident tanker. All very well until air raid warning ‘RED’ was called, being next to a tanker in a situation like that was far from ideal. The 14th June 1982, just before the final event that led to the capture of Stanley will probably be the most talked about day of Penelope’s involvement in Operation Corporate. Early that morning several enemy aircraft accompanied by the Exocet missile carrying Super Etendard had flown from the mainland to attack our troops surrounding the town and harass the British shipping. As they opened to the Northeast they spotted Penelope underway with a merchantman in company heading east. A missile was seen to have been launched and those on the upper deck saw its menacing red glow descending from the launch aircraft to skim at wave-top level towards the Penelope. Thanks to the first class reaction by all concerned including some violent maneuvering which produced a very high-indicated speed Penelope avoided being hit. It was a most sobering experience. The merchant man who would not have known at the time the finer points of the dire danger threatening, observed Penelope’s dramatic missile response to the threat and signalled – “We enjoyed the fireworks display”.
News of the Argentinean surrender came later that day giving Penelope the claim to be the last ship to come under air attack during the Falkland Operation. Port Stanley was our next immediate destination, a welcome change of scenery. President Galtieri resigned on the 17th June, apparently causing jubilation among the Argentinean prisoners in SS Canberra, and later that day Canberra sailed with 5,000 prisoners, bound for Argentina and a frosty reception.
The following weeks were spent in Port William and Stanley. In this relatively quiet period the ship was able to send parties ashore to stretch legs and view Stanley. The scars of war were very apparent and the sheer volume of the Argentine ammunition and equipment surprised everyone. The helicopter was kept busy over the next few days, transferring men and stores into Stanley. Everyone did not welcome the Lynx, when it chose the Brigadier’s front lawn, as a landing site the reception was definitely not courteous. Such language!
Two projects were undertaken during the week. First was to assist the newly appointed QHM (Queens Harbour Master), to establish his organisation ashore and secondly to salvage and re-float the Argentine patrol-boat RIO ICVATO which our Lynx had attacked and damaged previously. An interesting find had been made on the 20th June, as our anchor was weighed to move berth. Instead of recovering one anchor, up came two. The second, which had become snagged in the cable, was of the old sailing ship type and a fine antique. Discussions continued all week but failed to find a solution to the problem of getting the trophy to Plymouth. Reluctantly it was returned to the sea, its position marked carefully in the hope of returning one day to salvage it.
As the ships of the Task Force began to move homewards, it seemed that the spirit of the Flying Dutchman was coming home to roost, with Penelope seemingly cursed to sail the Southern Seas forever. The ship sailed on the 24th June for a patrol of the West Falkland Islands. In some ways this was a break from the grip of Port Stanley authorities where, for a nation who has recently ‘returned an empire’ there were some remarkable demonstrations of empire building. Most notable of these was the appearance of RAF Stanley, rising Phoenix-like from the ashes only to find its feed flight hampered by the reluctance to land Hercules aircraft.
After an absence of 27 days Penelope rejoined the Battle Group on the 1st July, for one day, having originally been detached for 3 days. Throughout the war only one casualty had been suffered and that was ‘self inflicted’ by our own Medics!, L/Stwd Alan Kipps, suffering from an appendicitis was transferred by air to Canberra where he was treated surgically. Of our ship’s company he was the sole person to see Argentina when Canberra returned her prisoners.
Since the now seemingly far off days of the war there has been much hard, yet interesting, work often on lonely patrols as a picket to the west of the Falklands sometimes in the most atrocious weather conditions. There has of course been the compensation of also seeing the scenery and inspecting the wide and picturesque bays and inlets. To the civilian population has gone help to assist them to recover from the Argentinean occupation. This has taken several forms from providing basic essential stores to flying children across the island to Stanley to school, and in one instance delivering a plough by helicopter from the far side of East Falkland to the extreme west of West Falkland. No offer was made to transport the horse! Rather agricultural flying as one aviator put it seeing the ship’s helicopter fly over head with the plough under-slung.
Blue on Blue?
That austral winter night of 13 June 1982, two Argentine Canberra bombers indicated that the outmaneuvered defenders had received the Marine captain’s broadcasts. They attempted to flatten a farm called Estancia House—whence the British first demanded Port Stanley’s surrender—and to kill the British generals who, they surmised, might occupy it. The destroyer HMS Exeter shot down one of the bombers, the last aircraft lost during the conflict. Simultaneously, the frigate HMS Penelope fired in alarm at a large missile streaking out of the dark toward her. A half-mile away, it ditched or detonated.
Argentine sources indicate that the missile action against the Penelope did not involve their forces. Two explanations are feasible: either the incident was imaginary or it was friendly fire. Reconstructing the Loss of the bomber reveals a broader tactical situation that suggests the latter: the missile fired at the frigate was a Sea Dart, also from the Exeter. Analysis suggests further that published accounts, generally accepted as authoritative and essentially official, describe these events incorrectly, and that the most plausible reason for these particular errors was to conceal a Blue-on-Blue incident: friendly fire.
The only open-source description of the missile attack against the Penelope is in The Royal Navy in the Falklands War, by British Ministry of Defence historian David Brown. The tactical situation for that night puzzled him: “Considerable mystery surrounds this last [bombing] raid. . . . The attack on the Penelope also requires some explanation.” Possible antecedents include an attack by an Argentine Exocet antiship missile or harking back the 4 August 1964 night incident when the USS Maddox (DD-731) and Turner Joy (DD-951) fired at Tonkin Gulf wave crests. Brown rejected both of those hypotheses: “There can be little doubt she was fired at, although her claims were regarded at the time with some disbelief . . . The lack of any interception of a missile homing head was rightly taken to mean that an Exocet had not been fired.”
Officials from the U.S. Navy studying the campaign with the Royal Navy after the war heard nothing about the Penelope incident from their hosts. In his 1992 memoir, 100 Days, British naval task force commander Admiral Sir John (Sandy) Woodward ignored it. He wrote of the bomber’s destruction:
In the small hours of the following morning [he kept the task force on British time; late on 13 June locally] several Arg aircraft were spotted along the southern coastline of the islands, most of them heading north. One of them, however, a Canberra bomber being tracked by [the Type 42 destroyer HMS] Cardiff, began to head across the land to the north of Port Stanley and as it did so it was struck by the Type 42’s Sea Dart missile.
It may seem presumptuous to contradict the on-scene commander, but a reconstruction of the Canberra’s loss fails to support his description. It was lost far from Port Stanley, and the Cardiff never engaged it. Perhaps even for Falklands veterans, an ineffective attack against a small warship, the loss of one more aircraft among scores, one more dead among hundreds, might rank as events too minor to warrant correction. If the Exeter also fired at the Penelope, however, then attributing the Exeter’s destruction of the bomber to another ship had the effect of concealing the friendly-fire source.
Author Brown drew on “various accounts, semi-official, private, and unpublished, British and Argentine” during 1982-84, almost certainly including Admiral Woodward’s notes. Private researchers during that same period, using both British and Argentine sources, compiled Falklands—The Air War, an encyclopedic account of every aircraft’s operations throughout the conflict.5 The Argentine Air Force has posted additional data on its Internet website. While none of these accounts is flawless, even their errors are often explicable and revealing. By synchronizing minute-by-minute details, charting units’ positions, and applying technical judgment and Occam’s Razor—the principle that “entities must not be multiplied without necessity”—a consistent picture emerges.
To reduce their susceptibility to air attack, the British light aircraft carriers Hermes and Invincible kept station far east of Port Stanley. On board the Hermes, Admiral Woodward noted at sunset on 13 June that visibility was more than 100 miles westward and recorded:
We are now on the cliff edge of our capability, with only three ships lacking a major OPDEF [operational defect] (Hermes, Yarmouth, and Exeter). Of the destroyer/frigate force, 45% are reduced to near-zero capability …. This afternoon, I was left on this most beautiful day for Etendards with one channel of Sea Dart fire.
Admiral Woodward promised the ground commander four frigates for gunfire support that night. After firing on consecutive previous nights from a gun line south of the Stanley peninsula, he ordered the frigates into Berkeley Sound to the north, despite mines that a submarine reported. To spare these frigates and to cover his dispersed convoys, he ordered every combatant out of Falkland Sound, the site of the original beachhead.
[HMS Penelope departed Falkland Sound by its northern exit and] sailed east with the Nordic Ferry, to be handed over to the Arrow to the northeast of East Falkland in exchange for the inbound Baltic Ferry and Lycaon. The Cardiff, on her first night as anti-aircraft guardship, also sailed to the north out of the Falkland Sound, to cover the convoys and the bombardment groups which were to be in Berkeley Sound that night. The gunfire support ships sailed in two pairs, the Avenger and Yarmouth leaving the Battle Group at noon [160OZ] and the Active and Ambuscade three and a half hours later. Intrepid and Minerva set off [from Falkland Sound’s southern exit] on another run to deliver and collect Fitzroy LCUs. By 9:20 p.m. [0120Z 14 June] the two ships were off the southernmost point of Lafonia, some 50 miles southwest of Fitzroy. The Penelope was with the Nordic Ferry, 45 miles on the other side of Fitzroy, with the Cardiff about 15 miles to the west-northwest of her…. Fearless [was] the only warship left in San Carlos Water.
Significantly omitted from both Brown’s and Admiral Woodward’s accounts was the position of the task force’s most capable air-defense ship, the new Type 42 guided-missile destroyer Exeter. Given Admiral Woodward’s expressed concern about minimal Sea Dart cover for the carriers, his assignment for the Exeter to be away from them implied that his mission for her had a high priority. The Exeter was on a barrier patrol for air defense east of Port Stanley, a logical sector also for covering Berkeley Sound for the gunfire support ships, still several hours away. The earlier Type 42 destroyer Cardiff guarded the northern air approach to Berkeley Sound.
Not only was the Exeter in the best condition among British combatants by Admiral Woodward’s notes; she was also the best equipped. She mounted a Type 1022 long-range high-altitude air-search radar and an upgraded integrated combat data system (ADAWS 7) to designate targets rapidly for her long-range Sea Dart missiles, which already had destroyed three Argentine aircraft. An obscure but significant detail was that the computer-generated tactical situation displays on board the other destroyers and frigates shown in Chart 1 shared data over Link 10. But the Exeter used Link 11. Since Link 10 and Link 11 were incompatible, the Exeter neither received automatic plot data from the other ships present nor provided her own tactical picture to them.
The Argentine Air Strike
With imminent defeat staring at Argentina, the Southern Air Force commander (Fuerza Aerea Sur, [FAS]) tasked his Canberra squadron to bomb Estancia House near Mount Kent in what became Argentina’s last combat mission of the air war. The Argentines might have surmised that the house was a major command post, because daily British commands to surrender were emanating over the farm’s medical radio frequency; besides, they thought, perhaps British officers liked making headquarters out of comfortable houses as much as Argentine officers did. After a single use of the civil transceiver as a fortuitous substitute for Estancia House’s dead telephone circuit, the Spanish-speaking Royal Marine captain radioed all subsequent days’ demands from the assault force flagship Fearless. Accounts from Argentine sources describe the raid:
Two Mk 62 Canberras, code-named Baco, armed with five Mk 17 1,000-lb HE bombs with fuze SSQ. Mission: horizontal bombing on Port Harriet House (51 deg 39’S-58 deg 08’E) [sic: Estancia House]. Crews: [Baco-1] Capt. Roberto Pastran, Capt. Fernando Casado; [Baco-2] 1st Lt. Roberto Rivollier, Ist Lt. Jorge Annino. They took off from Rfo Gallegos at 213.Z…. Two Mirage Ills, code-named Pluto, armed with Matra Magic. Mission: cover Puerto Argentino [Port Stanley]. Crews: Maj. Jose Sanchez, Capt. Ricardo Gonzalez. They took off from Rfo Gallegos at 215OZ.
… The mission commenced well enough and [the Mirages] initially flew in radio silence, approaching West Falkland from the south at an altitude of about 33,000 ft. However, even before finding the Canberras on radar or making radio contact with the Port Stanley CIC, both [Mirage) pilots saw the glow of shellfire from Port Stanley, well over 100 miles away. Through broken cloud, the effects of naval and artillery bombardment could clearly be seen.
. . . Their run from south to north over Mount Kent was to be at 40,000 feet, hopefully too high to provoke a Sea Harrier attack and beyond the range of most British SAMs [surface to air missiles].
Approaching East Falkland Island from the southwest, the Mirages’ characteristic radar signals alerted the frigate HMS Minerva of their identity. Two Sea Harriers scrambled from the Hermes at 01322 to respond.14 Chart 2 reconstructs the strike approach. With Gonzalez’s Mirage flying in close escort with one northbound Canberra, Sanchez in his Mirage flew northeast, just north of Port Stanley.
. . The Canberras were [flying] at about 40,000 feet and at 0150z [around 0143-0144Z by British timing] they made their radar-guided attack on predetermined positions.
… After connecting with the Falklands [CIC], guidance took place with variations of course towards the east and soon to the north; informed that there was no enemy aerial activity, one [Mirage] stayed back in escort to the left of Baco[-2] until bomb release. In the approach to the launch point (from south to north), Baco-1 turned aside a little to the east and Baco-2 lost it from sight. It [Baco-2] arrived early at the target, confirmed by its Doppler and the Falklands radar. It dropped its bombs and, confirming bomb detonations, turned left.
… [Baco-1] flew over the target and released its bombs…. Again the bombs fell near the headquarters of three British generals.
No British unit suffered damage or reported bomb explosions. With their bombs gone, each Canberra swung left “to return southwards by their inbound track, out over the coast and to safety.” Or so they hoped.
North of Port Stanley the guided-missile destroyer Cardiff tracked Sanchez’s Mirage. She fired her Sea Dart while the Canberras dropped their bombs 16 miles west of her target:
… By 9.44 [0144Z] the leading contact was well within Sea Dart range, over land to the north of Port Stanley, and the Cardiff opened fire with a single missile as the aircraft began to turn away to the south.
. . . [The Sea Dart] missile locked on to Sanchez’s aircraft. As it came up at him, glowing brightly, he spiraled down towards it in an attempt to break the lock but the missile suddenly exploded below him at the end of its run, leaving his Mirage undamaged . . . [As Sanchez dived:] A second missile passed by him at 15,000 feet shortly afterwards but without detonating.
The Royal Navy in the Falklands War confused two different aircraft as one:
. . Cardiff, tracking a contact to the south from the point of impact [sic-detonation] of the Sea Dart, believed that the bomber [sic-Sanchez’s Mirage] had crashed at least twenty-five miles to the south. To further complicate any analysis, the destroyer claimed a Mirage, on the strength of the unmistakable “noise” of a fighter-type radar on the target’s bearing. This had also been intercepted by the Minerva, coming from the aircraft which had flown over her ten minutes before the shoot-down [sic-engagement], and was again detected fifteen minutes afterwards.
The solution here is obvious: The Cardiff accurately identified and less accurately engaged a Mirage, hitting nothing. The 25-mile distance farther south was a natural range limit for her radar. The time and position of the second missile, which Sanchez observed at 15,000 feet over Port Stanley, are consistent to identify it as the Sea Dart with a quietus on it, climbing toward a Canberra at 40,000 feet near Fitzroy. Chart 3 reconstructs the destruction of Canberra Baco-1.
Baco-1 (B-108) was not so fortunate and at 0155z [about 0149Z by British timing] it was hit in the lower front fuselage area by a Sea Dart, almost certainly one launched from Exeter.
… Captain Pastran came down in the sea near the coast, inflated his life raft, disembarked, and [a day later near Fitzroy] was made prisoner…. Baco-2 evaded the intense antiaircraft fire, dropping flares and chaff while it escaped towards the west. [British units observed these flares at 0147Z.] It saw the brilliance of the intense cannonade against Puerto Argentino. It believed that the antiaircraft fire came from ships in Fitzroy [actually from Exeter east of Port Stanley]. . . . Already flown 60 miles in escape, the Malvinas [Port Stanley CIC] asked it whether it had contact with the guide [Baco-1], because it was lost from their screen. It responded no ….
The fatal missile’s ascending southwesterly trajectory shows that it was launched from east or northeast of Port Stanley—the Exeter’s patrol area. After the war, the Exeter displayed Baco-1’s silhouette on her Sea Dart launcher. An authoritative book appearing soon after the war, in 1983, credited the loss to “a long-range high-altitude shot from HMS Exeter’s Sea Dart.”24 How, or why, might later British semiofficial accounts lose sight of the Exeter?
The Royal Navy in the Falklands War gives the only account of the Penelope’s encounter with the incoming missile. She was a Leander-class frigate without integrated weapons. To fire at the intruder the individual 40-mm and Sea Cat gunners had to see it, specifically its exhaust flames in the night.
At 9.47 flashes were seen over the Fitzroy area [0147Z,Baco-2’s decoy flares] by the Fearless, Minerva and [?] Penelope…. Commander Peter Rickard [the Penelope’s commanding officer] took evasive action, fired chaff to screen himself and the Nordic Ferry and opened fire with Seacat and his Bofors as the missile closed at low level. It finally ditched, or possibly exploded above the water, about 1,000 yards between the frigate and her charge.
… The two aircraft in the Fitzroy area turned away as the missile arrived and headed for base, one [Gonzalez’s Mirage] going sufficiently close to the Intrepid and Minerva to cause them serious worry. By 10.00pm [0200z] the radar screens were again clear, apart from an aircraft [Sanchez’s Mirage] passing far to the south of the islands, westbound.
. . . The Fearless and Minerva both reported “flashes” or “explosions” in the sky at the time [0147Z] that the Penelope’s lookout saw the “glow”, and the bearings correspond to a position about five miles southwest of Fitzroy Settlement, where the Rapier troop reported hearing explosions overhead. The lack of any interception of a missile homing head was rightly taken to mean that an Exocet had not been fired.
The Sea Dart’s published range against air targets is 80 kilometers or 43 nautical miles.” Most likely, the Exeter fired when Canberra Baco-2 turned away after bomb release near Mount Kent. Tracing a trajectory from the Canberra’s splash area past Port Stanley, where Sanchez saw a surface-to-air missile at medium altitude, places this missile’s launch sector inside the Exeter’s barrier patrol area. If by coincidence the missile approached the Penelope from Fitzroy’s direction, then the Exeter lay close to that bearing. In fact, a missile approaching the Penelope from any southwestern bearing was consistent with the Exeter. Thus, the incoming missile’s guidance, bearing, range, and time of launch observed by the Penelope all corresponded to a missile launch by the Exeter at the instant when her Sea Dart battery was active. With two illuminators and without a major operational defect, the Exeter could attack two targets simultaneously with Sea Darts.
No evidence supports an Argentine missile attack from any platform. Of Argentine naval strike aircraft, the Super Etendards flew no combat missions that June, and only two Skyhawks remained operational. Skyhawks required air force tankers for missions to San Carlos and farther east. The Argentine Air Force denies involvement without contradiction.
Without official analysis, one can only speculate about why this incident occurred. Incompatible data links certainly could lead to inconsistent plots, in which the Exeter might project the Penelope and the Nordic Ferry as west of their actual location detected by radar. Conceivably, an error of identification friend-or-foe (IFF) radar procedures led to suspicion on board the Exeter that the eastbound contacts to her north were Argentine ships. Two of the Penelope’s search radars matched sets on Argentina’s own Exocet-capable Type 42 destroyers. Or perhaps the Penelope was radar-silent and relying on her passive intercept equipment to alert her of missile seekers. That would explain her apparently uncued visual sighting of the missile and her evident inability to correlate its trajectory with a launching platform. Either the Penelope’s defenses defeated the missile, or, more likely, the Exeter realized her error and aborted the attack.
Of the four inbound frigates, battered by heavy seas and continuous action with near-negligible logistical support, and whose some to Berkeley Sound was the task force’s immediate goal: one arrived on time and in condition to support the ground troops’ advance with gunfire. The others bombarded other targets. The Argentine ground commander surrendered that afternoon, 14 June.
The semiofficial accounts from historian Brown and Admiral Woodward failed to substantiate that the Cardiff, not the Exeter, destroyed the lost Canberra. Their assertions suggest that a political stricture demanded concealment of friendly-fire incidents. Confirming the stricture’s existence, Admiral Woodward recounted “immense consternation in very high places” years later against acknowledging another Blue-on-Blue incident, “the only one between British air and sea forces throughout the entire war.” It too involved Sea Darts fired from a Type 42 destroyer, the Cardiff. Political aspects of modern warfare include public relations and rules of engagement. During the Falklands campaign a committee met twice every day to change the rules of engagement. A U.S. admiral objected after the war that no operating unit could implement such an amorphous doctrine. Occurrences of friendly fire suggest inadequacies in the rules of engagement.
Broader considerations should encourage authorities to acknowledge this incident. Friendly fire may reveal inadequacies in training and equipment and conversely, acknowledgement might improve budgets. Friendly fire creates a difficult tactical problem. Royal Australian and U.S. Navy warships experiencing Blue-on-Blue missile attacks off Vietnam took crippling hits with fatal casualties. If this incident occurred as reconstructed here, even today allied navies will wish to learn how the Royal Navy resolved it safely. Historically, the Royal Navy can recognize proudly that HMS Exeter is the world’s highest-scoring warship using her own ordnance against hostile aircraft since World War II.
The tactical analysis suggested here draws on open sources that, despite identifiable errors, inconsistencies, and omissions, appear to describe participants’ specific experiences credibly. An alternative analysis must suggest multiple simultaneous errors that appear merely to comprise friendly fire. Perhaps the Cardiff severely miscalculated the range, bearing, altitude, and identity of the aircraft she engaged. Perhaps Argentine air crew and ground controllers made simultaneous identical errors in navigation as necessary to explain the Cardiff’s actions—errors beyond even Canberra Baco-1’s 40-mile departure from its formation. Perhaps Mirage pilot Sanchez imagined two missile encounters that nevertheless correlated with other reports. Perhaps the Penelope’s lookout, gunners, and captain imagined a missile that they fired upon. And perhaps the Exeter did nothing, indeed a strangely silent watchdog in the night, if so. Perhaps. But that analysis fails the test of Occam’s Razor.
By Captain Michael C. Potter, Supply Corps, U.S. Naval Reserve
Price: £875
South Atlantic Medal (with Rosette)
RFA Olna
Purser H R O Brooks (Unique Rank)
February 1982: Deployed to the Persian Gulf alongside the Type 42 destroyer HMS Cardiff and the frigate HMS Amazon
Early April 1982: Following the Argentine invasion on 2 April, Olna was diverted from Mombasa back toward the UK. En route, she anchored off Gibraltar to meet the requisitioned P&O liner SS Uganda (which was being converted into a hospital ship). Olna conducted crucial Refuelling at Sea (RAS) trials with Uganda before continuing north.
Journey to the South Atlantic (May 1982)10 May 1982: Olna officially departed Devonport/Gosport bound for the South Atlantic. She sailed as part of the “Bristol Group” (the second major reinforcement wave), centered around the destroyer HMS Bristol.
25 May 1982: The Bristol Group officially arrived inside the Total Exclusion Zone (TEZ) around the Falkland Islands, stepping in to reinforce the carrier battle group following heavy British ship losses.
Late May – August 1982: Operating in the hostile South Atlantic waters, Olna performed 143 Replenishments at Sea (RAS), providing an unbroken lifeline of fuel to the aircraft carriers and warships maintaining the blockade and supporting ground operations.
28 August 1982: Following the arrival of HMS Illustrious to relieve the battle group, Olna finally headed north for home alongside HMS Invincible and HMS Bristol.
17 September 1982: Olna arrived back in Portsmouth, completing a relentless deployment alongside HMS Invincible (which clocked a record 166 continuous days at sea).
Price: £700
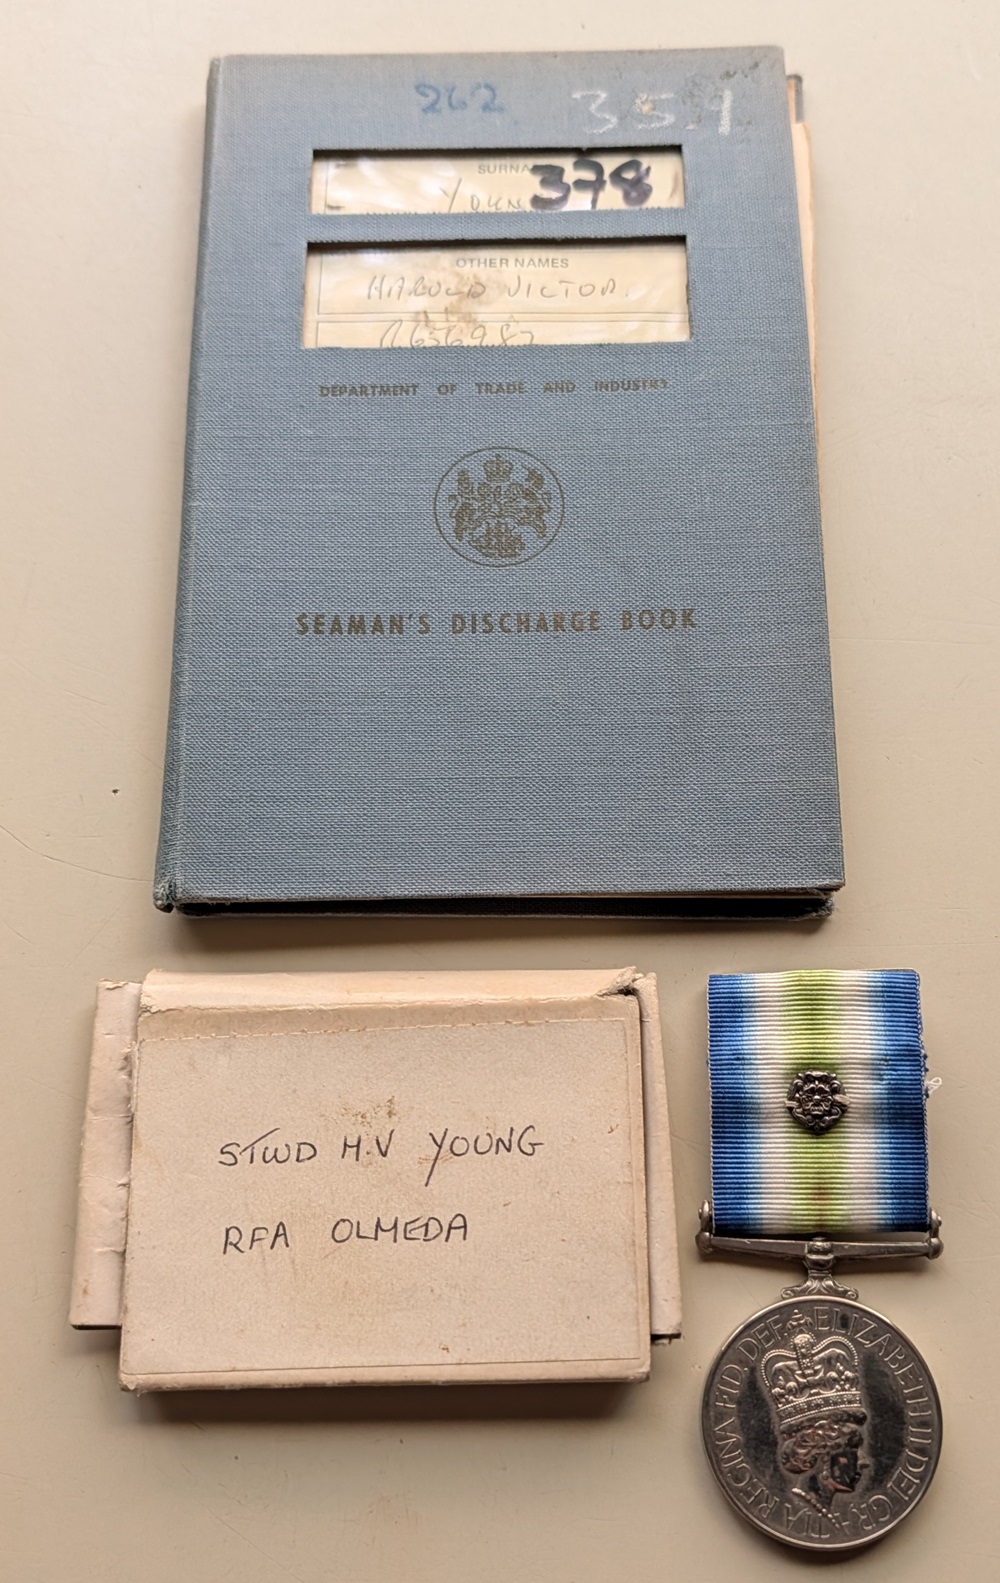
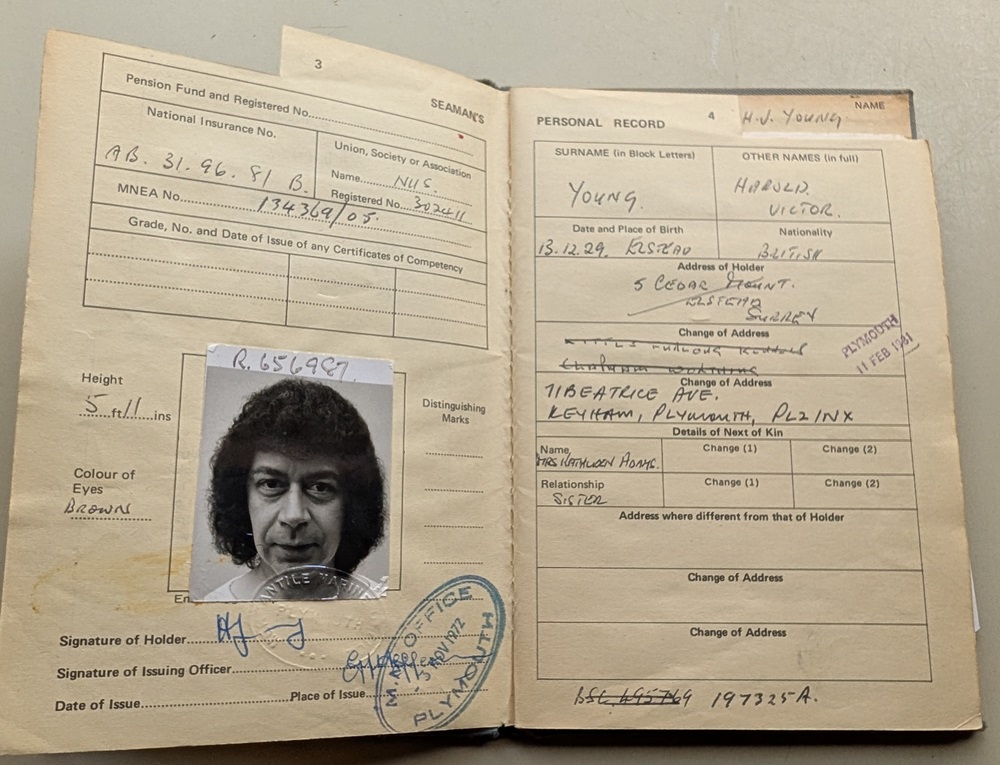
South Atlantic Medal (with Rosette)
RFA Olmeda
Steward Harold Victor Young
Served as a Steward Royal Fleet Auxiliary first ship RFA Lyness 9th April 1973. Joining RFA Fort Grange 14th February 1981, RFA Olmeda 4th April 1982, RFA Stromness 21st September 1982, RFA Appleleaf 10th December 1982, RFA Stromness 1st February 1983, RFA Olmeda 10th May 1983, RFA Fort Austin 13th December 1984, RFA Olmeda 16th April 1985, RFA Fort Grange 15th December 1986 leaving this ship and the Royal Fleet Auxiliary Service 9th December 1987 after 14 years service.
Olmeda saw extensive service during the Falklands War, being one of the first ships to head south. Olmeda refuelled numerous ships of the Task Force including HMS Hermes, HMS Invincible, and the SS Uganda.
After the Argentine surrender of the Falkland Islands, Olmeda, Yarmouth, Endurance and the tug Salvageman sailed to the South Sandwich Islands where Argentina had established a base in South Thule since 1976. Following a demonstration of Yarmouth’s guns, the ten Argentine military personnel surrendered. Before leaving South Thule, Yarmouth was refueled by Olmeda on 21 June, which may have been the most southerly underway replenishment in the history of the Royal Navy.
LIEUTENANT COMMANDER DAVID FIELDING SMITH ROYAL NAVY
His task was to keep the two Westland Sea King HC4 helicopters of 824 Squadron “battle-ready” for the varied and hazardous tasks ahead as Britain took back the south Atlantic islands after they were invaded by Argentina on April 2, 1982.
Arriving in the exclusion zone on May 1 in the fast fleet tanker RFA Olmeda, the two helicopters were kept in almost constant use for the next seven weeks to carry servicemen, ammunition and stores to where they were needed on the battlefield. Fielding Smith led a team of 20 men who often worked through the night in stormy seas to ready the aircraft for their next missions, including stripping out the engines at high speed.
On June 3, 1982 the Sea Kings lifted off from RFA Olmeda on a 400-mile journey to San Carlos in East Falkland, transporting urgently needed stores and ammunition from ships anchored in the bay to operating bases on land. Fielding Smith was told at 8pm that the Sea Kings must be ready to fly at first light. The operation lasted for four days and three nights, including supplying water and rations to the teams operating the Rapier missile sites on the hilltops.
“Each morning the machines were ready at first light and flew all day, during frequent air raids,” said Commander Ian McKenzie, Fielding Smith’s commanding officer. “Credit must go to David and his team for keeping the helicopters flying and on task day and night.”
Having originally been told they would be ashore for 24 hours, all the engineering team had to sleep in was a large tent on a slope in sub-zero temperatures. When the pilots returned after flying all day, there was nothing to eat apart from cold mashed potato in a nearby field kitchen.
After a miserable first night, Fielding Smith found a barn, complete with a stove. He knocked on the door of the nearby farmhouse to explain their urgent need. The barn’s incumbents — six aircrew from an RAF Chinook — were persuaded, not entirely graciously, to move. That night the pilots returned to a peat fire and hot food cooking on the stove. During air raids Fielding Smith, a fine shot, would return fire to enemy aircraft with a self-loading rifle.
After four days of almost constant use, one of the Sea Kings had an oil leak and was emitting plumes of blue smoke. Having safely landed back on Olmeda, a complete engine replacement was prescribed. The operation usually takes 12 hours; Fielding Smith and his team did it in seven.
On June 19/20 one of the Sea Kings took part in Operation Keyhole to land 48 commandos from the Royal Marines on Thule, part of the South Sandwich Islands towards Antarctica, where 11 Argentinian scientists and a company of soldiers were refusing to accept that their country had surrendered to Britain on June 14.
Because the helicopter originally planned for the mission had broken down, one of the Sea Kings from Olmeda was pressed into action. As an anti-submarine helicopter it was not designed as a troop carrier. Fielding Smith’s task was to strip out the anti-submarine equipment and seats so that the aircraft could accommodate 24 marines sitting on the floor. The weight limit was 21.5 tonnes and 19 in blizzard conditions. The Sea King took off carrying 23 tonnes. “It was illegal without official approval and if it had not worked we would have been court-martialled,” said McKenzie. “Any other engineer would have said ‘sorry I can’t do this’.”
The Sea King duly landed the first 24 marines in a blizzard and the Argentinians quickly surrendered. The second party landed in time to see the Argentinian research station and radio mast blown up. Fielding Smith and his team restored the helicopter to its original condition on the voyage home.
On June 21 he received a signal to return with his 20-strong team exhausted but unharmed and the two Sea Kings intact. The helicopters Fielding Smith had been in charge of had each conducted an average flight time of 140 hours 48 minutes during seven weeks in the Falklands.
Several months after the end of the conflict, Fielding Smith returned to the Falklands in Olmeda. To service the aircraft on Lively Island he “liberated” a broken-down RAF generator needed to power floodlighting. His commanding officer later pointed out that Fielding Smith had taken the equipment broken, fixed it, used it and returned it operational, before adding: “We’re all on the same side aren’t we?” It was probably prudent that Fielding Smith did not speak in his own defence as he could be outspoken and direct. “It was surprising how quickly everything got back to needing to be signed in triplicate,” McKenzie recalled.
Harold Victor Young born in Elstead, Surrey 13th December 1929, home address 11 Beatrice Avenue, Keyham, Plymouth.
With Department of Trade and Industry Seaman’s Discharge Book and box of issue.
Died Plymouth, October 2021, aged 92.
Price: £650
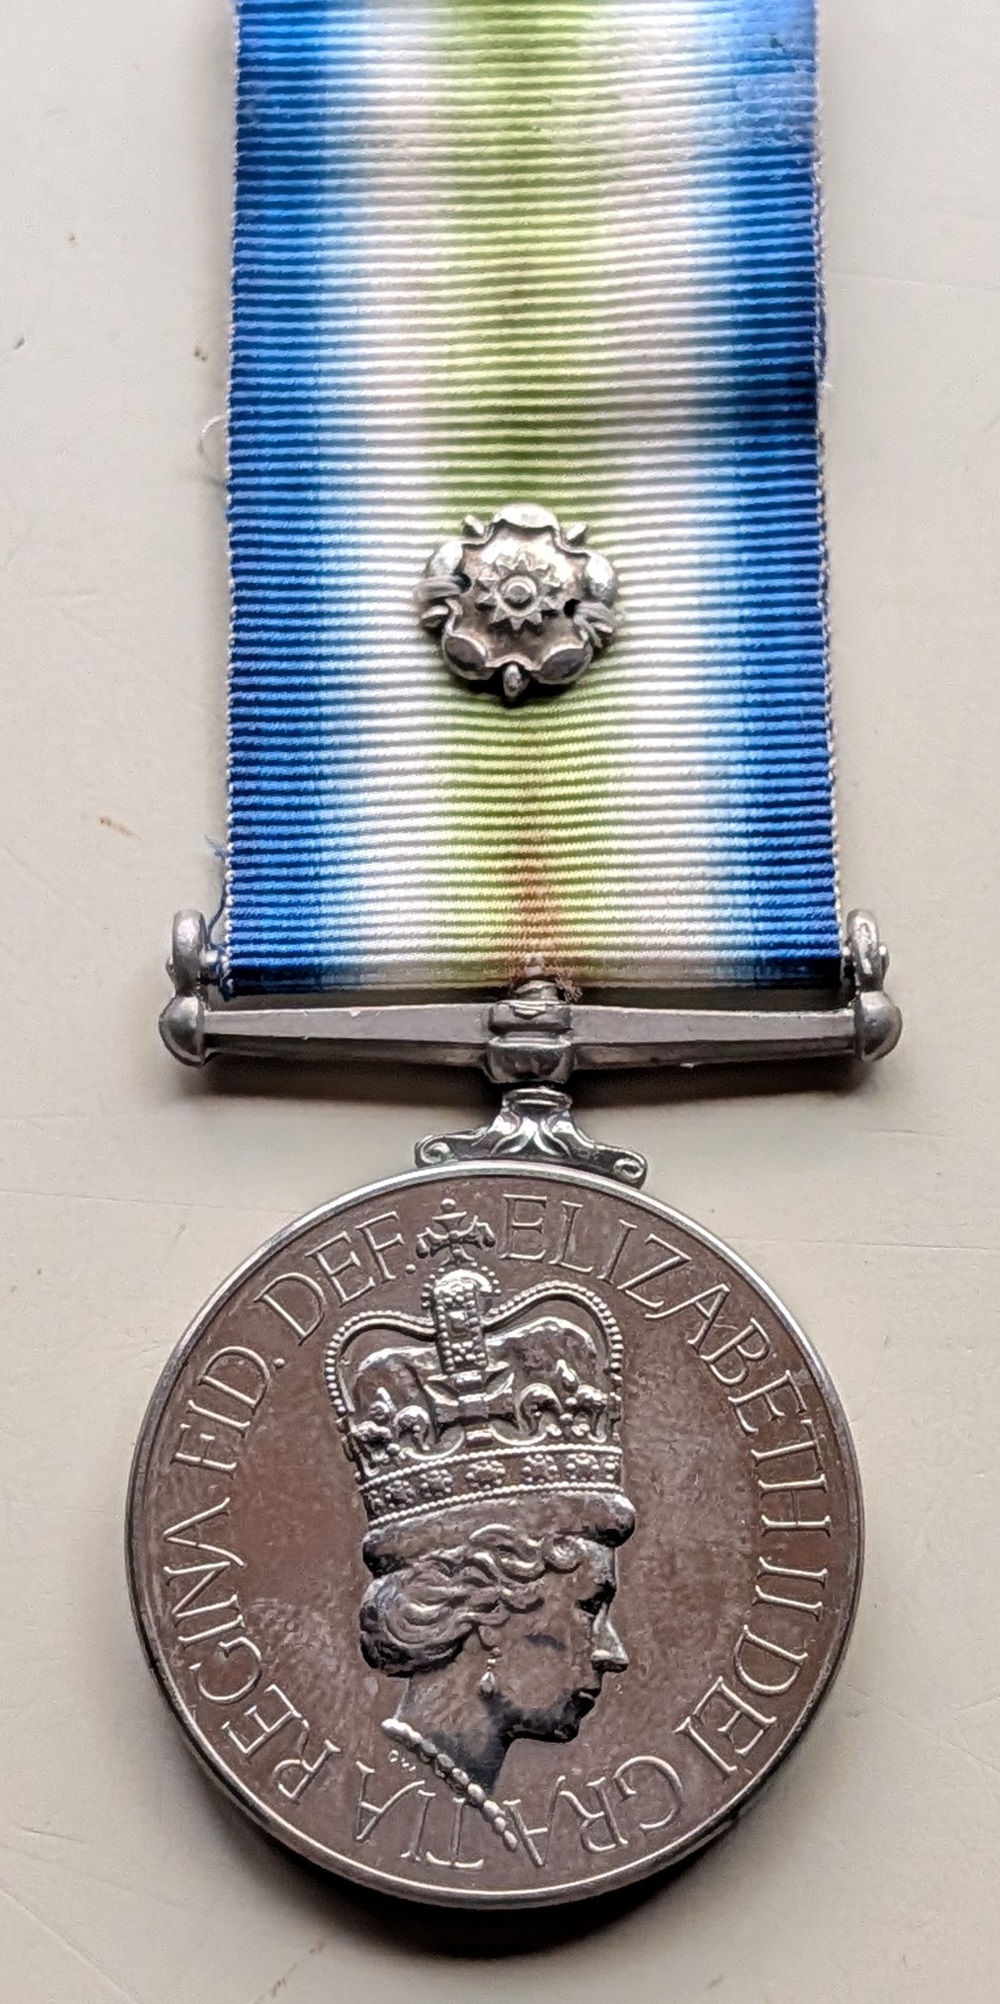
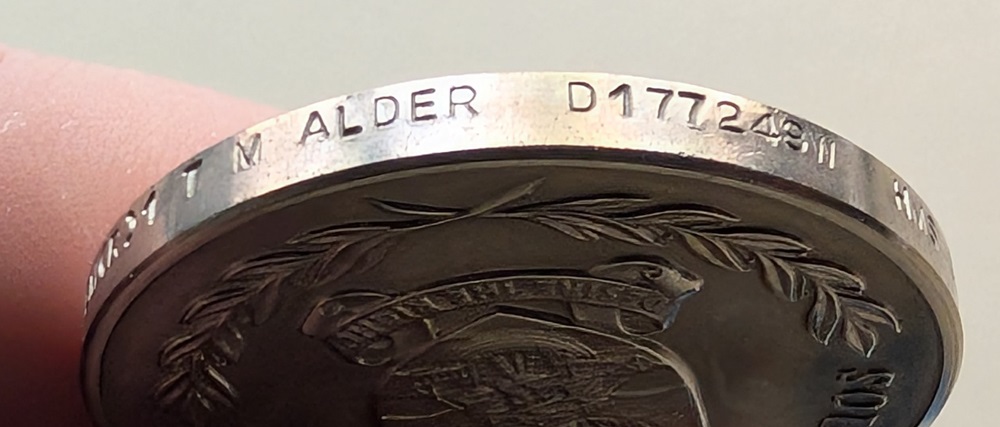
South Atlantic Medal (with Rosette)
HMS Invincible
MEM(R)1 T M Alder D177249W
The Falklands Conflict
On 25 February 1982, after several months of negotiations, the Australian government announced that it had agreed to buy Invincible for £175 million (285 million A$) as a replacement, under the name HMAS Australia, for the Royal Australian Navy’s HMAS Melbourne. Australia planned to make minimal changes to the carrier, adding more fuel and replacing some of the ship’s computers. Initially at least, it was planned to operate helicopters only. The sale was confirmed by the Ministry of Defence.
On 2 April 1982, however, Argentina invaded the Falkland Islands. Three days later, a naval task force headed by Invincible and Hermes left HMNB Portsmouth bound for the South Atlantic. On 20 April, the UK government formally ordered its defence forces to bring the islands back under British control. Along with eight Sea Harriers, Invincible’s air group included twelve Sea King helicopters that were slightly larger than the ship had originally been designed to accommodate. Small machine guns were added around the flight deck and island for close-in defence.
In April, while en route from Ascension Island to the Falklands, Invincible mistakenly locked her Sea Darts on a VARIG Brazilian Airlines DC-10 rather than on the Argentine Air Force Boeing 707 that had been monitoring the fleet’s movements. The previous day, Task Group Commander Rear Admiral Sandy Woodward had sought permission from Commander-in-Chief Admiral Sir John Fieldhouse to shoot down the 707 as he believed its activity indicated a raid would be launched from the Argentine aircraft carrier ARA Veinticinco de Mayo. As the 707 would be no direct threat to the fleet, Woodward ordered Weapons Tight and the continued tracking of the aircraft’s course while a Sea Harrier was dispatched to investigate. The Harrier pilot reported that “it was a Brazilian airliner, with all the normal navigation and running lights on.”
On 30 May, two Super Étendards, one carrying Argentina’s last remaining air-launched Exocet, accompanied by four A-4C Skyhawks each with two 500 lb (230 kg) bombs, took off to attack Invincible. Argentine intelligence had sought to determine the position of the carriers from analysis of aircraft flight routes from the task force to the islands. However, the British had a standing order that all aircraft conduct a low level transit when leaving or returning to the carriers to disguise their position. This tactic compromised the Argentine attack, which focused on a group of escorts 40 miles south of the main body of ships. When one of the Super Étendards detected a large target on radar, the Exocet was launched, and the Super Étendards turned for Argentina, while the Skyhawks followed the Exocet, which soon passed out of sight. Two of the attacking Skyhawks were shot down by Sea Darts fired by HMS Exeter, with HMS Avenger claiming to have shot down the missile with her 4.5″ gun (although this claim is disputed). No damage was caused to any British vessels. During the war, Argentina claimed to have damaged the ship and continues to do so to this day, although no evidence of any such damage has been produced or uncovered.
On 1 June, the Australian Prime Minister, Malcolm Fraser, advised the British government that the sale of Invincible to Australia could be cancelled if desired. In July 1983, a year after the end of the Falklands conflict, the Ministry of Defence announced that it had withdrawn its offer to sell Invincible so it could maintain a three-carrier force.
Price: £700
South Atlantic Medal (with Rosette)
MT Irishman
E D Kilby
Rare, Only 11 medals issued to ship
Ernest Dale Kilby was born at Hull on 25th May 1935, the second child (and only son) of John Dale Kilby and his wife Annie Elizabeth Kilby (nee Ferguson). He had an elder sister, Jean, who was born on 21st May 1933. The family lived at 22 x 30th Avenue, Hull. His father was a merchant seaman. It would appear that Ernest Kilby was also known simply as “Ernie”.
The Hull Blitz and evacuation
The Hull Blitz was the bombing campaign that targeted the English port city of Kingston upon Hull by the German Luftwaffe during the Second World War.
Hull was the most severely damaged British city or town during the Second World War, with 95 percent of houses damaged. It was under air raid alert for 1,000 hours. Hull was the target of the first daylight raid of the war and the last piloted air raid on Britain.
Of a population of approximately 320,000 at the beginning of the war, approximately 152,000 were made homeless as a result of bomb destruction or damage. Overall almost 1,200 people were killed and 3,000 injured by air raids. More than 5,000 houses and half of the city centre were destroyed.
Large-scale attacks took place on several nights throughout March 1941, resulting in over 200 deaths. The most concentrated attacks were on the nights of 7/8 and 8/9 May 1941, resulting in just under 400 deaths, and another large-scale attack took place in July 1941 with 143 fatalities.
The scale of destruction and death in Hull must have prompted Annie Kilby to evacuate her son to somewhere she considered much safer. In 1941 young Ernie was evacuated to Newark where he spent the remainder of the war being cared for by a couple by the name of Clem and Annie Jones.
The Merchant Navy and starting a family
Hull was a thriving seaport in the early 1950s, and it was only natural that Ernie would follow in his father’s footsteps and join the Merchant Navy, however little is known about his early and subsequent career at sea. reference
On 23rd February 1963, aged 27, Ernie married Maureen Bryan at Hull. The couple went on to have three sons; David, born on 22nd August 1963, and twins Andrew and Martin, born on 15th January 1965. By 1982 the Kilby family were living at 15 Faraday Street, Holderness Road, Hull.
Letters published in the Hull Daily Mail, submitted by Ernie’s wife in 1982, refer to him being involved in the Suez Crisis of 1956 and the Cod Wars of 1972-73. Ernie was probably employed by the United Towing Company Ltd of Hull by the early 1970s, and it is known that their tugs served as “buffer tugs” protecting trawlers from Icelandic gunboats during this time.
The Falklands War 1982
6 Apr – Three United Towing Company Ltd Tugs at Hull, Irishman, Yorkshireman and Salvageman are requisitioned by the Admiralty.
Arrived in Portsmouth the next day to take on towing and salvage equipment. She sailed on the 10 April and arrived at Ascension Island on the 24 April. Irish man and her sister tug Salvageman left Ascension Island together and headed for the Falklands.
Sat 10 Apr – Tugs Irishman and Salvageman leave Portsmouth. The Irishman crew – Captain W. A. (Tony) Allen, Mate John E. Handley (Bransholme, Hull), Second Mate Neil H. Salter (Scunthorpe), Chief Engineer J. Gary Brown (Hull), Second Engineer Michael F. Eves (Easington), Third Engineer T.E. Frankish (Sutton Park, Hull), Deckhand G. Bales (Thorngumbald), Deckhand E. Mason (Hull), Deckhand Dennis Paul Betts (Hedon), Cook Edwin Dale Kilby (Hull) and J. Scaramuzza (Huddersfield).
25 May – HMS Coventry and Atlantic Conveyor hit during a savage Argentinian air attack.
One of her prime tasks, when she arrived, was to try and secure the badly damaged Atlantic Conveyor and bring her under tow so that what was left of the useable stores could be salvaged. Unfortunately it was not to be, the Atlantic Conveyor was still burning and had lost her bows. The valiant efforts of the Irishmans crew to recover the ship were in vain and she sank while under tow.
Two of the Irishman’s crew were decorated with the BEM for bravery, for twice entering the burning ship to connect a tow.
Mon 14 Jun – Argentinian forces in Port Stanley surrender at 9pm local time. The 75 day conflict comes to an end.
6 Jul – Crew of 10 United Towing men flown from RAF Brize Norton to Ascencion Islands and then the Falkland Islands to relieve the crew of the Irishman.
Thu 8 – Fri 9 Jul – Relief crew of the Irishmen arrives in Port Stanley (8 Jun) and commences 24 hour “change-over” period with original crew.
Wed 14 Jul – The Hull Daily Mail reports that the original Irishman crew are now en-route to the Ascencion Islands by sea, from where they will be flown back to the UK.
Thu 22 Jul – The Hull Daily Mail reports that the crew of the Irishman are expected to arrive at the Ascencion Islands on Sat 24 Jul, from where they will be flown to RAF Brize Norton at the earliest opportunity.
Approx 7 Oct – Several members of the original crew of the Irishman fly out to bring her back to Hull.
21 Oct – Irishman reported as having left the Ascencion Island for Hull on 13 Oct.
28 Oct – Irishman returns to King George Dock, Hull.
Lots of research, photos, newspaper reports.
Rare
Price: £850
South Atlantic Medal (with Rosette), GSM – Gulf & Royal Navy LSGC
HMS Andromeda
Chief Petty Officer Communication Technician Edward V Spiller D165002R
SAM: E V Spiller D165002R HMS Andromeda
GSM: E V Spiller D165002R
RN LSGC: E V Spiller D165002R
Enlisted: 1977
Falklands Conflict
During the Falklands War in 1982, HMS Andromeda was part of the Royal Navy Task Force and she arrived at the Falklands on May 26th. She mainly acted as a close escort for the aircraft carrier HMS Invincible or served on the air defence picket line ahead of the Task Force.
After the Argentine surrender on June 14th, HMS Andromeda was the first ship to enter Port Stanley and the ship’s white ensign was flown over Port Stanley to mark the recapture of the Falkland Islands.
Demobed: 2000
Lives: Bedford
Basic research including Ancestry and Facebook (photo) details.
Price: £1200

South Atlantic Medal (with Rosette)
HMS Avenger
Marine Engineering Mechanic (Mechanical) 2 M K Robson D185407N HMS
Falklands Conflict
With the appointment of Captain Hugo White in 1981, the type 21 Frigate HMS Avenger became leader of the 4th Frigate Squadron. Avenger was a late arrival at the Falklands War, as she didn’t leave the UK until 10th May 1982, arriving on 25th May – a record for any ship involved in the operations, and a great distance to have covered in 14 days. The Rolls-Royce Olympus turbines of Type 21 frigates enabled them to maintain high speeds, but at the time the Royal Navy preferred this information not to be publicised. Avenger had averaged 28 knots and the Type 21s became nicknamed the Boy Racers.
H.M.S. Avenger joined the Task Force on 25 May 1982, in readiness for bombardment duties. On the night of 27th-28th, when between firing runs and to the south of Harriet Cove, a large projectile hurtled noisily across the Avenger’s flight deck at a height of about five feet – the frigate was well out of range of shore artillery and surface to air missiles, Captain White concluding that his ship had been targeted by a shore-based Exocet. The ship also managed to shoot down at least one (some accounts say two) Exocet missiles with it’s 4.5 inch gun. Having then fired 125 rounds of 4.5-inch shells on enemy observation posts on Mount Brisbane and McBride Head – to cover the insertion of an S.B.S. patrol – she again came under fire from a combined Super Etendard-Exocet and Skyhawk bomber attack but emerged unscathed. On 30 May, she was credited with shooting down one A-4C Skyhawk, and on 2 June fired 273 rounds of H.E. and 20 star-shell rounds on Argentine positions on Pebble Island, prior to the Royal Marine Commandos carrying out a landing. Having then conducted a bombardment of Sea Lion Island during her return to San Carlos Water, Avenger accepted the surrender of Argentine forces at Fox Bay on 23 June.
Her divers salvaged a 20mm Oerlikon from the wreck of HMS Antelope which was remounted to increase her anti-aircraft capability, referred to on board as “Antelope’s Avenger“. She also assisted with naval gunfire support during the campaign. On 11th June she was conducting Naval bombardments of Port Stanley in preparation for an amphibious assault by British troops. She directly struck a house where civilians were sheltering, killing three Falkland Islander women and wounding several others. They were the only British civilian casualties of the Falklands War.
During the Falklands deployment, an alarming crack in the ship’s hull progressively worsened with the stormy South Atlantic weather. On return to UK, she was taken in for refitting, with a steel plate being welded down each side of the ship to eliminate the problem. At the same time modifications were made to reduce hull noise.
From Hugo White’s Obituary Telegraph 6th July 2014:
Hugo White commanded the “Fighting Fourth” frigate squadron in Britain’s naval task force in the Falklands war, and his ship, HMS Avenger, proved a lucky one. She escaped both an unidentified projectile that skimmed five feet above her deck, and an air-launched Exocet missile apparently making straight for her.
In return Avenger destroyed three shore-based gun batteries, a mobile radar station, an Argentine Skyhawk aircraft, and two Argentine encampments, and came through the war unscathed. Two of White’s squadron’s seven Type 21 frigates were sunk, however: HMS Ardent and HMS Antelope.
Various accounts exist of the Exocet attack, on 30 May 1982, when the Argentine High Command was striving to sink or disable the Task Force flagship HMS Hermes or her fellow aircraft carrier HMS Invincible. Many, including newspaper reports at the time, are plainly wrong, though in all of them admiration shines through for White, a much-loved captain.
One has him, before his astounded crew, personally calculating bearing and elevation with lightning mathematical ability, and with the perfectly-timed firing on his order of her single 4.5in gun, blowing the Exocet, at eight miles’ distance, to pieces. In fact Avenger downed an Argentine Skyhawk among four following behind two Super Etendards, of which one had fired the Exocet. White’s own account, as remembered by his family, was that Avenger’s decoy “chaff” diverted the Exocet. Two of the aircraft circled overhead, then sped back towards Argentina. Another ship, probably the destroyer HMS Exeter, was behind Avenger.
The Task Force commander, Admiral Sir John “Sandy” Woodward, recorded in his 1992 memoir One Hundred Days his belief that a Sea Dart missile from HMS Exeter travelled close past Avenger, and that either Exeter’s second Sea Dart or Avenger’s 4.5in gun destroyed a Skyhawk. “Meanwhile,” Woodward added, “the Exocet, either poorly aimed or unserviceable, passed harmlessly mid-way between Exeter and Avenger… The other two Argentinian pilots .. went for Avenger… Their bombs, however, missed.”
White’s frigate squadron distinguished itself by blowing up an Argentine ammunition dump on Mount Harriet as the British land forces under Brigadier Julian Thompson began their final main offensive on 12 June. The well-aimed shot on this occasion was from HMS Active, under Commander (later Captain) Paul Canter, who died in 2006. Woodward assigned Avenger and Arrow, with the frigate Yarmouth and the destroyer Glamorgan, to support the land forces with naval bombardment. Arrow was also ready to assist special forces if need be.
The war won, Avenger took the surrender of an Argentine infantry regiment and some engineers at Fox Bay on 15 June. White sent her Lynx helicopter with his first lieutenant, Tony Bolingbroke, and a handful of comrades armed only with pistols, while she lay at anchor, taking across her bow the heavy seas whipped up by a force nine gale.
Price: £750
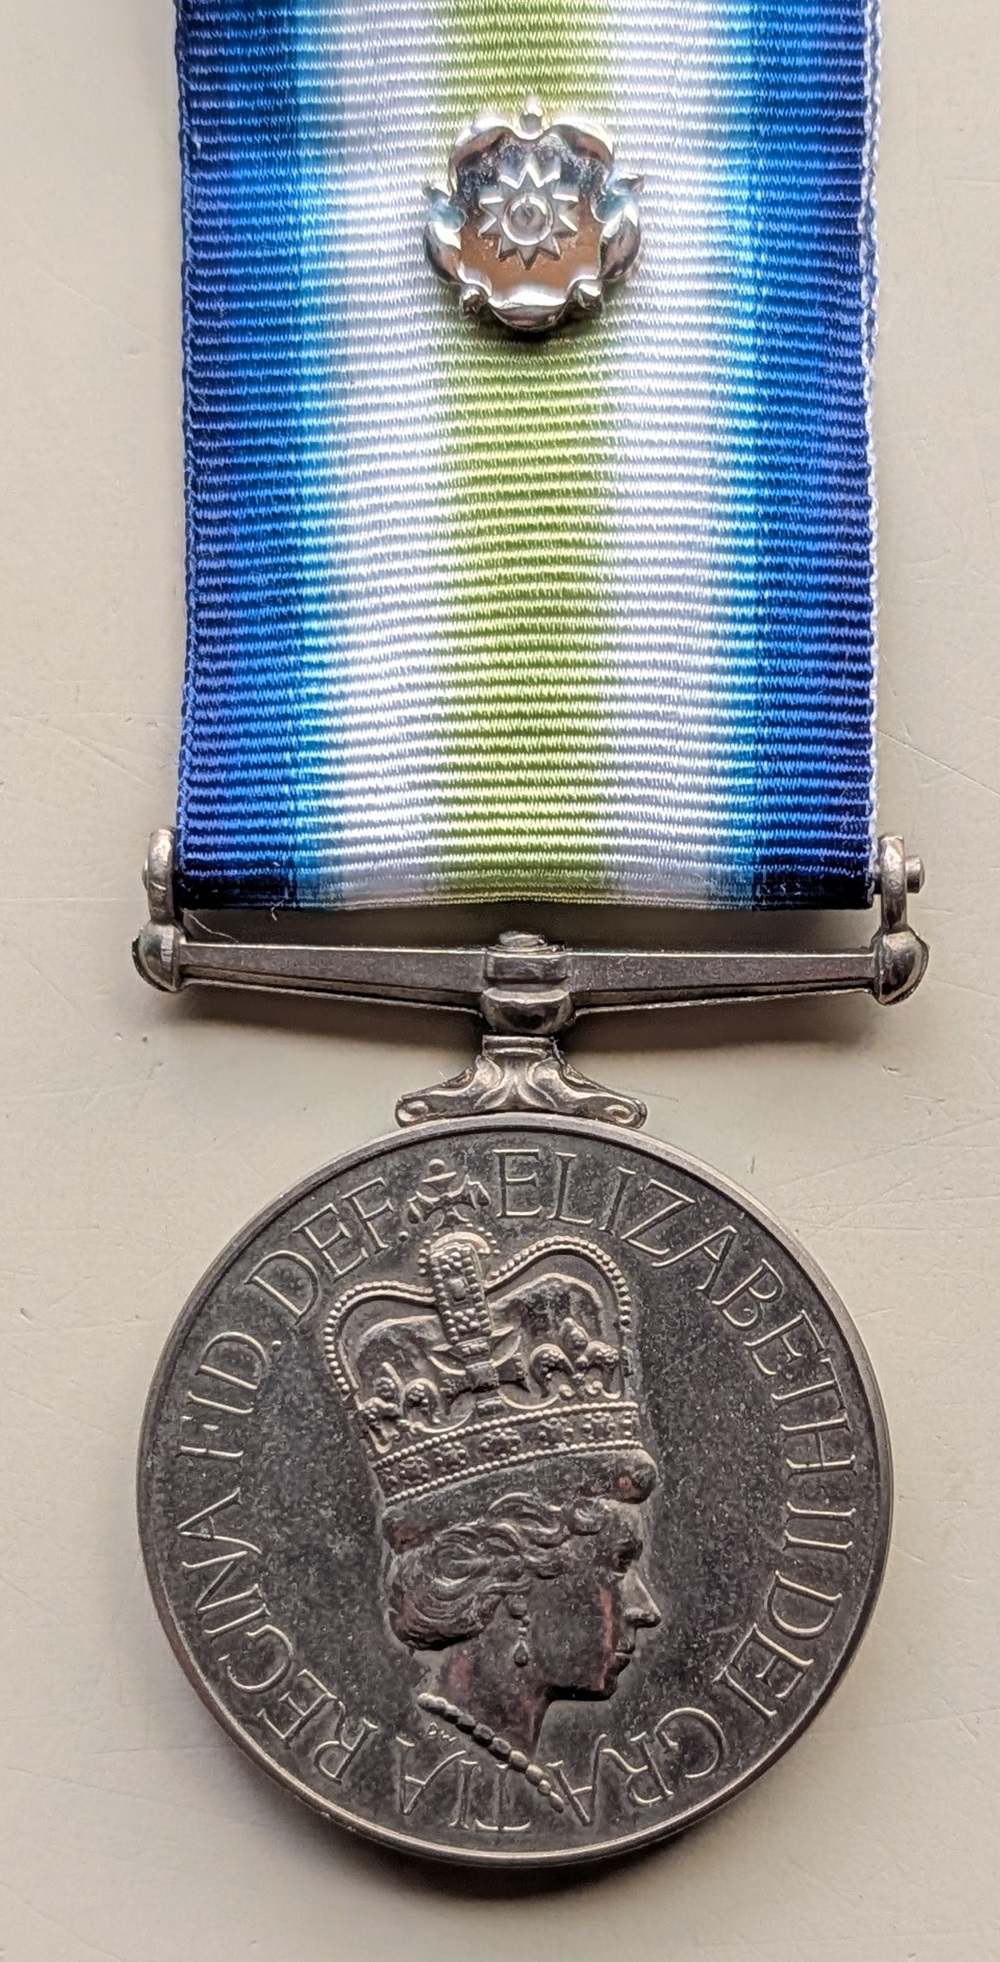
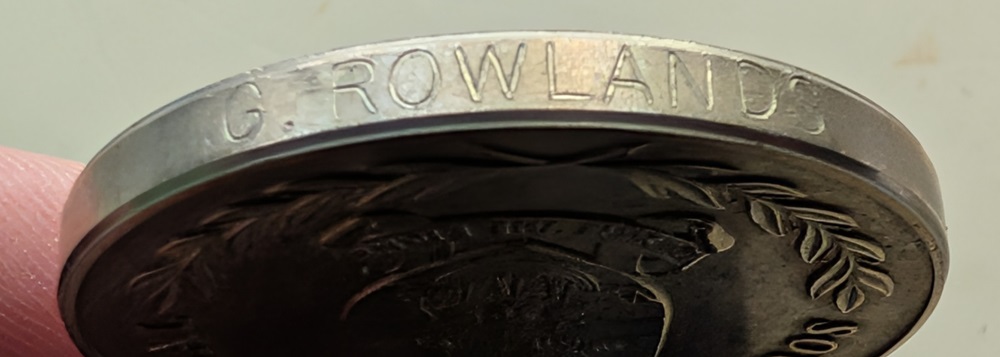
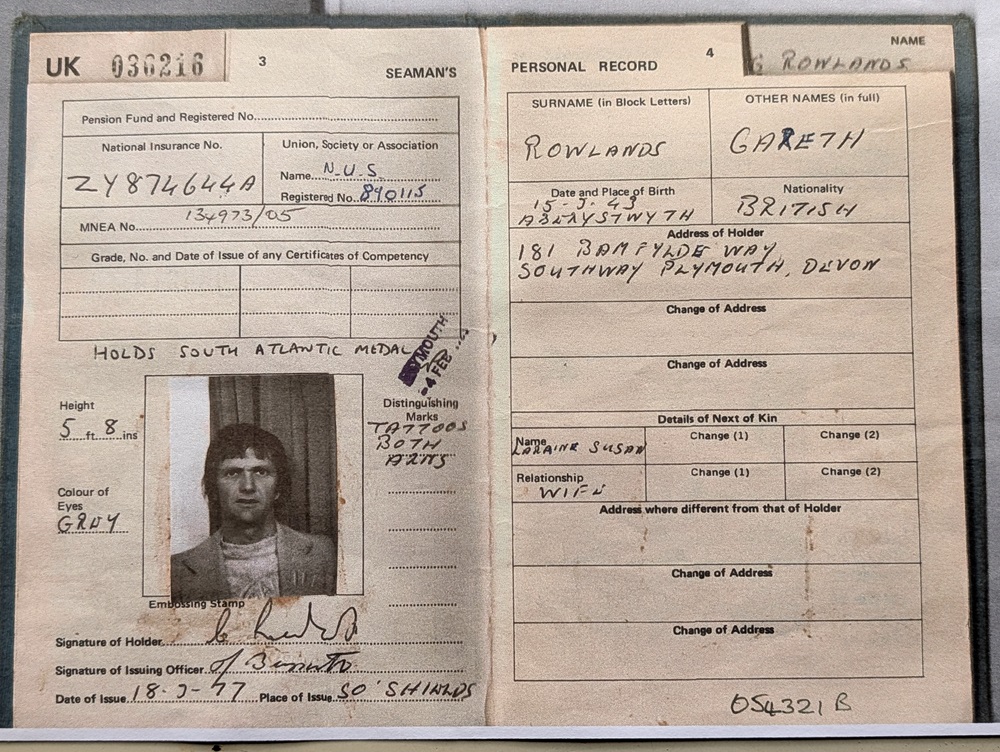
South Atlantic Medal (with Rosette)
MV British Dart
G Rowlands
(32 medals issued to ship, according to the Merchant Navy Medal Roll)
Born Aberystwyth: 15th May 1943
Joined Merchant Navy: 18th March 1977
Operation Corporate
BP River Class Tanker that was chartered as the ship arrived at Portsmouth on the 9th April 1982, where she was fitted with RAS gear, before sailing for Loch Striven on the 11 April to load. The ship sailed for Ascension Island on the 22 April, arriving on the 4th May. The ship left the following day to take up a holding position mid-way between Ascension and the Falklands to refuel RFA’s on their way down and back from the islands. British Dart joined the Carrier Battle Group on the 31May to collect homeward bound mail, before returning to Ascension Island on the 16th June. Arrived back in the UK, at Plymouth on the 16 July before sailing for Grangemouth and return to her owners.
Includes copy of Service Book.
Price: £550
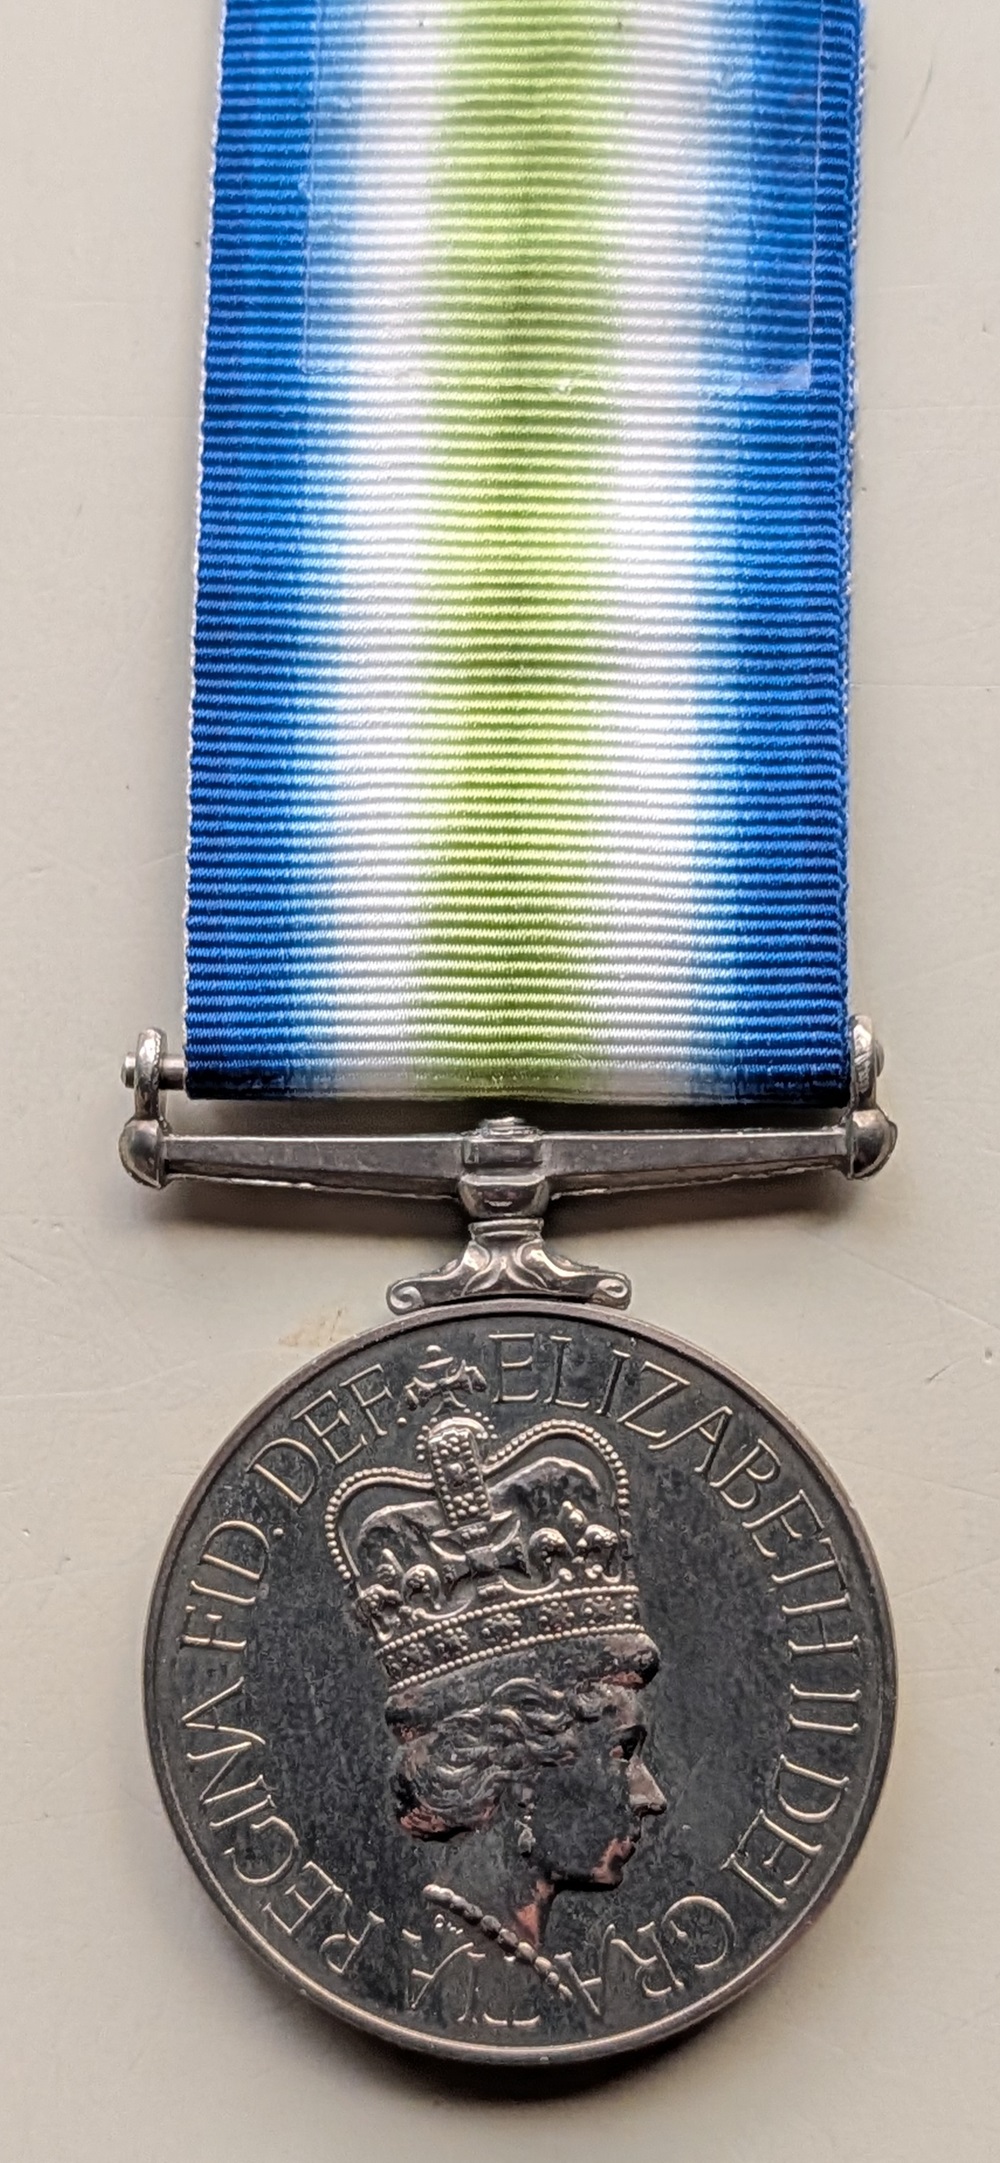
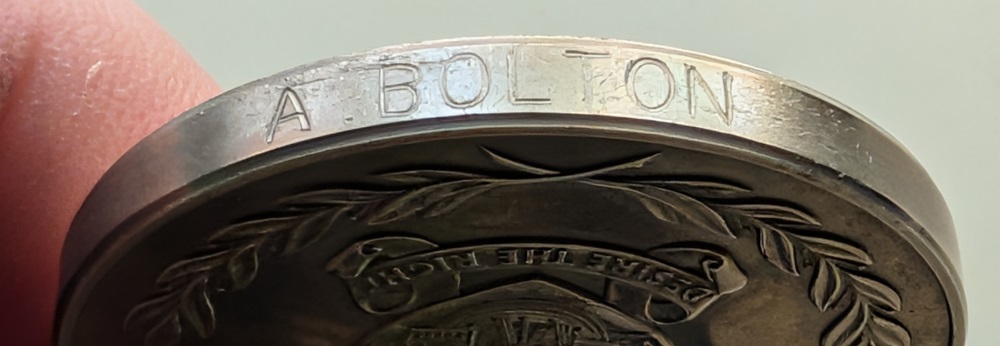
South Atlantic Medal (without Rosette)
MV British Tamar
A Bolton
(32 medals issued to ship, according to the Merchant Navy Medal Roll)
Operation Corporate
A River Class tanker chartered from BP for Fleet Fuelling duties. Arrived Portsmouth on the 9 April 1982 for the fitting of RAS gear before sailing for Milford Haven on the 10th April to load fuel. She sailed for the South Atlantic on the 14 April, she reached Ascension via Madeira on the 28 April. The ship then moved to a holding area south-west of Ascension to refuel ships of the task force, which included a record breaking RAS with RFA Plumleaf which lasted 52 hours and 40 minutes.
The ship returned to Ascension, before sailing for Gibraltar to reload, arriving on the 14 May and sailing again on the 17 May for duties in the South Atlantic. The ship returned to Gibraltar once more on the 24 August via St Helena. Sailing back to the South Atlantic on the 6th September and accompanied HMS Lowestoft on a journey that took in Ascension Island, Tristan da Cunha and St Helena. The ship remained on charter to the MOD until 1984.
Price: £450
South Atlantic Medal (with Rosette)
HMS Courageous
ME (M) 1 S Sellers D181945P HMS Courageous
H.M.S. Courageous, SSN06, was the last of the Churchill (Valiant Repeat) Class submarines. She was built by Vickers (Shipbuilding) Limited at Barrow-in-Furness. Her keel was laid down on the 15th of May 1968 and she was launched on the 7th of March 1970 as S50 (SSN06). At a ceremony held at Vickers, she was commissioned into the Royal Navy Submarine Flotilla on the 16th of October 1971.
Courageous was a formidable underwater weapon. Her time submerged was limited only by the food that could be carried and the endurance of the crew. Her nuclear reactor was a virtually limitless power supply driving both the propulsion and the life support systems onboard. Making fresh water and even oxygen from the sea water around her, she could remain beneath the surface for months at a time.
In response to the invasion the British dispatched a Taskforce to recapture them under the codename Operation CORPORATE. Visibly the taskforce consisted of warships and troopships. Invisibly it included five nuclear powered attack submarines (SSNs) and one diesel-electric submarine (SS) for special operations.
Falklands War
Being faster than the surface ships the SSNs arrived in theatre first (they travelled at around -28-29 Knots constant). In fact, two set sail before the actual Argentinian landings. The five SSNs were;
HMS Splendid, a Swiftsure Class SSN, set sail 1st April commanded by Cdr. Roger Lane-Nott
HMS Spartan, a Swiftsure Class SSN, set sail 1st April commanded by Cdr. James Taylor
HMS Conqueror, a Churchill Class SSN, set sail 4th April commanded by Cdr. Chris Wrenford-Brown
HMS Valiant, a Valiant Class SSN, set sail 2nd May commanded by Cdr. Tom Le Marchant
HMS Courageous, a Churchill Class SSN, set sail 12th May commanded by Cdr. Rupert Best
Initially the plan involved using the SSNs to get Special Forces (SBS and SAS) to the Falklands as fast as possible, and 6 SBS joined HMS Conqueror at Faslane before she set off. This involved loading about 6 tons of equipment (weapons, ammunition, explosives, inflatable boats, breathing apparatus, canoes and possibly diver propulsion devices) into the torpedo room the already heavily laden submarine.
2 SBS flew ahead to Ascension Island which was about half way between Britain and the Falklands where they would join either HMS Spartan or HMS Splendid.
The use of SSNs to land Special Forces was not popular in some sections of the Submarine Service and naval planners as it detracted from the submarines’ primary missions of sinking enemy ships and ISR (Intelligence Surveillance and Reconnaissance).
Soon plans were changed and 6 SBS were cross-decked to surface combatants, and 2 SBS plus the SAS (and later 3 SBS) instead travelled south on surface ships. This did delay their arrival but freed up the SSNs to hunt for the Argentinian Navy. Meanwhile a single diesel-electric submarine, HMS Onyx (S-21), was sent south to support Special Operations.
Her sonar, the best sensors of their time, allowed Courageous to listen quietly for the sounds made by other ships and submarines and her weapons meant that she carried a real sting with which she could both defend and attack. The small nuclear reactor (about the size of a household dustbin) provided heat to produce steam to drive the turbines which drove the single propellor as well as for driving the turbo generators which produced enough electricity to supply a small town. Courageous was based at Faslane Submarine Base situated on the Gareloch in Western Scotland throughout her operational career as part of the Third Submarine Squadron. She conducted many Cold War patrols, mostly in the North Atlantic and Mediterranean.
Her crew named her “The Mean Machine” and the nickname was to remain with her throughout her service.
Courageous underwent a major refit in Chatham from September 1976 to August 1978 following which she returned to operational duties. She was then to become the trials submarine for the Royal Navy Sub-Harpoon missile and was based at San Diego in the USA for nine months. During the Falklands Conflict of 1982 Courageous served in the South Atlantic.
Courageous was finally paid off at Devonport in April 1992 where she was fully de-fuelled and laid up.
In 2002 she was removed from mothballs and moved to No. 3 Dock where she was open to the public as a unique exhibit in the UK. Ongoing problems with the caisson, which seals the dock, necessitated her move back to 3 Basin in 2007 where she is currently once again open to the public.
In 2022 Courageous celebrated 20 years service as the only nuclear submarine on public display in the United Kingdom, and one of only 2 in Europe (the other is the French ballistic missile submarine Redoubtable in Cite de la Mer museum in Cherbourg).
Price: £1950
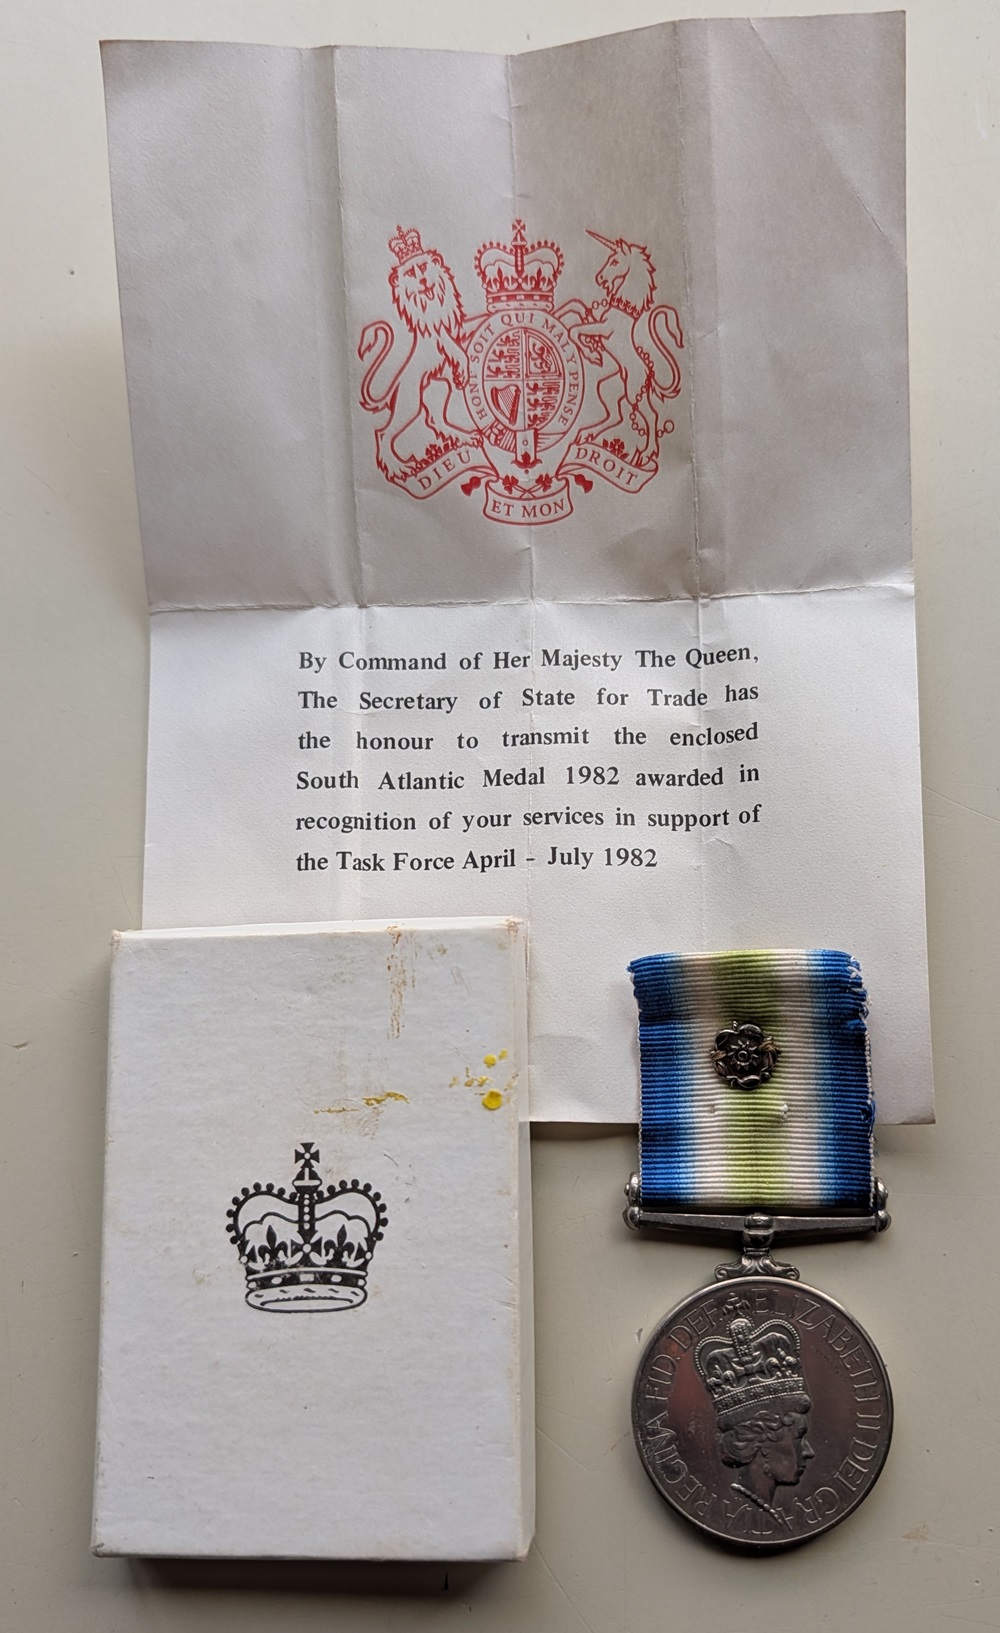
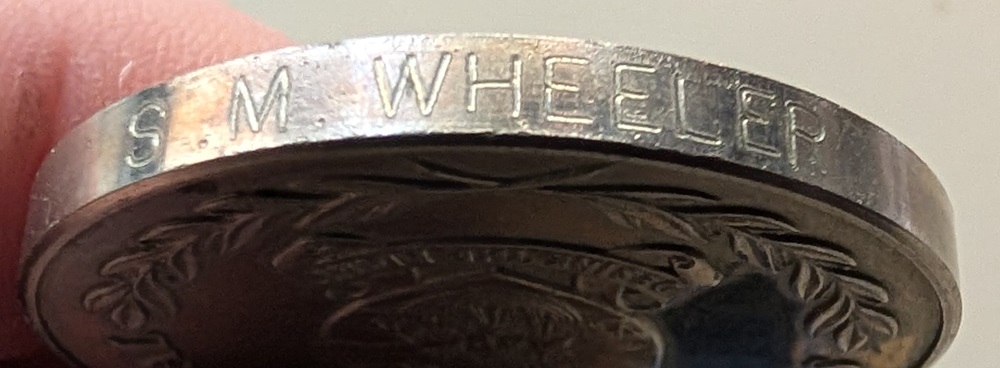
South Atlantic Medal (with Rosette)
MV Elk
S M Wheeler
(23 medals issued to ship, according to the Merchant Navy Medal Roll)
Operation Corporate
‘Two Gun Ship’
The MV Elk was requisitioned by the UK Government for service in the Falklands war as a transport vessel on 4th April 1982.
Two troops (3 and 4) from B Squadron, The Blues and Royals were tasked to travel south. Vehicles were transported aboard the M/V Elk while crews embarked on the SS Canberra. The vehicles taken were Scimitar, Scorpion and a single Samson. After arriving at Ascension Island and engaging in some range practice the vehicles were then moved aboard HMS Fearless in readiness for the amphibious landing at San Carlos.
P & O’s ro-ro ferry Elk became the Royal Navy’s first ‘Two Gun Ship of the Line’ when her twin 40/60 Bofors were mounted during her call at Ascension Island. The guns crews consisted of eager volunteers from the Royal Navy, Royal Marines, Army and RAF personnel; in addition, a backing crew of P & O officers and crew were also trained. Captain John Morton, the ship’s master, in his report dated 16 April said: ‘A great variety of emergency drills, intelligence briefs, first aid lectures, vehicle running, weapon training and physical jerks continued throughout the day with the ship’s staff, surprisingly enough, joining in. The last time I saw the cook, he was learning to strip and re-assemble a machine gun.’
AW Task Group
Elk sailed from Ascension as part of the AW Task Group, tactically loaded for support of an amphibious landing and with a full complement of helicopters. The group, which also included Canberra, Norland, Atlantic Conveyor and
On meeting the Task Force outside the Total Exclusion Zone (TEZ) on 16 May, two hectic days of cross-decking of first line ammunition and stores took place and all Elk’s helicopters were disembarked. She then remained with the Task Force, with the Brigade’s entire war maintenance reserve of ammunition on board, until ‘called forward’ for three overnight runs into San Carlos to land essential stores and vehicles and re-supply rations and ammunition. Following the Argentinean surrender, Elk remained in San Carlos for two days before loading the entire Commando Logistic Regiment and stores and transporting them to Port Stanley where she arrived on 20 June.
In the case of MV Elk, the ammunition and explosive ship, an LSL was laid alongside her using a Mexefloat and between the ramps which increased the inter-ship transfer rate to between 60 to 80 tonnes per hour.
After her service in the South Atlantic, MV ELK was returned to P&O in July 1982.
Her African Grey Parrot mascot, Lord Nelson, made it through the conflict without losing a feather
With Box of issue
Price: £550
South Atlantic Medal (with Rosette), Gulf War Medal with 16 Jan-28 Feb 1991 Clasp, Saudi Liberation of Kuwait Medal & Kuwait Liberation Medal
South Atlantic Medal with Rosette – Stwd K W Stockwell
Gulf War Medal with 16 Jan-28 Feb 1991 Clasp – Stwd K W Stockwell RFA
Operation Corporate – Falklands Conflict
When the Falklands War began, the ship was deployed in the western Mediterranean for the annual Spring Train exercise, and received orders to head south, taking part in the landings at San Carlos Water as a stores and ammunition ship. When the order to head south was given, several warships had the WE.177A nuclear weapon deployed aboard. Amongst these were the Type 22 frigates HMS Broadsword and HMS Brilliant and the aircraft carriers HMS Hermes and HMS Invincible. Some newspaper reports also named RFA Fort Austin. The Ministry of Defence explored various options to transfer these nuclear weapons from the frigates to the safety of the deep magazines aboard Fort Austin, Hermes and Invincible. An MoD publication describes a complex series of manoeuvres to avoid the presence of these nuclear warheads in areas that would break the UK obligation to the Treaty of Tlatelolco, often referred to as the Latin-America Nuclear Free Zone. In no circumstances could ships carrying nuclear weapons enter territorial waters around the Falkland Islands. After the conflict ended, weapons were transferred at sea to the two RFAs Fort Austin and Resource for transport back to the UK.
29 March 1982 returning to the UK from Armilla Patrol duties, she arrived at Gibraltar and then sailed to the South Atlantic with stores for HMS ENDURANCE and service during Operation Corporate – the Falklands Conflict. Was the first surface ship ordered south
6 April 1982 was the first Task Force ship to arrive at Ascension Island and loaded stores which had been delivered to the Island by C130 transport aircraft. Lynx HAS2 helicopter no: XZ242 – on the ship for delivery to HMS NEWCASTLE
8 April 1982 Wessex HU5 helicopter No: XT765 – to the ship
9 April 1982 sailed Ascension Island with 3 x Lynx and 2 x Wessex helicopters, 120 men of combined SAS/SBS force and an RN Surgical Team embarked to meet the Ice Patrol Ship HMS ENDURANCE
12 April 1982 replenished HMS ENDURANCE then headed back north to meet the South Georgia Task Group
13 April 1982 rendezvoused with RFA TIDESPRING for a fuel transfer and to transfer food, ammunition and the SAS/SBS teams to the destroyer HMS ANTRIM and the frigate HMS PLYMOUTH and to transfer a full RN Surgical Support Team to RFA TIDESPRING in preparation for the retaking of South Georgia
16 April 1982 rendezvoused with TG 317.8/11 consisting of the destroyers HMS’s COVENTRY, GLAMORGAN, GLASGOW and SHEFFIELD and the frigates HMS’s ARROW and BRILLIANT which was also joined by RFA APPLELEAF(3). RASed with HMS BRILLIANT. Coventry rendezvoused with RFA Fort Austin to swap their Lynx (XX700, ‘Lady Godiva’) for a Sea-Skua equipped example (XZ242 ‘Wee Geordie’, formerly of HMS Newcastle’s Ship’s Flight). Coventry’s Lynx helicopter crew familiarised themselves with the handling and firing of the new Sea Skua anti-ship missile, and cobbled together swivel mounts for machine guns to fire out of the cabin doors using office chair bases! When a proper mount was made available it was found to foul the Sea Skua hardware inside the cabin, so was instead attached to a bollard on the flight deck for local defence.
17 April 1982 Lynx HAS2 helicopters no: XZ241 & XZ700 – in the ships attached flight
21 April 1982 arrived back at Ascension Island to restore
23 April 1982 sailed Ascension Island to rejoin the Carrier Battle Group
26 April 1982 entered the TEZ (Total Exclusion Zone) around the Falkland Islands
3 May 1982 rejoined the Carrier Battle Group
4 May 1982 embarked 170 survivors and the Lynx helicopter from the stricken destroyer HMS SHEFFIELD after the Exocet attack on her
5 May 1982 Lynx HAS2 helicopter no: XZ240 – in the ships attached flight
9 May 1982 RASed with HMS HERMES
16 May 1982 recovered a number of Special Forces and their equipment which had been parachuted into the South Atlantic from a Hercules transport aircraft
17 May 1982 RASed with RFA RESOURCE
21 May 1982 entered Falkland Sound along with the HMS FEARLESS Group and claimed a kill on an Argentinean aircraft in San Carlos Water
24 May 1982 near-missed by Argentinean bombs in San Carlos Water along with RFA’s RESOURCE and STROMNESS
25 May 1982 embarked survivors from the destroyer HMS COVENTRY and sailed from San Carlos Water
2 June 1982 RASed with HMS INVINCIBLE
3 June 1982 was relieved by and RASed with RFA FORT GRANGE and RASed with HMS BRILLIANT, HMS GLASGOW, RFA RESOURCE and HMS INVINCIBLE
5 June 1982 began transferring stores to RFA FORT GRANGE
6 June 1982 sailed for South Georgia then back to the U.K
8 June 1982 arrived South Georgia
11 June 1982 sailed South Georgia for home
16 June 1982 RASed with RFA PLUMLEAF at 22°05S 18°56W receiving 704 tons of bunker fuel and arrived Ascension Island two days after the Argentinian surrender and was one of the first ships to return home after Operation Corporate
28 June 1982 arrived back in Devonport on completion of Operation Corporate duties.
With medal ID discs (Dog Tags)
Price: £850
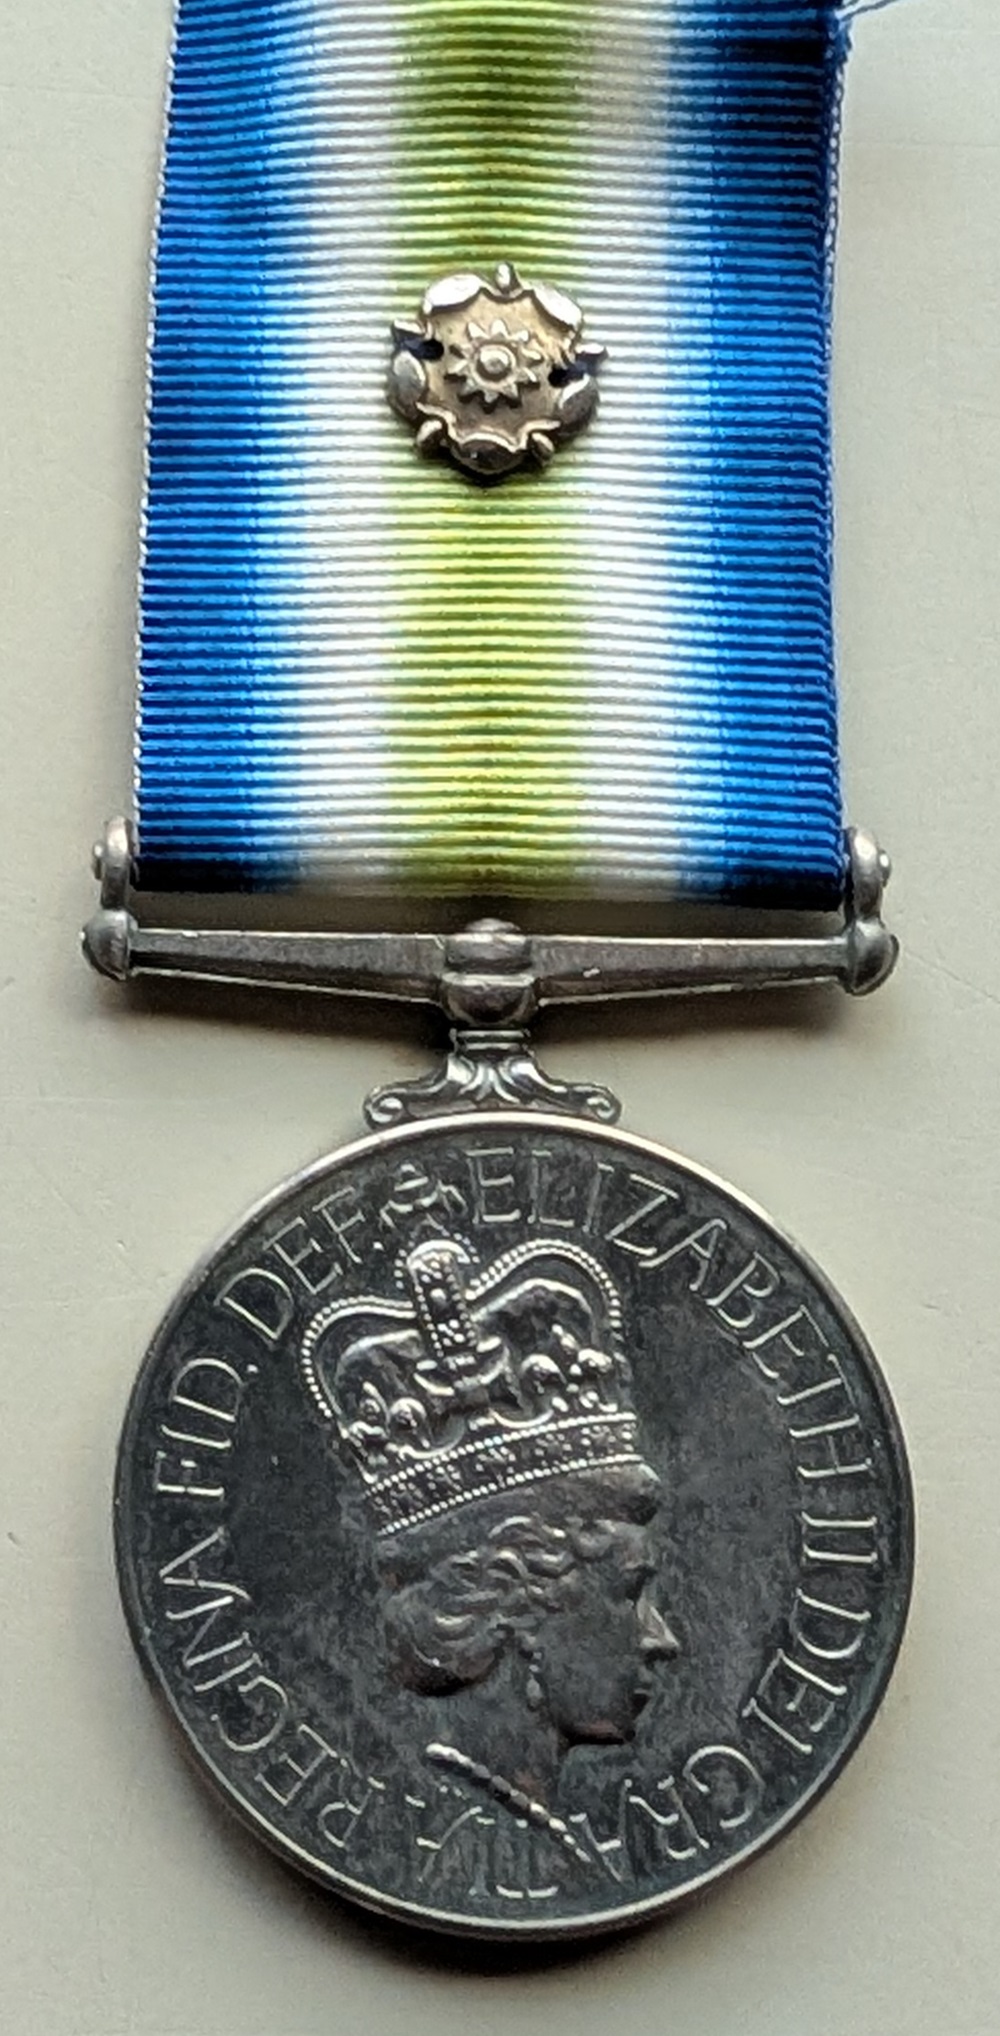
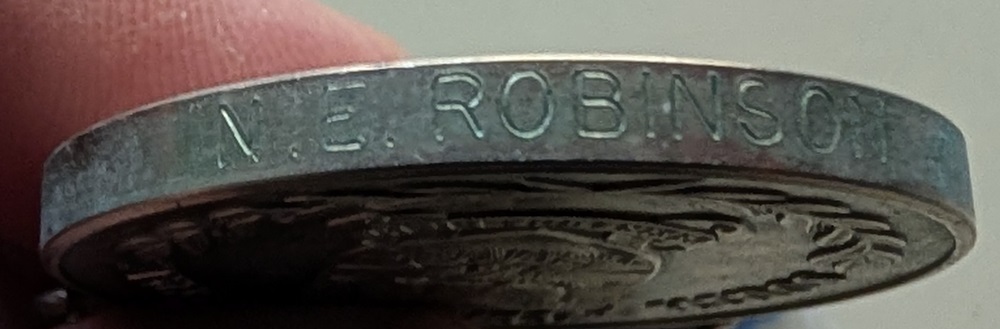
South Atlantic Medal (With Rosette)
MV Geesport
N E Robinson
Operation Corporate
The MV Geestport was requisitioned by the UK Government to transport food and supplies to the Falklands as a Forward Support Ship.
On the 9th May 1982 she sailed into Portsmouth for conversion, which included fitting a helicopter landing platform and RAS gear. She then sailed South on the 21st May, Captained by Capt G F Foster with NP1920, 2nd Officer R Bourne RFA.
At the Surrender on 14th June, Geesport was operating in South Georgia’s waters.
37 medals awarded to Geestport
Price: £550
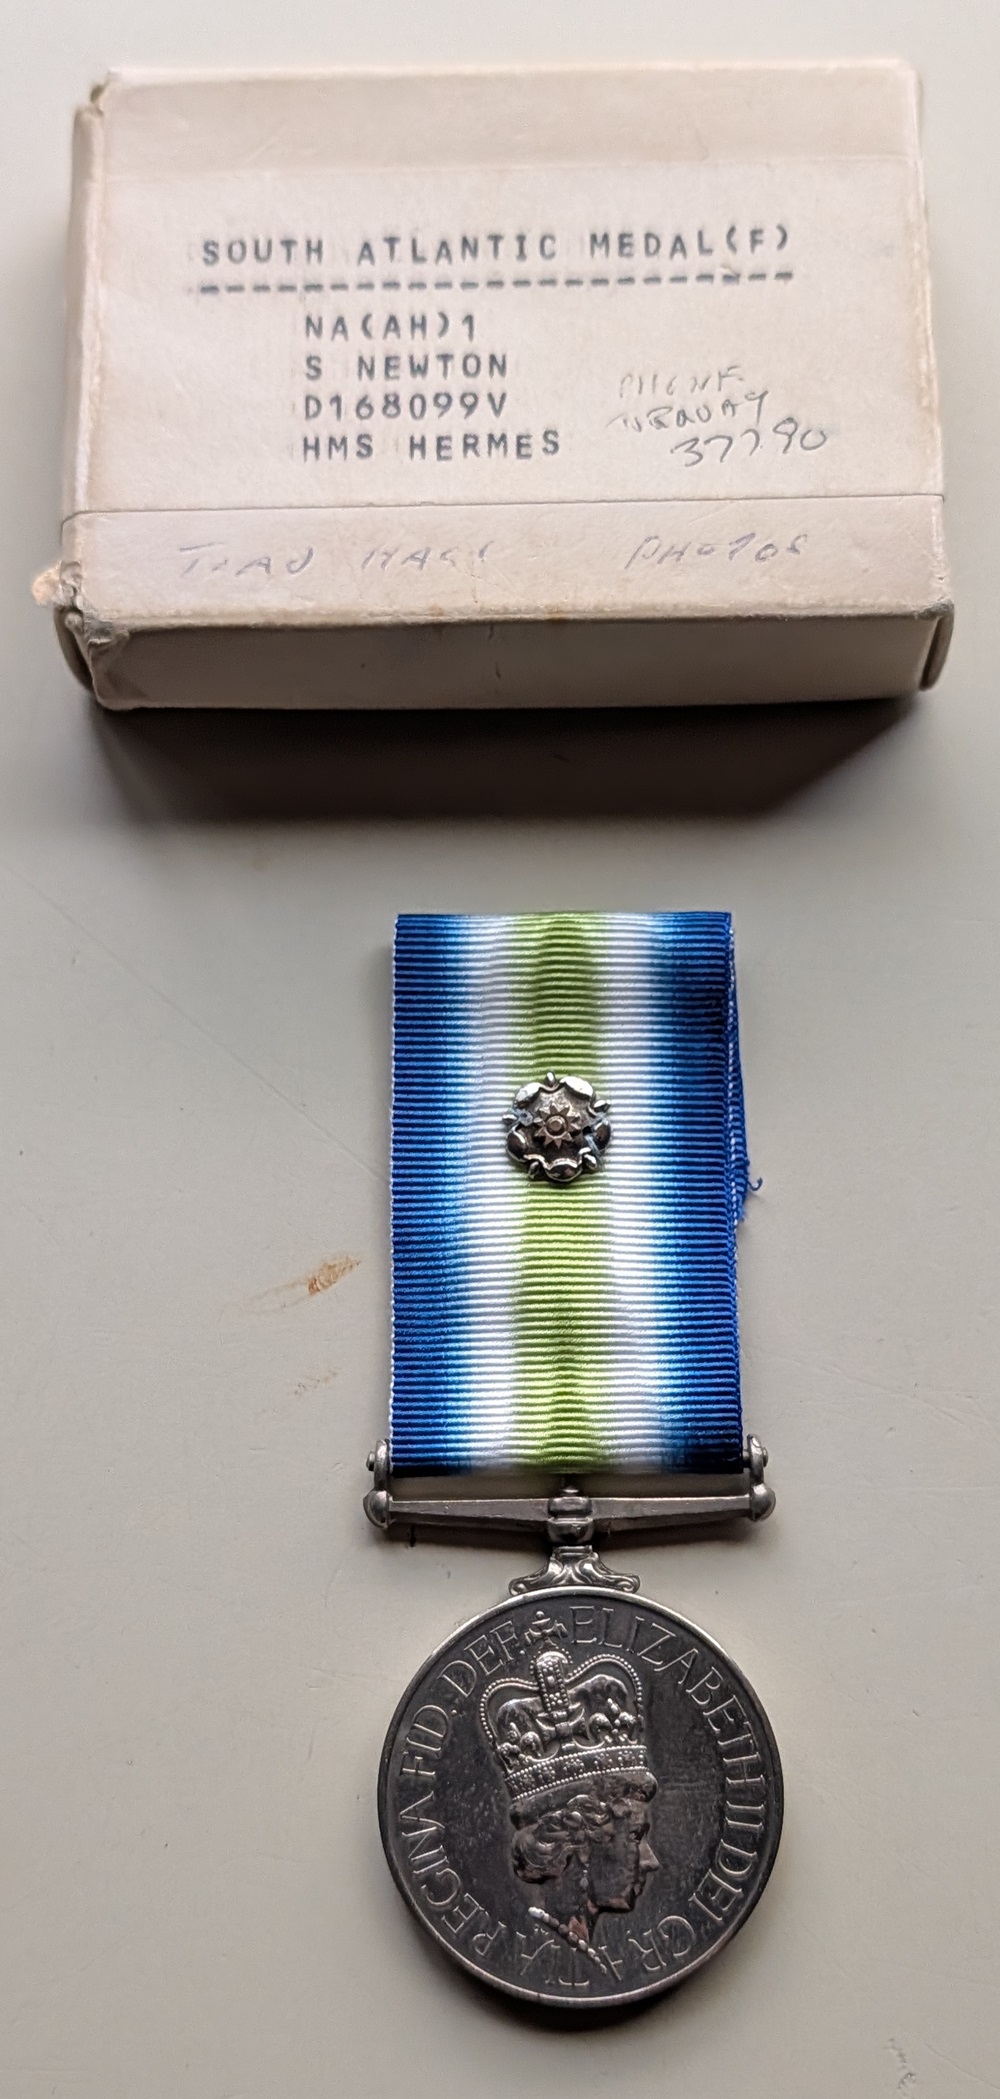
South Atlantic Medal (with Rosette)
HMS Hermes
NA(AH) (Naval Airman Aircraft Handler) 1 S Newton D169099V
“Happy H,” as she was affectionately known by her crew, served in the Royal Navy from 1959 to 1984. She had a lengthy, varied career, operating in several roles. Completed as a strike carrier, in early 1970s her catapults were removed and her fixed-wing aircraft landed. First she was converted to a “Commando Carrier” with helicopters and LCVP Mk.2 landing craft to embark Royal Marine assault forces. Soon after she became an Anti-Submarine Warfare (ASW) carrier, with an air complement oriented around ASW helicopters. This new conversion was intended to counter the threat of Soviet submarines.
Her most significant modernization occurred in 1981, when in order to operate Sea Harrier STOVL (Short Take-off and Vertical Landing) jets, she was refitted with a prominent “ski jump” at the leading edge of the flight deck. She emerged from refit as a multi-role carrier, able to carry a flexible, well-rounded air complement of strike and ASW aircraft, while still being able to carry assault/landing forces.
The Falklands War
Her service as flagship during the Falklands War stands out. Hermes left for the South Atlantic from HM Naval Dockyard Portsmouth 5 April, 1982, only 3 days after the Argentine landings on the Falklands. Hermes led a powerful task force which included the new carrier, HMS Invincible R-05, the nuclear-powered submarine HMS Conqueror, destroyers and frigates and other ships. This force eventually expanded to include more than 120 ships. During the conflict, she embarked an air complement of Sea Harriers, RAF GR.3 Harriers, and Westland Sea King Anti-Submarine Warfare helicopters, and also carried a troop of Special Air Service (SAS) and Royal Marines, who were forward-deployed to other ships for assault operations. The Harriers flew combat air patrols. Intended to operate nine Sea King and 5 Harriers, while in the South Atlantic, the ship carried as many as 37 aircraft! After the end of hostilities in mid-June, Hermes went back to the usual exercises, a refit, but then wound up in reserve status by late 1983. “Happy H” was decommissioned from the Royal Navy on 12 April 1984.
Air group at the height of the Falklands Conflict:
800 NAS – 16 Sea Harrier FRS.1
826 NAS – 5 Sea King HAS.5
846 NAS – 5 Sea King HC.4
No. 1 Squadron RAF – 10 Harrier GR.3
Two years later the Indian government purchased the ship, which was reconditioned at Devonport Dockyard before her departure from British waters. INS Viraat commissioned into the Indian Navy during May 1987. The acquisition of the carrier was a major development for Indian naval aviation, being significantly larger than the first carrier, INS Vikrant. Viraat was the Indian Navy’s pride and joy, serving for 26 years as the navy’s flagship, mostly homeported at Mumbai. Numerous refits at the Cochin Shipyards, Kochi kept the ship operating well into the 21st Century.
As happens to all active ships in modern navies, the vessel was eventually determined to have reached the end of its service, being uneconomical to continue to safely operate. The deactivation process gained momentum during 2014-2015 and culminated in drydock work at Kochi from Aug-Sep. 2016. INS Viraat was formally decommissioned 6 March, 2017, and remained outwardly intact at her usual berth at Mumbai.
A public campaign to save the ship from scrapping gained media attention during 2018-2019. There are several reasons for preserving this unique warship. She is the last non-US aircraft carrier of any pre-1975 Cold War design…anywhere. Her incredibly long period of service with two navies adds up to about the same time as the only comparable record: USS Enterprise CVN-65’s 55+ years of service. Hermes/Viraat is a substantially older ship, with portions of the lower hull dating from before the end of the Second World War; An important flagship for both British and Indian navies, she is also one of the last remaining combatants of either side from the Falklands War, and could usefully interpret events of that time to the public; Carriers are designed to be upgraded with new technologies to combat obsolescence, but the range of technological transformations of Hermes / Viraat is unique – A ship design intended to operate piston-engined aircraft instead wound up embarking generations of jets and helicopters.
With Box of Issue
Price £650
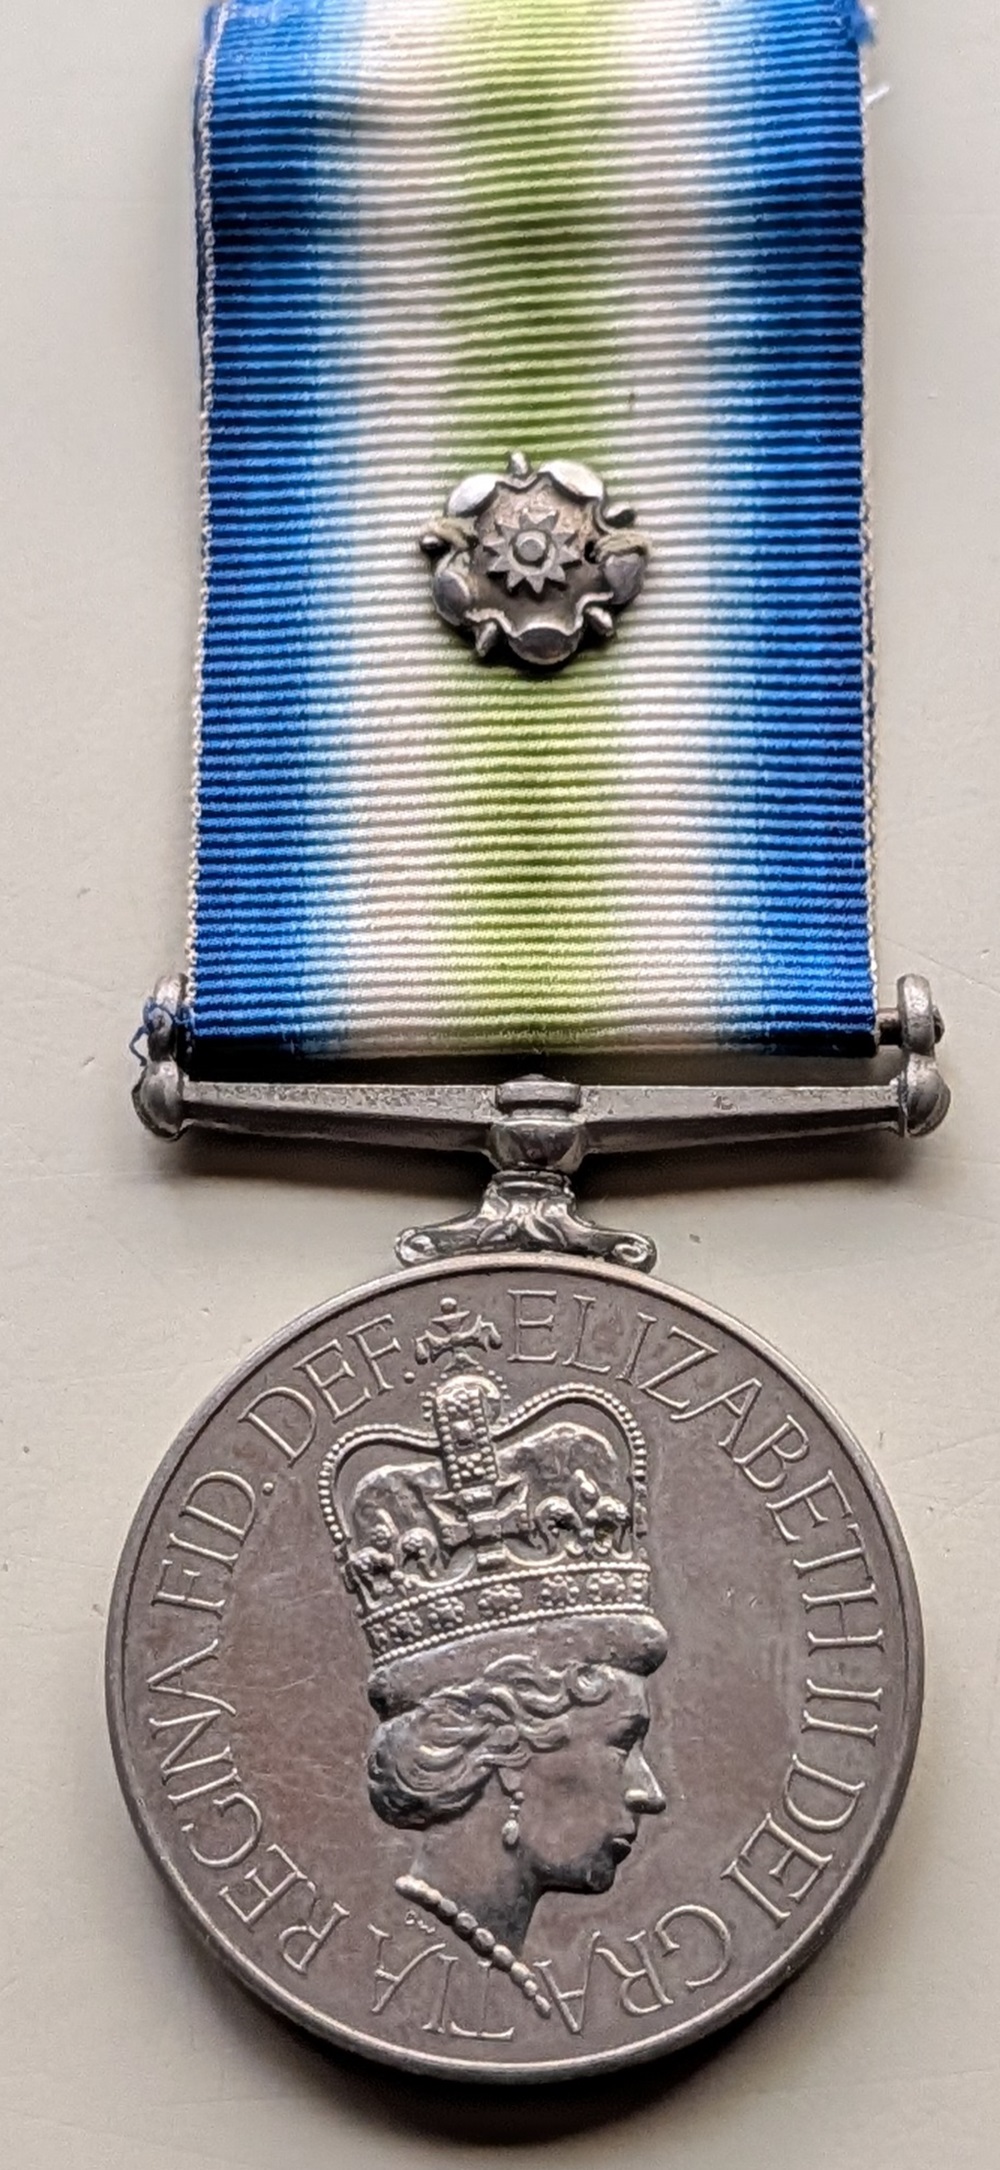
South Atlantic Medal (with Rosette)
HMS Intrepid
POSTD J D Budworth
The Falklands War
April 1982 and long-simmering hostilities broke out between the UK and Argentina over the Falklands Islands, a UK territory since 1833.
The UK despatched a task force to retake the islands, comprising 37 warships, 24 Royal Fleet Auxiliaries, six submarines and 15 Merchant Navy vessels – named STUFT ships, Ships Taken Up from Trade.
As a Royal Naval Officer, Lieutenant Edward John Perry was appointed to the landing ship, HMS Intrepid, which was described “as the last ship to arrive, the last piece of the jigsaw, and all the invasion timings depended on her.”
On arrival, Lieutenant Perry became the Engineer Officer for the Sixth Assault Squadron, Royal Marines. Here, he tells of his experiences and the demands placed on him and his team at the centre of the conflict almost 40 years ago.
Joining HMS Intrepid
HMS Intrepid had been in service since 1967. By 1982 she was decommissioned for sale, but the Argentine invasion prompted her immediate recall. The returning crew were tasked with reinvigorating this urgently-needed asset to extend its service life.
At 12,000 tons, Intrepid’s main armament consisted of four 100-ton landing craft capable of transporting stores, vehicles, ammunition and troops. The craft were contained within the ship’s dock which, when flooded, raised the ship’s displacement to 17,000 tons.
With two Babcock and Wilcox diesel fired boilers and two English Electric steam turbines driving contra-rotating propellers, the ship was capable of speeds in excess of 20 kts and a range of 5,000 nmi.
Crew complement
The returning crew consisted of 500 men, including a detachment of Royal Marines. Normally, the vessel could carry 400-700 additional personnel for short periods but, for the invasion on 21 May 1982, the ship conveyed 1,500 troops to the Falkland Islands.
Cramped conditions aboard made life difficult. Passageways were full with troops, equipment, weapons and ammunition. Galleys were working around the clock; weapon systems were at immediate readiness and the ship remained at action stations for long periods. With the attack on HMS Sheffield on 4 May, the threat from Argentinian aircraft, and submarines, was well understood by all.
It was easy to differentiate between ship’s crew and those going ashore. Land-bound troops were fully equipped to fight; crew members were dressed in working rig; carried lifejackets; ante-gas respirators and wore ante-flash hoods and gloves. The latter offered protection from explosion and fire.
The landing of Intrepid’s troops was unopposed but Argentina’s response was swift. By the end of the first day on 21 May, its aircraft had inflicted significant damage to British warships, the worst being to HMS Ardent. Devastated by bombing, with several major fires, she was abandoned and sank. Her crew transferred to P&O’s liner Canberra, a STUFT ship.
Once anchored in San Carlos Water, Intrepid became the special forces’ operating base with further elite troops transferred from HMS Hermes.
Wet, cold and hungry, special forces returned to the ship’s warmth for hot food, a change of clothes and a brief rest. However, their stay onboard was short, as there was much to do ashore.
By the end of the first week everyone was tired. On our first day in San Carlos Water we remained at action for over 20 hours and similar timescales continued throughout the week. Many ships suffered damage, inflicted by incoming aircraft. This could have been more severe, had it not been for the Sea Harrier Combat Air Patrols from carriers Hermes and Invincible. Even so, by the end of the first week, two more warships, HMS Antelope and HMS Coventry, had been lost.
As the battles progressed, Argentine aircraft focused their activities ashore around the capital, Port Stanley with Intrepid’s landing craft delivering and recovering personnel at points around the islands.
Daily, when an opportunity arose, I would check how my team, and the landing craft, were faring. Opportunities like this were rare, as my time at action was spent in the ship’s damage control centre.
Operations end
The end came on 14 June 1982 with the successful recapture of Port Stanley, and the Argentinian surrender. Afterwards, Intrepid visited several of the archipelago’s islands, repatriating prisoners and supporting the Falkland islanders.
Finally, on 26 June, we sailed for home. From a South Atlantic winter to summer in the United Kingdom, everyone was looking forward to the journey.
Heading home to Portsmouth over the next few weeks, we passed warships steaming south on the way to relieve ships still there.
Price: £850
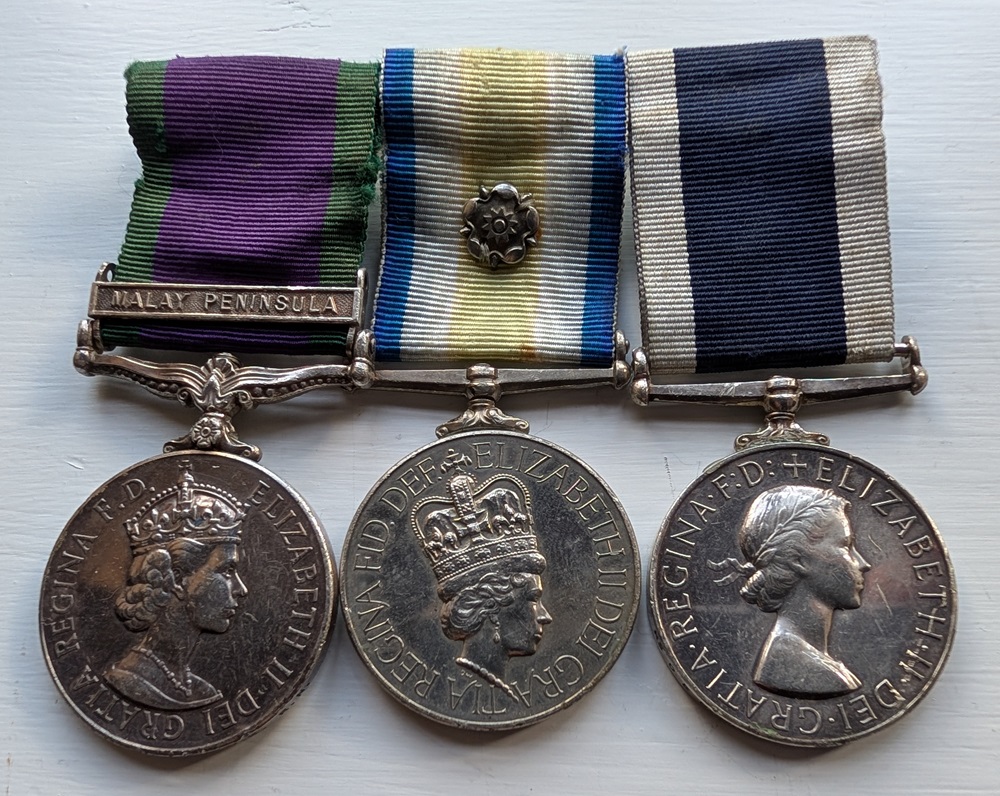
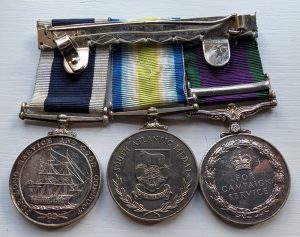
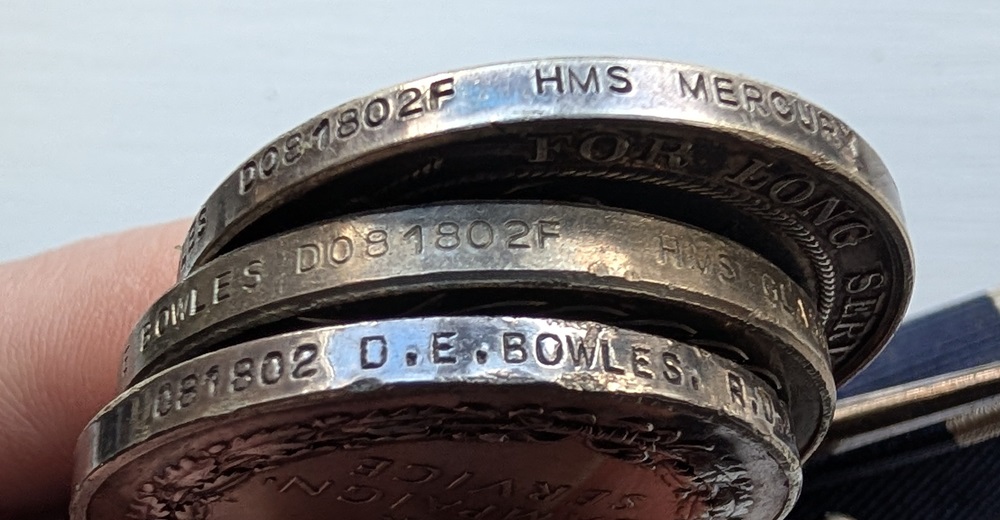
GSM 1962 “Malay Peninsula”, South Atlantic Medal, Royal Navy LSGC
HMS Glasgow
(HMS Mercury on LSGC)
D081802F Radio Supervisor D E Bowles (Chief Petty Officer Rank)
Date of Enlistment approx April / May 1964
The Falklands War
Glasgow was among the five Type 42 destroyers which were part of the Task Force sent to retake the Falkland Islands after invasion by Argentina on 2 April 1982. Armed with the Sea Dart long range anti-aircraft missile system, Glasgow along with her sister ships, Sheffield and Coventry were among the first ships to arrive in a 200-nautical-mile (370 km; 230 mi) exclusion zone imposed by the British around the islands.
Glasgow was deployed towards the South Atlantic direct from Gibraltar, where 18 Royal Navy frigates and destroyers were taking part in “Exercise Spring Train”. On Friday 2 April 1982, 8 of the frigates and destroyers (Antrim, Arrow, Brilliant, Coventry, Glamorgan, Glasgow, Plymouth and Sheffield) were ordered by CINCFLEET (Commander-in-Chief Fleet) to “store ship” ready to sail south. The stores, fuel and ammunition required for full operational readiness came from a combination of sources, but mostly from the other ships already in Gibraltar at that time. Using a ‘buddy ship’ replenishment approach, the ships with less suitable sensor and weapon suites went alongside the deploying ships to transfer stores and ammunition, either by hand or using helicopter VERTREP (Vertical Replenishment). There were also a number of crew exchanges between the ships deploying and ships returning to the UK i.e. juniors under 17.5 years or crew with other compassionate / operational situations.
Glasgow saw action early in the war when, on 2 May, her Lynx helicopter severely damaged the Argentine naval vessel Alferez Sobral. On 4 May, Glasgow detected an Exocet missile fired at the Task Force and warned the fleet. However Sheffield failed to receive the warning and was hit, later sinking. Down to two Type 42s (Exeter and Cardiff would not arrive until the end of May), Glasgow and Coventry were left as the long-range defence of the fleet.
Following the loss of Sheffield, a new air defence tactic was devised to try to maximise the task group’s remaining assets; the two remaining Type 42 destroyers paired up with the two Type 22 frigates. The pairs were then deployed much further ahead of the main force in an effort to draw attacking aircraft away from the carrier groups. The idea was that if Sea Dart was unable to neutralise the threat, the short-range Sea Wolf advanced point-defence missile fitted to the frigates could be used. Coventry was paired with Broadsword and Glasgow paired with Brilliant. This combination of ships created a long-range (30 n.miles), short-range guided missile capability along with shore bombardment or NGS (Naval Gunfire Support) using the Type 42’s 4.5-inch guns (range 12 n.miles).
This ‘picketing’ tactic was effective in drawing Argentine aircraft attacks away from the carrier groups and moderately effective in drawing them away from San Carlos Bay. The pairs would take turns positioning themselves closer to the islands, shelling Argentinean positions and then waiting for the aircraft to come.
On 12 May, Glasgow and the Type 22 frigate Brilliant were on a “42-22” combo around 15 miles south west of Port Stanley. At 11:00 Glasgow was carrying out shore bombardment of Argentinean positions. Then later in the afternoon a wave of four A-4B Skyhawk jets of Grupo 5 attacked. Glasgow’s Sea Dart system and 4.5 inch Mk.8 gun both failed, but Brilliant’s Sea Wolf shot down 1st Lt Oscar Bustos (C-246) and Lt Jorge Ibarlucea (C-208), whilst Lt Mario Nivoli (C-206) crashed into the sea evading debris. All three pilots died in the action but were posthumously promoted.
Despite the losses in the first wave, a second wave of Grupo 5 Skyhawks attacked, but Brilliant’s Sea Wolf failed and the jets each released three bombs. One bomb from Skyhawk (C-248) piloted by Lt Fausto Gavazzi damaged Glasgow, passing clean through the aft engine room without exploding. It damaged fuel systems and disabled the two Tyne cruising engines. A third wave of aircraft was detected but they did not engage the ships. On his return flight, Lt Gavazzi was shot down by friendly fire over Goose Green and killed. Gavazzi was posthumously promoted to Capitan for his bravery.
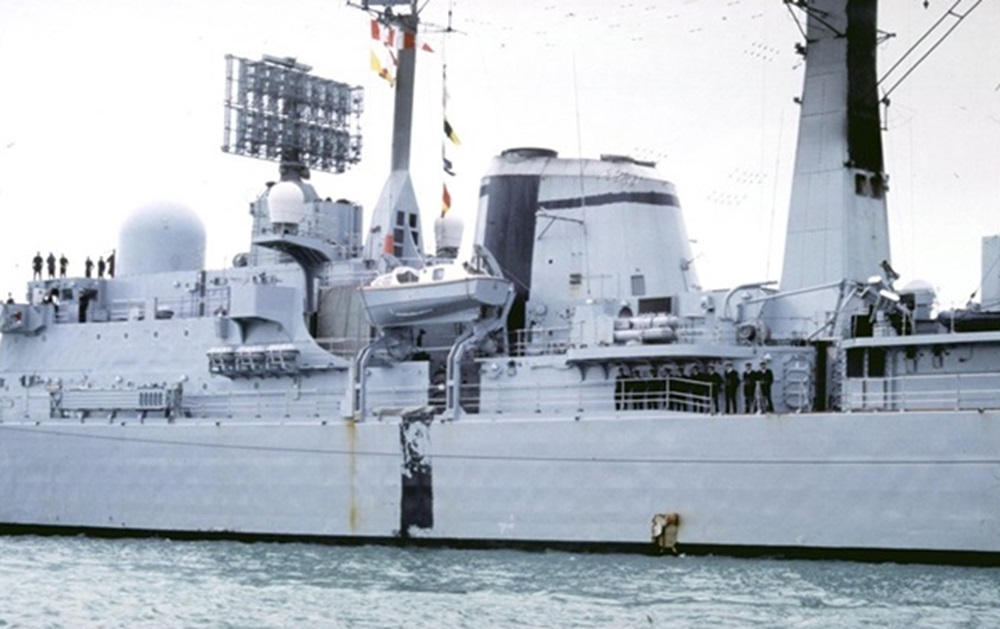
Lt Gavazzi’s bomb had hit Glasgow 3 feet above the waterline on the starboard side where damage control teams quickly plugged the hole. The exit hole was much more difficult to access behind machinery and closer to the waterline, so the ship was temporarily patched until it could reach calmer waters. The Glasgow was no longer fully operationally effective due to a limited speed of 10 knots and returned to the main group. Glasgow eventually returned home to be repaired in Portsmouth Dockyard. Glasgow then returned to the South Atlantic after the end of the war (August 1982) on routine Atlantic Patrol South.
Post-war
In later years, Glasgow served on a variety of missions including acting as the West Indies Guard Ship (WIGS) in 1987. Glasgow had a major refit in Rosyth during 1988–89 which included major machinery replacements, weapons and sensor upgrades including replacing her dated 30mm Oerlikons with 20mm Phalanx. While performing sea trials, issues with the new propulsion system and new radar meant she had to keep returning to port. 1990 saw her calling at New York and Toronto. In 1991, the destroyer deployed to the Persian Gulf on ARMILLA Patrol just after the Gulf War. In 1992, the warship was sent to the Mediterranean for the first time as part of the NATO naval force, STANAVFORMED. Glasgow was deployed to East Timor as part of the Australian-led INTERFET peacekeeping task force from 19 to 29 September 1999. In early 2004, the ship was deployed on the Atlantic Patrol South tasking. Like most Royal Navy Ships, HMS Glasgow maintained a proud and productive relationship with her namesake city of Glasgow; visiting Yorkhill Quay on the River Clyde on several occasions during her commission.
Mounted as worn. Some edge knocks to GSM.
Price: £1450
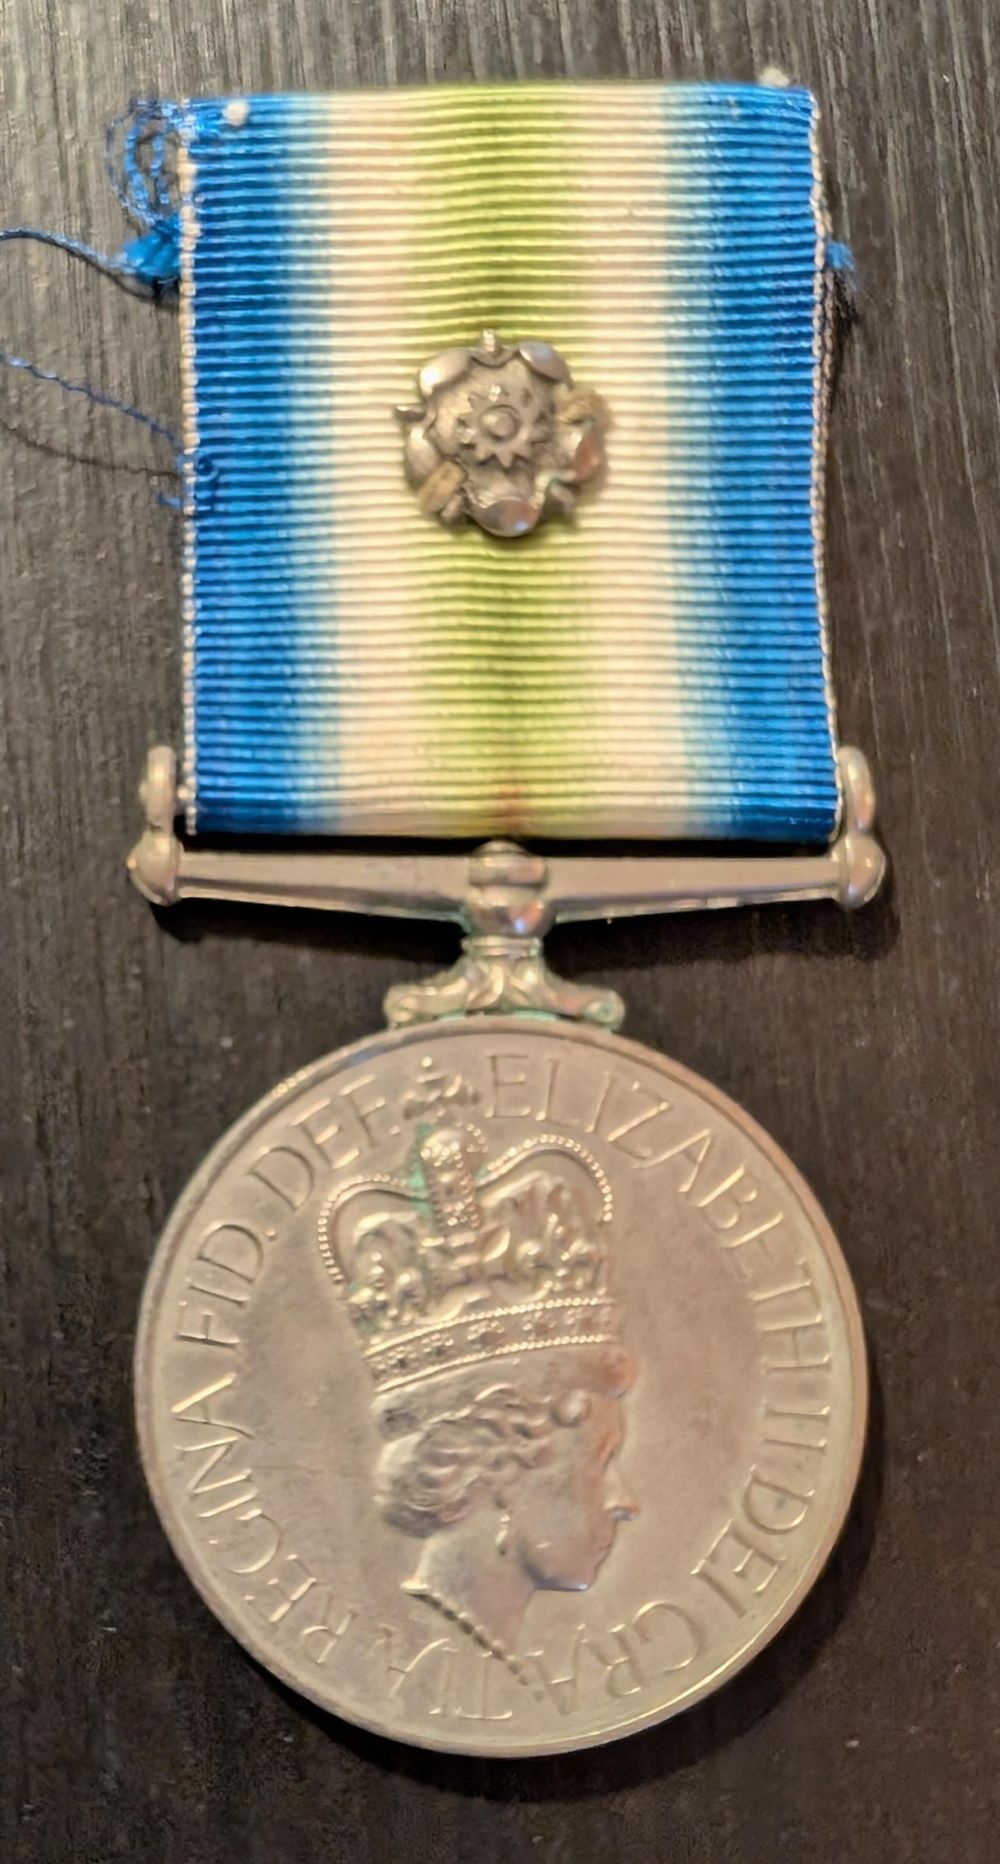
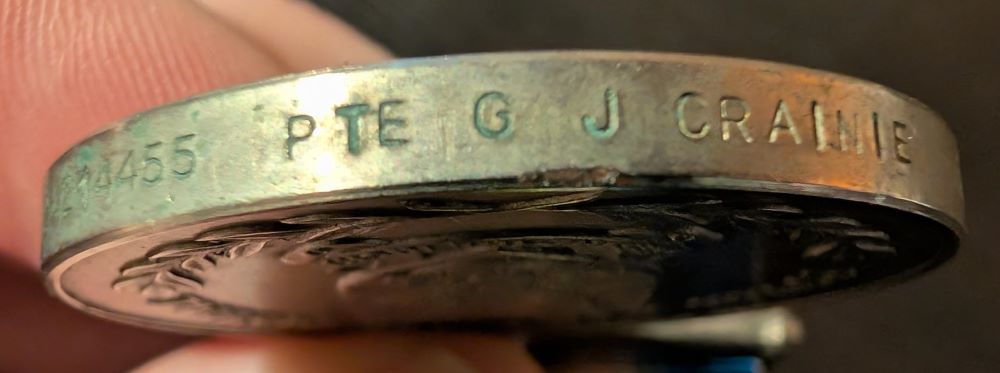
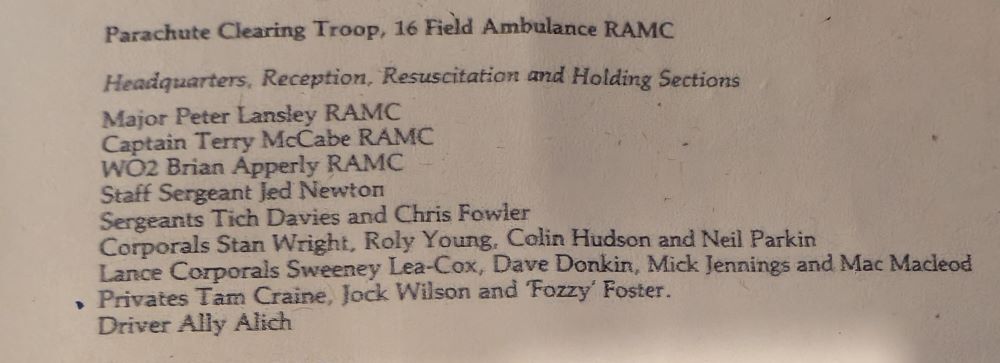
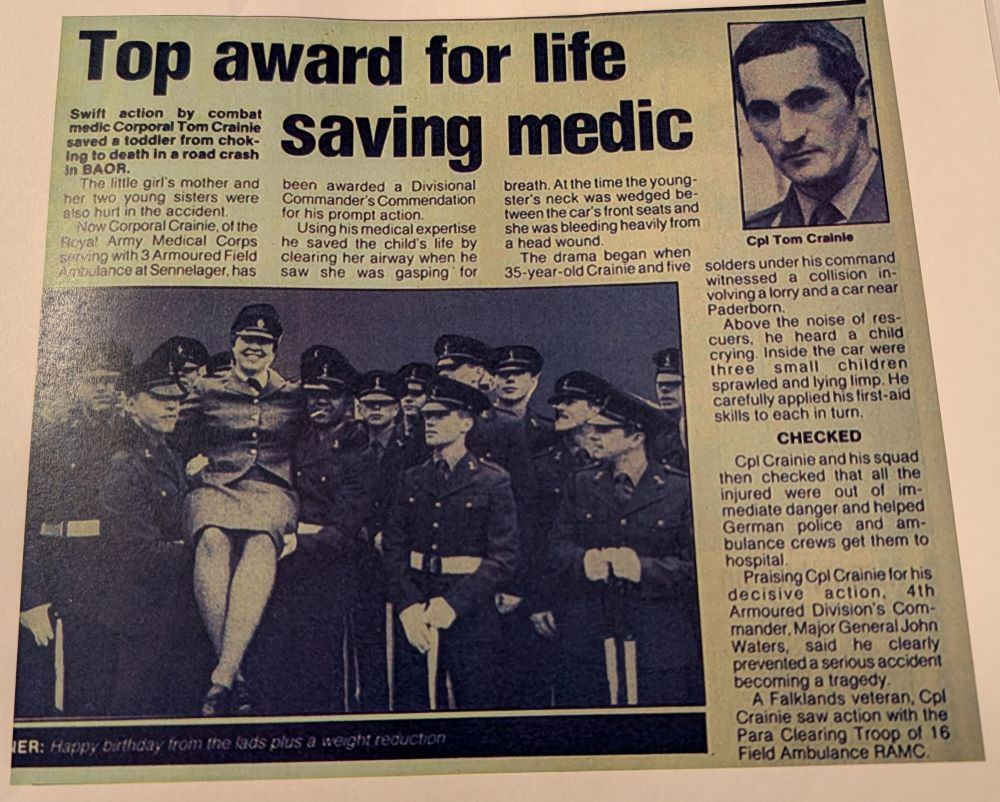
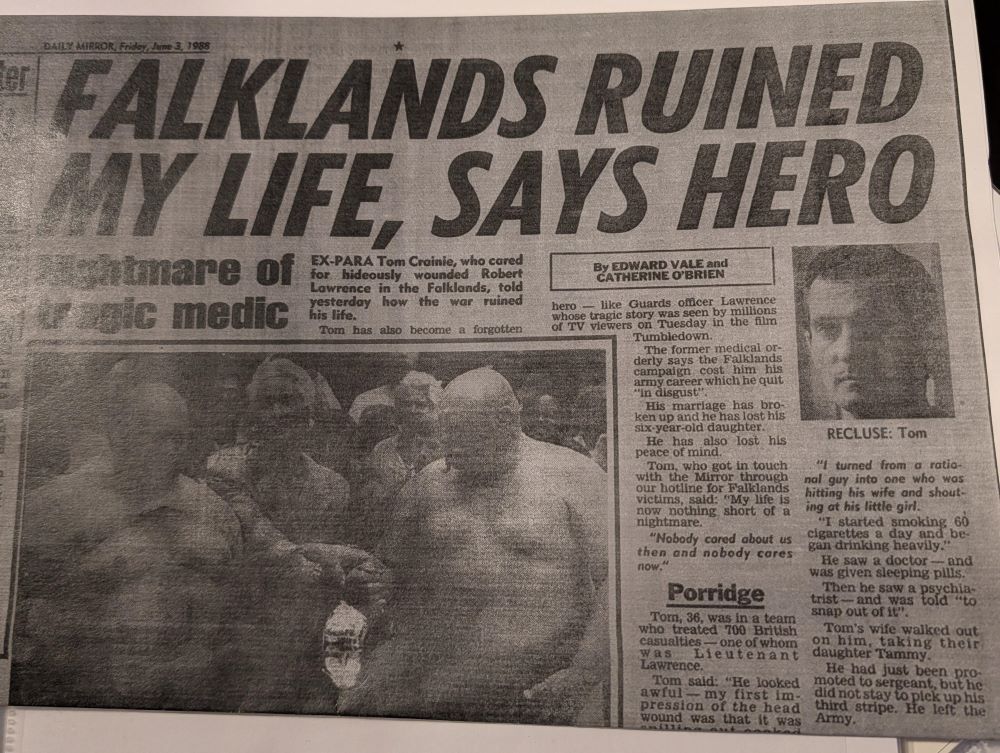
South Atlantic Medal
Parachute Clearing Troop (PCT)
24214455 Pte Gordon Thomas Crainie RAMC
Known as “Tom”, medal middle initial incorrectly impressed “J”.
Enlisted: 20.10.70
Married: Sarah J Smith, Aldershot 1980
Discharged: 13.05.86
Lived: St John’s Wood, North London
Falklands
Crainie served with the Parachute Clearing Troop (PCT) in the Headquarters, Reception, Resuscitation and Holding Section under Major Peter Lansley RAMC, as part of the “Red and Green Life Machine” at Ajax Bay.
On the 8th June, the 16th (Para) Field Ambulance were on board the ill-fated Sir Galahad whilst it waited to disembark troops. They lost 3 members killed that day.
In a newspaper article in the Daily Mirror in June 1988 he related a story about how his life and fallen apart after returning from the Falklands.
During his time in the Falklands he was responsible for looking after Lt Robert Lawrence, Scots Guards who had lost part of his head and brain from a bullet wound. He described the wound as “spilling out cooked porridge”
Soldier Magazine January 1985: Awarded Divisional Commanders Commendation for saving a child’s life who had been in a car crash whilst stationed in Sennelager, Germany.
Price: £1450
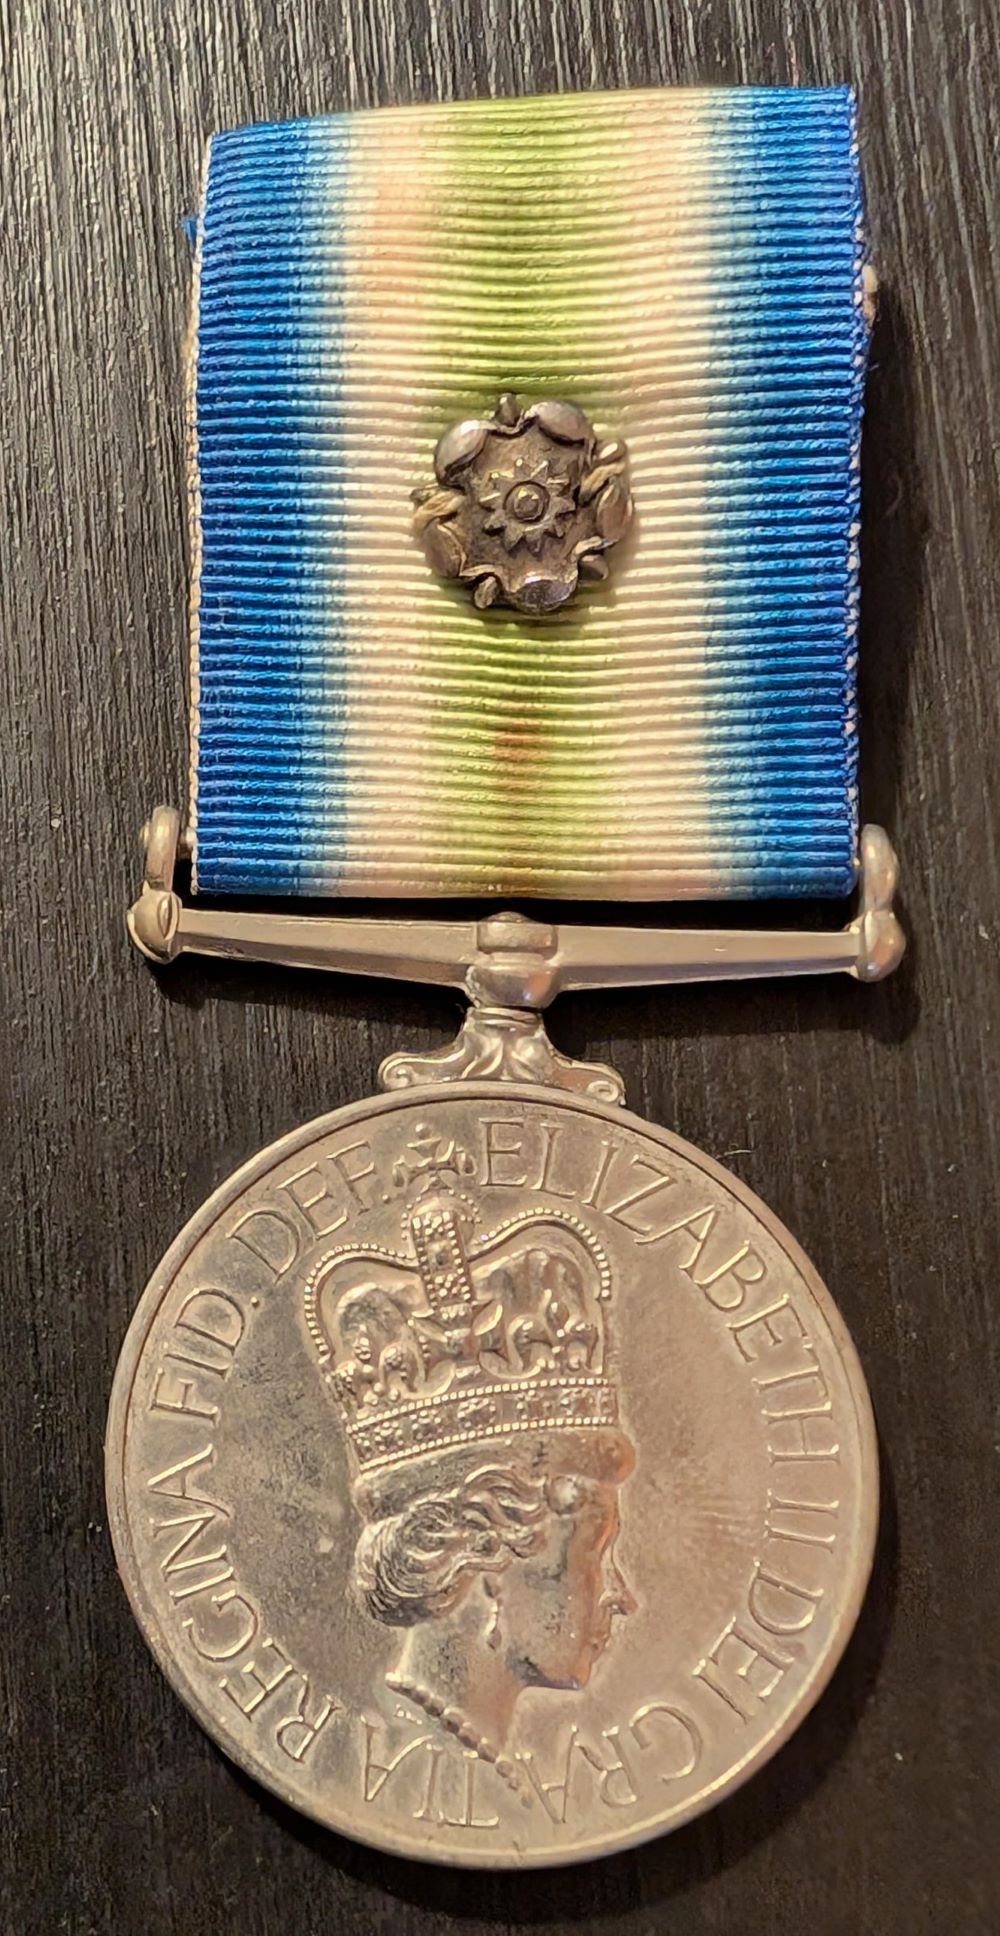
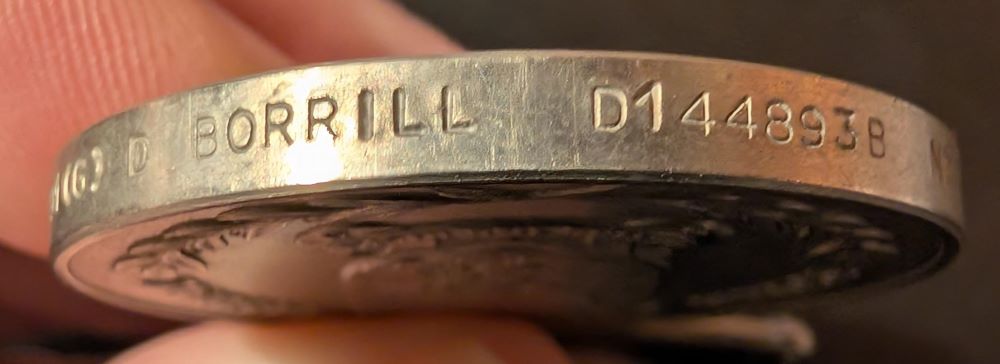
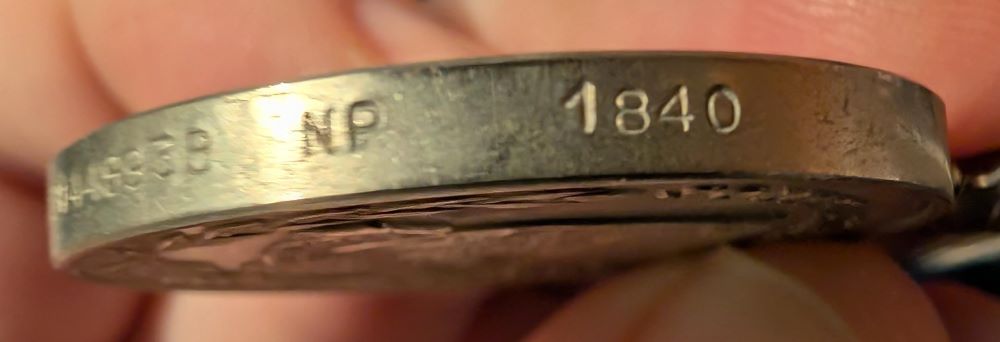
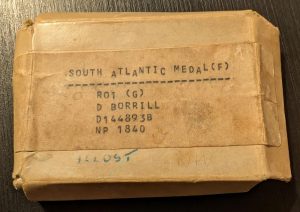
South Atlantic Medal
With Box of Issue
SS Atlantic Conveyor
Radio Operator 1st Class (General) D Borrill D144893B NP 1840
Note: Naval Party 1840 was a specialised Royal Navy unit comprising of Aircrew and aviation support personnel based onboard The Atlantic Conveyor.
The Falklands
Taken from on-line source https://www.atlantic-conveyor.co.uk/:
The Atlantic Conveyor was initially taken up from trade for adaptation into an aircraft ferry on 14th April 1982 but ended up resembling a WWII merchant aircraft carrier equipped with Harrier jets and helicopters. After her newfound capabilities were shown off to the press on 25th April, little more was heard of her until the 25th May when she was destroyed by Exocets most probably aimed at the nearby British flagship, HMS Hermes.
Conversion and Preparation (Early April 1982)
When Ministry of Defence (MoD) planners realised there would be a need to supply the deployed Falklands Task Force aircraft carriers, HMS Hermes and HMS Invincible with spare Harrier vertical take-off jets, they started looking around for a ship with a suitable flat deck capable of transporting required aircraft to the war zone.
By the second week of April 1982, they’d approached Cunard to make use of the Atlantic Conveyor which was laid up in Liverpool. The company agreed to release the ship along with a volunteer civilian crew to sail her south. The only problem was that the ship would need to be altered to allow the embarked Harriers to be flown on and off as there would be no other way of physically transferring the aircraft to the carriers at the destination.
Accordingly, huge metal plates were welded on fore and aft to form flight decks before the ship moved to Devonport Dockyard for fitting out. There, during a frantic ten-day conversion, the ship was provided with the means to store, repair, refuel, arm, launch and recover Harriers and helicopters. Life rafts and ladders were added and a magazine created at the bow to house cluster bombs. Pieces of equipment salvaged from laid-up warships were used to transform the existing sickbay into a makeshift hospital after asbestos dust was removed. Conveyor’s fuel system was modified so she could refuel at sea and fire mains and fire fighting equipment were added fore and aft.
Meanwhile, as news spread around the MoD that there was a transport ship with capacious cargo decks about to head south at speed, logistics teams from all services started dispatching lorries and railway trucks full of equipment to be loaded on board before she sailed.
In the end, local establishments were turned out and even helicopters employed to somehow help pack the delivered stores onto the ship, including such things as a tented city, a portable runway, equipment for constructing an airfield, small boats, containers, gas, bombs, missiles, thousands of gallons of kerosine, electronic equipment, paper, food for hundreds of crew for six months, and every conceivable item planners thought the deployed forces might need.
By 24th April, everything that could be done had been done. But, time had now run out. Conveyor was to leave port with no military radar, usable weapons, or chaff launchers and any remaining safety concerns about the loading of munitions would have to be dealt with after she’d sailed.
Note: For many years afterwards, accountable items that went missing ashore were often written off as having been ‘lost on the Atlantic Conveyor’.
On 25th April, Atlantic Conveyor was guided out of Devonport Dockyard and then proceeded under her own steam into nearby Plymouth Sound. There, she anchored in full view of the shore where media had gathered to witness a rather special demonstration of naval air power.
The press and TV cameras were acting on tip-offs that the MoD had converted the Cunard ship into the modern equivalent of a World War II merchant aircraft carrier. Now they were here to see what this new class of vessel could actually do.
They weren’t to be disappointed. Soon, huge Chinook helicopters arrived to circle and land for the first time on the container ship’s two specially strengthened decks. It had certainly turned out to be a spectacular air display, but the best was yet to come.
After the helicopters had been moved out of the way, a military jet arrived overhead. It was a new Harrier aircraft which hovered above Conveyor like a hummingbird before dropping gently onto her forward flight deck. Later, the fighter took off vertically, realigned its thrusters and headed off towards the horizon.
Unseen by the cameras, a naval party aircraft engineering officer and civilian members of Conveyor’s crew were working out how to cut pieces out of the aft deck so the ship’s modified stern ramp would close properly.
Safety at sea aside, it was later discovered that the stern ramp had to be left slightly ajar when flying helicopters off the aft flight deck where a wrapped Chinook was taking up some of the room.
Nevertheless, with the Conveyor now having demonstrated an ability to transport, refuel, launch and recover the latest fighter aircraft, on the face of it, it appeared the Royal Navy had just demonstrated a step-change in its capabilities. Although very far from the truth, this was certainly the message the MoD hoped the media would report in order to add to the pressure for Argentina to withdraw its occupying forces from the Falkland Islands. If Britain had secretly been able to convert one merchant ship into an aircraft carrier in two weeks, how many more such ships would the Argentines have to face in the coming months?
When the air display in Plymouth Sound was over, the militarily blind and defenceless floating bomb that was Conveyor left Plymouth disguised as an aircraft carrier.
South to Freetown (25th April – 2nd May)
When Captain Ian North headed Conveyor out of Plymouth en route for the Falklands, he had a merchant crew of 30 merchant navy volunteers under his command to sail the ship.
A further 90 military personnel were on board to assist with the running of the ship and operation of her aircraft. These were either part of Naval Party 1840 under the leadership of the experienced aviator, Captain Mike Layard or embarked squadron aircrew. NP 1840 included a MARTSU aircraft repair team, a medical team of two and aircraft handlers from the three services.
The first aircraft to join Conveyor were five huge Chinooks of 18 Squadron and 6 Wessex V helicopters of 848 Squadron. These were flown on in Plymouth and sailed with her. The Chinooks subsequently had their blades removed for storage inside their airframes and were wrapped up against the elements. One Chinook ended up tucked away aft of the accommodation block leaving just enough room for Wessex helicopters to use the adjacent flight deck providing the stern ramp was slightly lowered.
Although Conveyor’s crew had been assembled from various units and ships and had very different ways of doing things, they worked well together in good spirits to tackle the not inconsiderable challenges thrown up by the improvisations inherent in the ship’s rapidly conversion.
Ian North showed off his skill when bringing Conveyor alongside the tanker Grey Rover to refuel at sea for the first time. In Biscay, the naval maintainers had to find a quick way of stabilising the huge aviation fuel bag in one of the deck containers that was spewing aviation fuel over the helicopters and threatening to rupture. It was drained and then shored up with wooden supports before being refilled from a tanker.
In the scratch-built hospital, Gordon Brooks, the ship’s doctor and Ken Dunn, his assistant were sorting through medical stores they’d haggled for, training up first aiders and trying to work out crewmembers’ blood groups in case the combination of new aircraft using a new flight deck went badly wrong.
Up to Conveyor’s arrival at Freetown on 2nd May, many on board thought the crisis to be a phoney-war that would probably end in a standoff. Attitudes changed on hearing about the large loss of life when the Argentine cruiser Belgrano was sunk by HMS Conqueror.
The British blow provoked a swift response. When, on the 4th, crewmembers were informed about the destruction of the modern destroyer HMS Sheffield by a single French-built Exocet missile, this convinced many sceptics that Conveyor was heading into a real war after all.
Despite this, there was considerable optimism on board as the damage control and first aid teams hoped for the best whilst preparing for the worst. Everyone had been issued with a once-only immersion suit (a plastic oversuit) and a demonstration was given about how to put it on.
Ascension Island (5th May)
On 5th May, after a fast passage south, Conveyor arrived at Ascension Island to join other ships gathering to travel southwest for the Total Exclusion Zone around the Falklands. Here, one chinook was landed ashore and victualling stores were flown over to RFA Stromness.
With most of her helicopters debladed, wrapped up and stashed out of the way, Conveyor now had room on her deck for her most important cargo.
One by one, eight Sea Harriers and six RAF GR3 Harriers landed on the forward flight deck and were then moved back to make way for the next arrival.
Once shut down, each aircraft was allocated a place on the increasingly crowded main deck and lashed with chains to stop it moving when Conveyor was underway. Things didn’t quite go to plan when it was discovered that the RAF versions of the Harrier didn’t have fixing points for tying down the plane’s nose. After hunting around, the deck crew found Cunard strops designed for securing cars in the vehicle hold that did the trick.
Although landing all these planes on Conveyor’s deck and squeezing them in was an exceedingly hazardous business and there were a few wobbles, the loading passed off without incident. The newly arrived Harrier aircrew and aircraft maintainers all had to be squeezed into the ship’s accommodation, and the ship suddenly seemed very crowded.
Conveyor was amongst a convoy of warships, Fleet Auxiliaries, troopships and other requisitioned civilian ships of the amphibious landing group that set off from Ascension for the Falklands on the 7th May.
An Aircraft Carrier?
Over the next days, all but one of the Harriers were wrapped up in green plastic to end up like oversized Christmas presents. The one unwrapped Harrier was hidden from aerial reconnaissance under a stretched tarpaulin on the forward flight deck. Whenever the ship was informed a Russian satellite might be passing overhead, additional tarpaulins were pulled over between the containers to cover the Harriers on deck.
Although the medical officer had been involved in the mild subterfuge of talking up Conveyor’s capabilities to the media in Plymouth, she was not a real aircraft carrier like Admiral Woodward’s flagship, HMS Hermes, or the new HMS Invincible.
For one thing, Conveyor could only launch one Harrier at a time and that vertically from the forward flight deck. Such launches were also extremely hazardous operations given the proximity of containers and stowed rubber bags full of aviation fuel.
Conveyor’s limitations were demonstrated on the way south from Ascension when the MoD decided her available Harrier would be put to good use. On one occasion, the ship was buzzed by a giant Russian ‘Bear’ aircraft taking pictures of her decks. Knowing there was little that could be done about it without causing an international incident, when the plane flew over, British tars waved up at the Russian aircrew and they waved back.
But then, when the MoD received word that an Argentine airliner had adapted as a spy plane and had been trying to photograph the convoy, Conveyor was instructed to use her ‘alert’ bow Harrier to shoot the plane down.
Such a mission was far more complex than it appeared at first sight. In fact, it was a logistic nightmare. The Harrier, armed with Sidewinder missiles and guns, would use a great deal of its fuel on take-off and would need to refuel before going after the spy plane.
So, in order to complete the mission, there would have to be sufficient warning for tanker aircraft to leave Ascension and refuel one another, so they could be overhead to refuel the armed Harrier when it took off from Conveyor.
Nevertheless, on two occasions, Conveyor came within a minute of launching her available Harrier against the spy plane before the project was abandoned. In the event, Conveyor didn’t enter the history books as the first merchant aircraft carrier to successfully attack a target using vertical take-off jet fighters.
Delivering the Harriers – Mission One Completed
On 19th May, Conveyor arrived in the Exclusion Zone and rendezvoused with the flagship Hermes to offload four Sea Harriers and four GR3s. The next day, Conveyor offloaded a further four Sea Harriers to Invincible and one GR3 to Hermes.
On the 21st, with the final GR3 departing to Hermes, the task force’s two carriers now had sufficient reserve Harriers available to support the invasion. British troops landed at San Carlos Water and, at the cost of a number of ships, established a beachhead.
For the next four days, Conveyor stayed with the carriers acting as a helicopter support ship, using three active Wessex and one Chinook to transport much-needed supplies and spares around the task force. On the 22nd, a Lynx was embarked for the MARTSU unit to cannibalise for spares and one Wessex transferred to RFA Stromness.
There were frequent air raid alerts and alleged submarine sightings that had Conveyor and the other ships of the Carrier Group zigging and zagging with planned irregularity to put off anyone watching through a periscope.
On the 23rd, twenty cluster bombs were laboriously transferred from the bow magazine along the packed cargo deck and up through the aft deck hatch for transfer over to Hermes by helicopter. Two more Wessex 5 of 845 Squadron joined and the ship’s company continued to rehearse emergency drills dealing with imaginary fires and practising the rescue of casualties from deep within the ship’s cargo decks.
The danger from Exocets was also discussed amongst the ship’s officers and aircrew. Conveyor had not been fitted with chaff launchers or any anti-aircraft weapons, nor did she have military radar so would not be able to track approaching aircraft or missiles.
Nevertheless, there was one thing she could do to lessen the chances of Exocets locking onto her with radar in the last phase of their approach. Like the two carriers, she was to turn end-on to any incoming Exocets to minimise the size of her radar echo in the hope that missiles would choose a larger dummy chaff target over her.
Whereas, the carriers were to put their bows to any incoming Exocets, in order to try and save their engines, Conveyor could risk this due to having a large magazine of cluster bombs up front. Instead, she was to put her reinforced stern ramp to the Exocets and hope that if she was hit, the ramp would act a bit like armour plating.
During daylight hours, the carrier group would stay east of the Falkland Islands keeping out of range of the Super Etendard aircraft the Argentines were using to carry and set up targets for the few remaining Exocets they owned.
Though the crew never saw the Falkland Islands, those on the bridge sometimes glimpsed the outline of land on the radar when the carrier group closed in at night to support operations ashore.
Mission Two – San Carlos Water
Early on the 25th May, Captain North received battle orders to take the Conveyor into San Carlos Water overnight to unload the transported helicopters and stores needed by the land forces.
The operation was clearly going to require a lot of skill and hard work. The large draught container ship would be brought in to anchor close to land where she would lower her stern ramp. The outline plan was then for small ferries to back their ramps over the top of Conveyor’s so cargo could be rapidly moved across for transport ashore. The ship’s helicopters would also be used as well as small landing craft stowed on the cargo decks once they’d been released.
If necessary, Conveyor would be beached in the hope of being refloated later. There was a shock for Gordon Brooks, the ship’s doctor and diving officer, who was put on notice for helping clear any obstructing mines found in the shallows.
In case the ship fell into Argentine hands, crewmembers were issued with a copy of prisoners’ rights under the Geneva Convention.
In the morning, (as it turns out) false news was received that the Argentinian aircraft carrier, ARA Veinticinco de Mayo, and her escorts had broken out of the British nuclear submarine blockade and were heading for the British carriers. This added spice to the already excited talk about the technicalities of being able to achieve what had been asked of the crew and aviators.
Although everyone had absolute faith in Captain North’s ship handling skills, anyone who’d toured the vast decks full of equipment and munitions below, and witnessed the difficulties of loading it all on, would have known it would be virtually impossible to unload all Conveyor’s gear and helicopters before the Argentine bombers found the ship at first light on 26th May. Faced with this prospect, it is known that more than one person on board started looking around for thick pieces of metal to hide behind if it all went badly wrong.
The afternoon of 25th May was spent transferring cluster bombs and stores to nearby Hermes by helicopter and preparing the ship, her helicopters and the embarked aviation equipment for the overnight rush into San Carlos Water. Ammunition and grenades were piled up on the aft flight deck ready for transfer. Elsewhere, merchant crewmen busied themselves finishing off the repainting of Conveyor’s white accommodation block in battleship grey to try and make the ship less obvious.
Exocet Attack (25th May 1982)
In the early evening, Conveyor was sailing in close company with the frigate HMS Ambuscade and the flagship, HMS Hermes. The ship had two helicopters in the air. Chinook (BN) was off on a mail run with instructions to pick up helicopter manuals from HMS Glasgow, 30 miles to the NE. Wessex (YD), was returning from a short test flight to Hermes by a circuitous route to allow the navigator to take photos of the ships in the fading light.
Elsewhere, Captain North had broken open the ship’s supplies of Double Diamond ale to throw a small farewell celebration for the off-duty helicopter crews who were due to depart the ship the next day. Whilst many of the ship’s company were enjoying their evening meal, others were on deck preparing the helicopters. The medical team was closed up for flying stations with the doctor in the hospital and the first aid team at their casualty clearing station just aft of the main deck.
All of a sudden, the hooter sounded and ‘Emergency Stations’ and ‘Air Raid Warning Red’ were piped on tannoys throughout the ship. The ship then heeled over as the helmsman acted on an urgent navigation instruction from Hermes to turn to port onto course 040.
Whilst the medics confirmed their readiness, other crewmembers grabbed their gear and headed for their allocated emergency positions, whether on the bridge, in the fore and aft damage control parties or forming a manpower pool ready to react to any crises on board. On reaching the bridge, Captain Layard tried to find out from Hermes where the attack was coming from but didn’t receive an answer.
At about this time, the crew of the airborne Wessex spotted a missile passing under them which they later thought must have been one of the Exocets (the photos were confiscated on Hermes).
A few minutes after the air raid warning, and with the sky full of chaff clouds from vessels and helicopters, aircrew on Conveyor’s bridge spotted an approaching missile off the port quarter. There was a jarring thud that reverberated all through the ship as if she’d gone aground, then her engines stopped.
Shortly afterwards, Captain Layard took to the tannoy to encourage crewmembers to ‘hit the deck’. There was another bang and the cabin lights went out.
From “Abandon Ship” by Paul Brown:
“A report of man overboard was issued, with the 3rd Officer attempted to release the starboard bridge wing lifebuoy, but the release pin broke off in his hand. Radio Operator Borrill (sic) released the smoke float only by cutting the line to the bouy. It hit the water 1000 yards from the man. A helicopter scrambled from Hermes recovered the man.”
Seeing the ship now pouring smoke from the hole in her side, and realising she was on fire, the forward damage control team let slip the liquid oxygen tank stored on deck and started preparing to boundary cool the magazine one deck below.
But, before long they were called to work their way back through the upper cargo hold to assist the merchant navy mechanic trapped in the engine room.
At main deck level in the accommodation block, after recharging his breathing apparatus, the partially-fire-suited ship’s third engineer set off down through a hatch towards the engine room in a second attempt to try and rescue his shipmate accompanied by the ship’s doctor who was sheltering behind him.
…Then, realising that a further rescue mission was a forlorn hope and knowing that there was a grave risk of further explosions and the spread of fire, he armed himself with asbestos gloves and fresh breathing apparatus and accompanied by the Doctor and a PO Engineer again braved the appalling heat and smoke for a further attempt to rescue the mechanic.
They were almost immediately forced back by the intense heat and smoke and no sooner had they cleared the hatch than it was ordered shut so the command could activate the ship’s CO2 system to try and dampen the fire.
Shortly afterwards, crewmen from the after-deck who’d suffered smoke inhalation were brought to the casualty clearing station and were given oxygen.
By now, there was a strong smell of smoke and the crew could hear the background rumblings of explosions in the cargo decks below.
The forward damage control team who had attempted to work aft to help the trapped mechanic were now at the bow cut off from the rest of the ship’s company by an impenetrable cloud of thick smoke.
When they heard that the ship was to be abandoned, they released the bow life raft but it got stuck halfway down the side of the ship. To add to their misery, the rope ladder couldn’t be released, so there was no safe way down to the water. The engineer trapped with them was considering linking chains together when Conveyor’s Wessex helicopter arrived and was waved in by chief Nick Martin.
Kim Slowe, the pilot, landed his aircraft and embarked the ten men he had room for. Finding he had more lift available, he took another five. Now seriously overloaded, he flew the short distance to Hermes, only to find he was denied permission to land on her flight deck. Knowing he had insufficient power to hover, he set down anyway.
Back at Conveyor, Prince Andrew brought his Sea King helicopter in after the Wessex had gone and took off the remaining men from the forward deck.
The Cruel Sea
In Conveyor’s accommodation block, with the air full of smoke, the baking deck melting shoes and explosions being heard from below every few seconds, many started to lose hope of getting off the ship alive.
In this darkest moment of impending doom the order to abandon ship came through. Sensing a glimmer of hope, crewmen quickly pulled on their plastic once-only-suits and life jackets ready to take to the rafts.
Whilst the medical assistant and first aiders helped three aircrewmen who’d been treated for smoke inhalation into their gear, the doctor clattered up the external stair to see if he could launch a starboard lifeboat for them.
Unfamiliar with the mechanism and seeing people already in the water below where the boat would fall, he headed back to find what looked like a crowd of aliens from a horror film inhabiting the smokey gloom of usable deck by the unrolled ladders.
Men took their turn at the descent past glowing red steel and holes in the side spouting flame and smoke. But some soon came to the end of ladders that had been cut when Alacrity had briefly nudged alongside spraying water, and they were forced to jump.
Sadly, the poorly-positioned rafts had fallen together and were now held in a tight circle by their tangled ropes making access from the water difficult. Swimmers trying to reach the entrances had to deal with a considerable swell which threatened to batter them against the unforgiving side of the doomed ship. To make things worse, around half of the once-only-suits failed and started filling with icy water which soaked into garments beneath and rapidly drained precious energy.
Although some, including Captain North, didn’t manage to make it to the rafts, others were hauled in to find places around the side. At this point, many of those unlucky enough to have been wearing waterlogged suits found themselves falling into the middle of rafts where they lay like beached whales trapped by their weight with pooled seawater slopping around their faces.
In one raft there were calls to cut the tethering ropes before the inflatables were sucked under the stern of the ship and crushed. Other survivors voiced their concerns about rafts being overloaded.
At this point, Christopher Craig brought Alacrity back in and fired lines over the huddle of small craft so they could be dragged clear from Conveyor’s looming stern. Once the rafts had been pulled into open water, Alacrity and Brilliant started gathering up the survivors.
Once aboard, they were dried off and taken to messes for sustenance and strong drink. Having come round from having fallen briefly unconscious after a slow climb up Alacrity’s side from the water in a bulging suit, Conveyor’s doctor joined the warship’s medical team who were trying to resuscitate others who had been less fortunate.
Some while later, another air raid warning came through and Conveyor survivors, who’d previously been sitting around lost in their thoughts were seen to get up and start putting on their survival gear ready to go over the side again. They were held back and reassured.
Despite the conflagration having burned through Conveyor’s decks of cargo and munitions and destroyed ten (3 Chinooks, 6 Wessex V and a Lynx) of her twelve helicopters, the ship remained stubbornly afloat.
Although the ship subsequently looked like a burned-out hulk, for the next few days, MoD planners hoped it might still be possible to beach the ship and cut a hole in her side to extract some of her cargo and helicopters intact.
Conveyor was taken under tow but broke in two and sank.
Although Conveyor’s survivors had been made very welcome on board the rescuing frigates, Alacrity and Brilliant, their dark mood was soon casting a shadow over what were operationally-ready vessels. On the morning of 26th May, the survivors were transferred to Hermes where they gathered on the flight deck for a multi-denominational burial service.
Later, they were transported by helicopter to the tanker British Tay which was about to head north. As it was still hoped stores could be rescued from Conveyor’s hulk air engineer Ken White was briefly held behind to map out where particular goods might be found.
The sparse accommodation available aboard British Tay was immediately swamped by the newcomers who had to make-do as best they could. Although everyday essentials like underwear and toothbrushes were in short supply, the men did their best to entertain themselves on the passage to Ascension.
Part-way through, a mail drop was received which included redirected letters from loved ones back home. One wife writing before Conveyor was hit said how pleased she’d been to hear that all the requisitioned merchant ships were now on their way home. In a second letter, she related how she’d been unable to find out anything about her husband’s whereabouts since being told he’d survived the attack a week earlier.
The arrival of mail coincided with a signal from the MoD asking for the names of volunteers who were prepared to go back to the front line. In the event, no one put their name forward, which the doctor thought was probably the right decision all round. In his view, the Conveyor’s old crew needed rest and recuperation before facing the trauma of war again.
The night before the Tay arrived at Ascension, her crew threw a party for their guests and virtually everyone ended up the worse for wear. One crewman suffered particularly badly after having decided to take a swim in the ship’s swimming pool, only to find it empty of water. He was strapped up by the medics.
On reaching Ascension, there was a debriefing about what was known about the Exocet attack that had claimed Conveyor. The take-away message was that she had simply been in the wrong place at the wrong time. The Exocets had flown around until they’d found a chaffless vessel to home in on.
There was also talk of financial loans and information given about claiming for gear and personal effects lost on the ship.
Homecoming
On 7th June, Conveyor’s surviving crew members were greeted by their loved ones at Brize Norton. The media were there to film the reunions and interview any prepared to speak of their experiences.
Sadly, unsympathetic reporters only really seemed interested in hearing about how close crewmen had been to the Exocets’ blast and how they felt about it.
The ship’s Public Relations Officer (the doctor) draped his British Tay dry swimming casualty in a coat and steered him away from the cameras in case anyone pounced on the unfortunate man to find out the gory details of his embarrassing ‘war wound’.
Afterwards, when the PRO spoke to the BBC, his words were entirely drowned out by the yells of his two-month-old daughter who was probably quite shocked to find a bearded man of the sea entering her life. Bizarrely, the moment was caught by a cameraman snapping pictures through a bus window and the resulting image took on a life of its own, later to be used by C4 to represent a typical survivor.
Unlike for other ships, there was to be no hero’s return for Conveyor’s crew.
On 21st June, the MoD convened a Board of Inquiry to look into the reasons for Conveyor’s loss. The purpose was to discover what more could have been done to save the ship after she had been hit.
More than a few survivors, already burdened with their own traumas from the sinking, found the experience particularly insensitive.
Safe to say, despite officialdom looking around for people to blame for the tragic loss of ten of Conveyor’s twelve helicopters (3 Chinooks + 6 Wessex V + 1 Lynx ) and vast quantities of stores, once the Exocets had spewed their burning propellant amongst the flammable materials and munitions of the container ship’s open-decked’ belly, the ship had been doomed.
It was a matter of luck that the smouldering forward magazine hadn’t caught and broken the ship’s back much earlier.
On 1st July 1982, a service of remembrance was held at Liverpool Cathedral for those who died on Conveyor and in the surrounding waters. She’d been a Liverpool ship and the city wanted to remember one of their own.
Medals to the Atlantic Conveyor are rare to the market.
Price: £2400
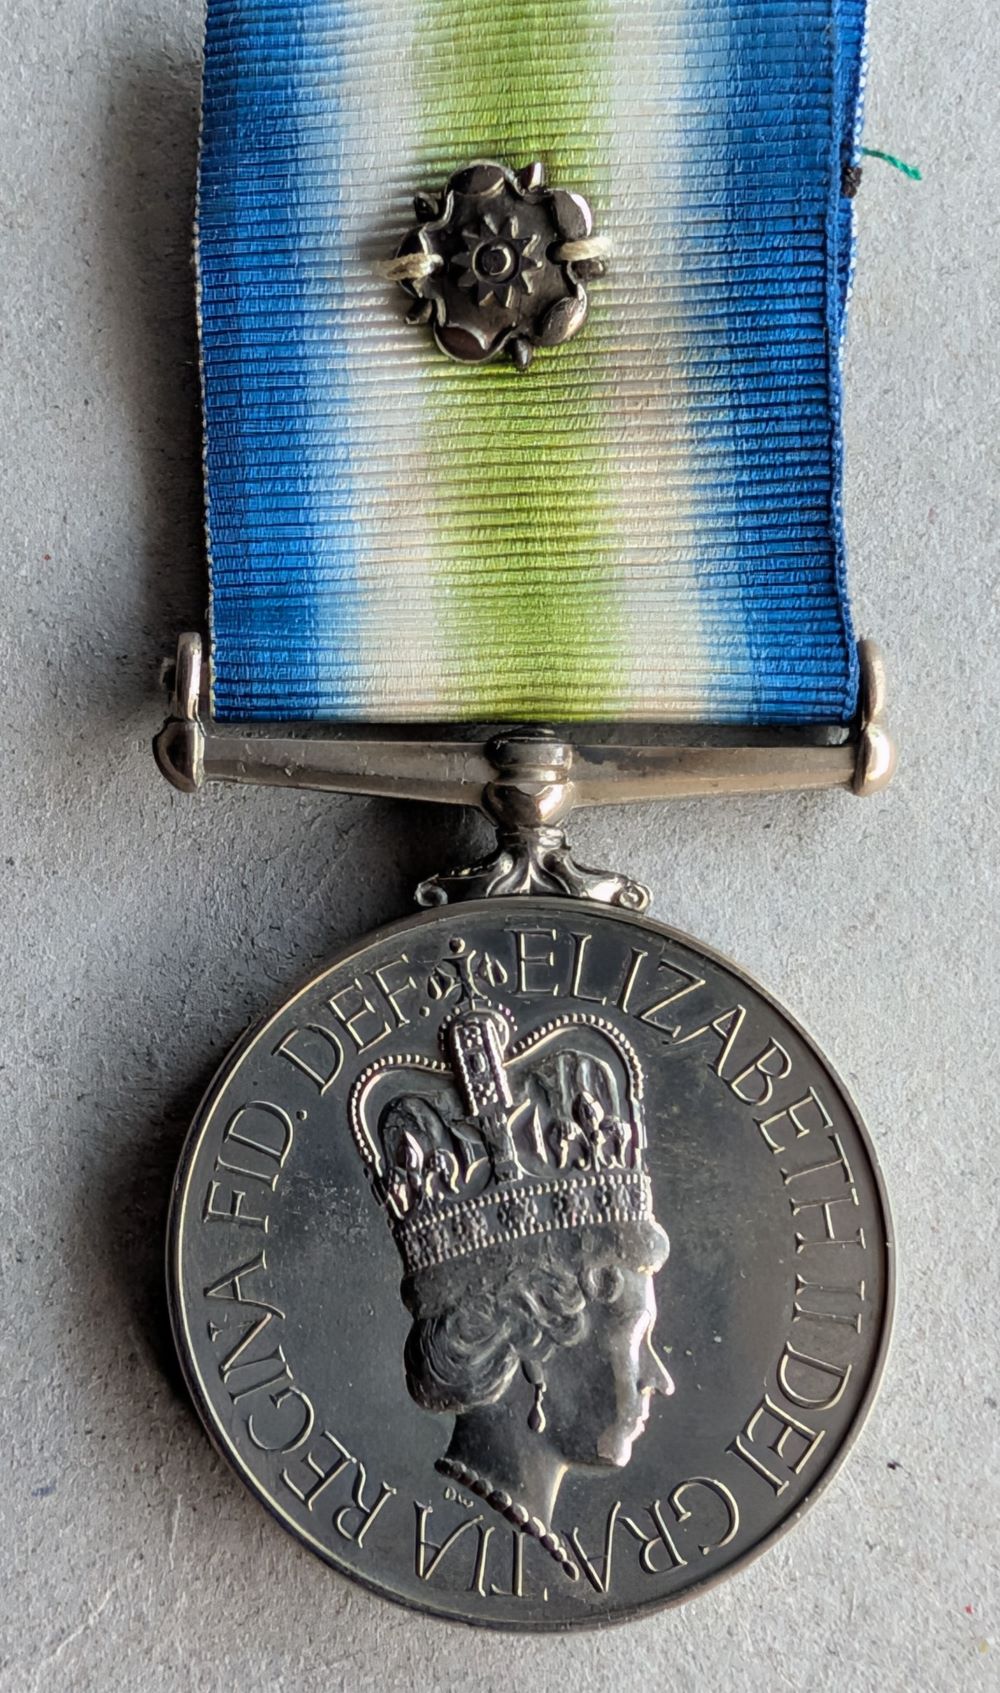
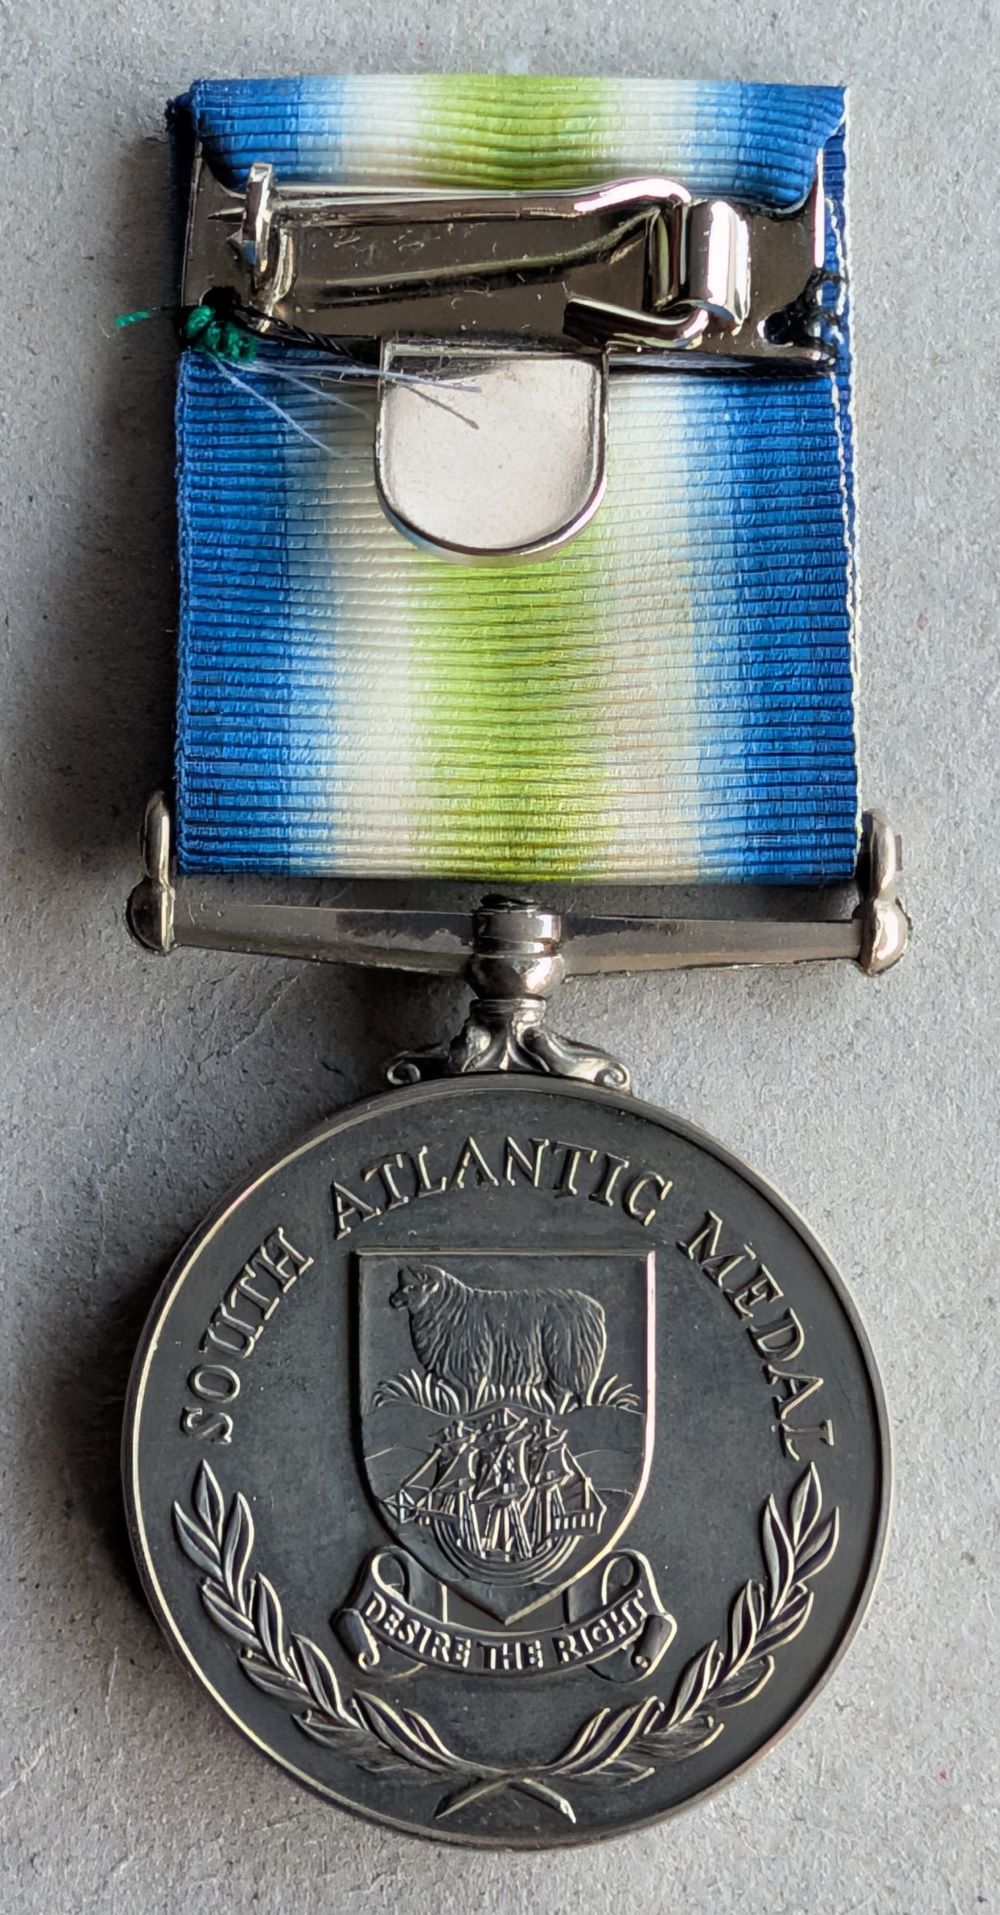
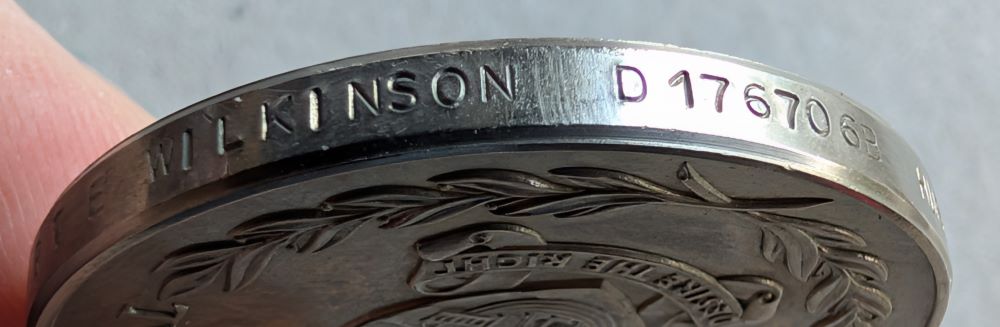
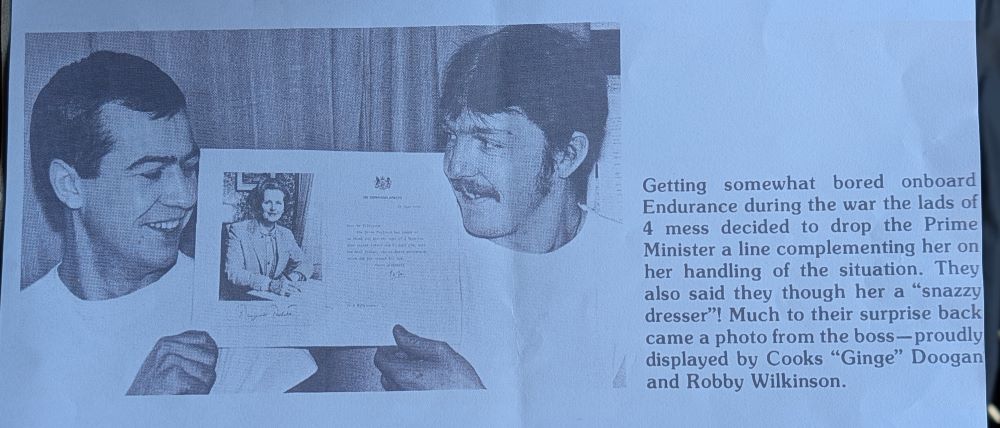
South Atlantic Medal
HMS Endurance
Cook Robby T E Wilkinson D176706B
Copy Photo
Mounted as worn.
Price: £1475
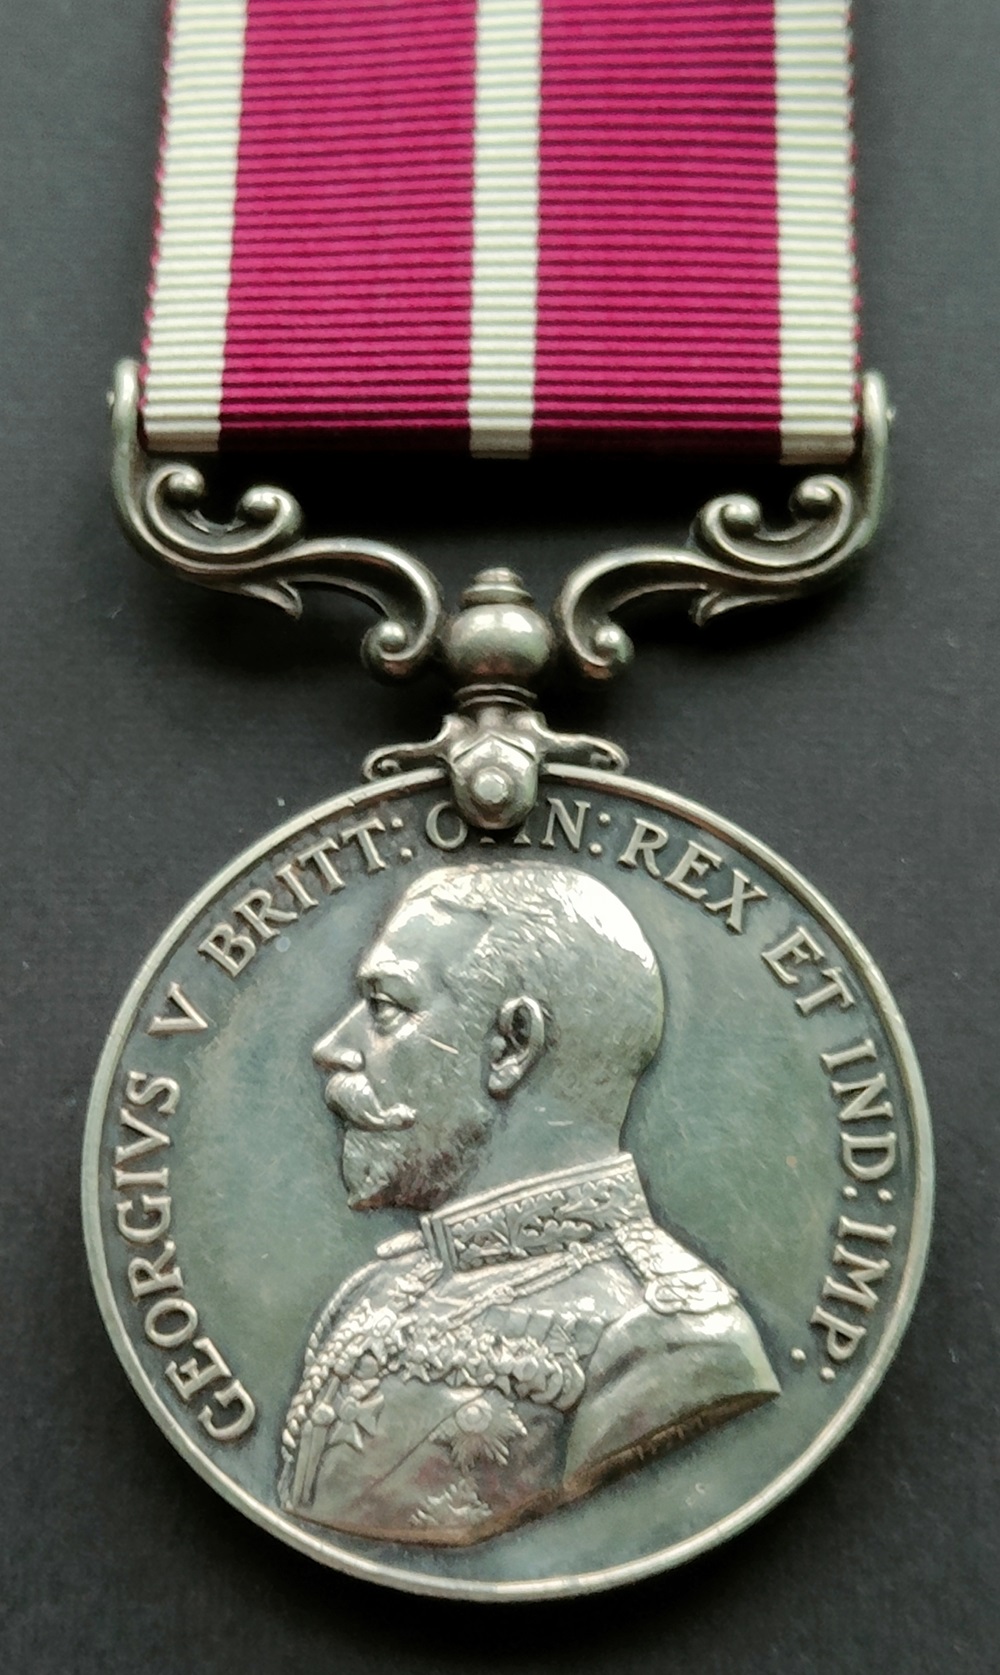
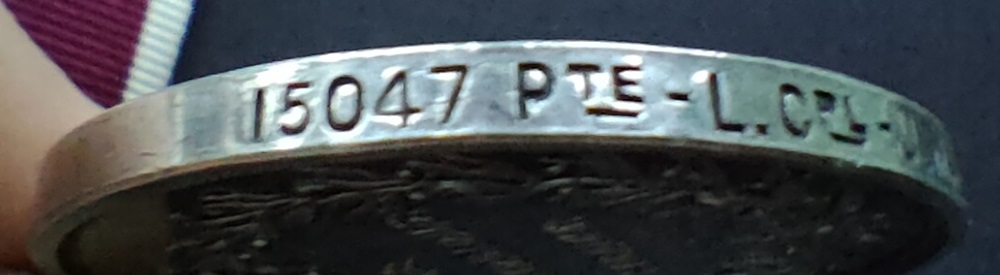
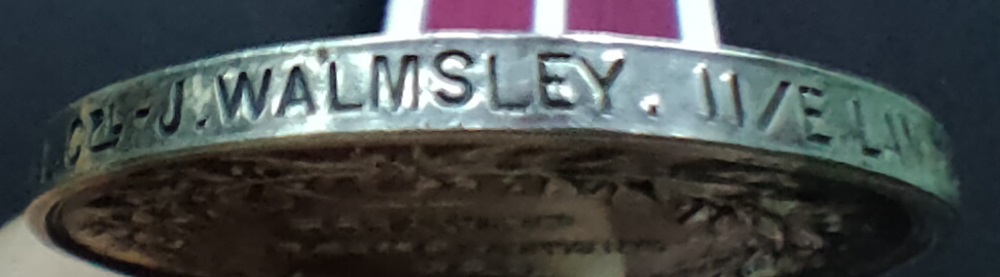
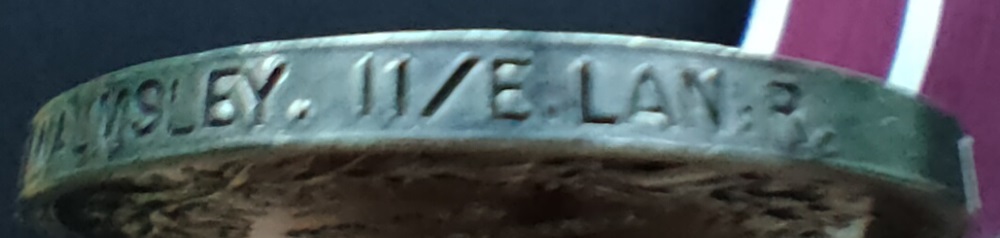
WW1 Meritorious Service Medal
11th Battalion (Accrington Pals) East Lancashire Regiment – Original Enlister
15047 Pte / L Cpl James Walmsley
Born (1890) and lived in Accrington, enlisted 14th September 1914.
Awarded MSM London Gazette 3rd June 1919.
Very Rare – 1 of only 5 to Original Accrington Pals.
Research from various on-line sources: MIC, Medal Roll, Penson Card, LG
Price: £1250
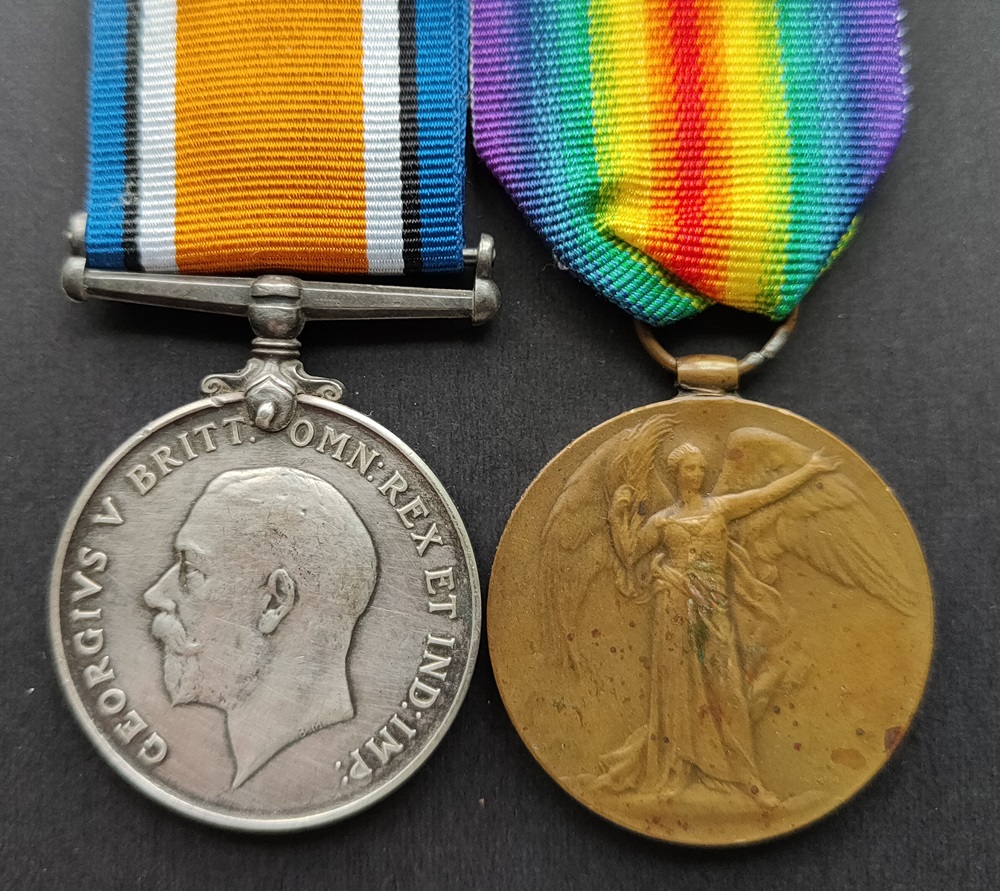
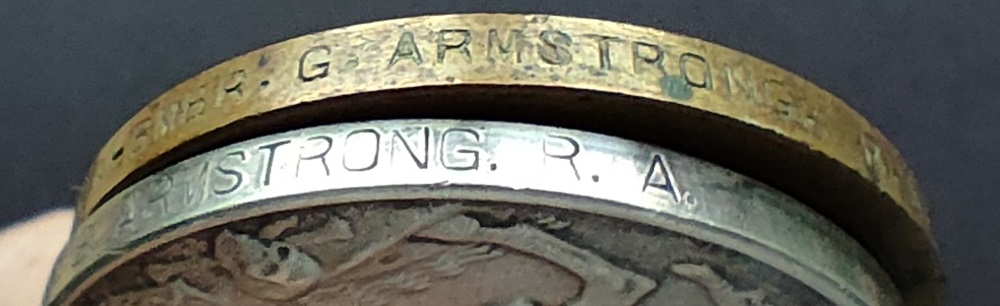
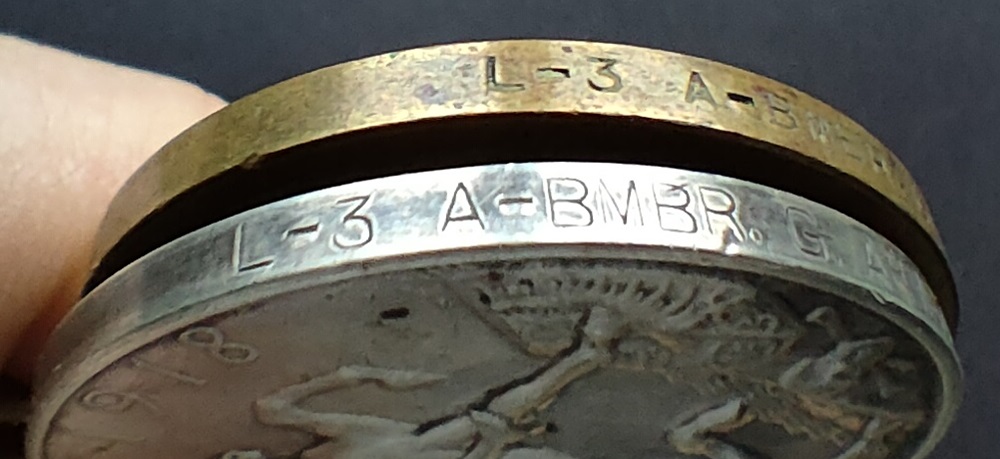
WW1 BWM & Victory Medal Pair
158th Brigade RFA (Accrington and Burnley Howitzers) – Original Enlister
Very Low Number
L/3 A/Bombardier George Armstrong RA
Born (1896) and lived in Accrington, Armstrong enlisted into the Royal Artillery on the 26th Feb 1915, aged 19.
For those not familiar with this unit, an excellent account of the Howitzers can be found here: https://www.pals.org.uk/howitzers/index.htm.
On the 30th March 1918 he was Wounded in Action, GSW Right Foot
Research from various on-line sources: MIC, Service Papers, Medal Roll
Price: £125
Pingback: TikTok
Pingback: Twitter Posts